On my current project, we’re integrating Amazon’s Dash Replenishment Services (DRS) into an Android app. DRS allows “smart” devices to automatically reorder supplies from Amazon if users of the device (and accompanying apps) opt in. For example, a washing machine might order more detergent, or an electronic device might order more batteries. The order is triggered once that refillable item gets down to a certain point.
Understanding DRS, SNS, and LWA
There are a lot of moving parts required for DRS to work correctly—more than I can fit into one blog post. DRS-enabled devices need to report their refillable status to a server at least once a day, and that server must report that status to Amazon. Amazon then determines whether something should be ordered and orders it. It also handles cases such as: the refillable is out of stock, payment information is expired, or the user cancelled the order.
Orders and issues are reported back to the server through Amazon’s Simple Notification Services, or SNS. Certain cases like cancellations require user notification, while others don’t. If everything works correctly, users receive their refills just in time, and they’re happy. (Presumably, Amazon is also happy with this arrangement).
For this whole system to work, Amazon must be authorized to make payments on behalf of the user. During the setup or registration of their smart device, users can opt in to the service by linking their Amazon account to their smart device (and its accompanying apps and server), and selecting which refillables they want. This process is called “Login With Amazon” (LWA), and it is the subject of today’s post.
There is a fair amount of setup to be done in order to get the LWA process to work. As someone who is fairly new to Android, and entirely new to Amazon DRS, SNS, and LWA, I had a hard time finding all the information I needed in one spot. As a result, I thought I’d recreate and record the Amazon Dash setup process for Android step-by-step to help others.
Note: There are two options for Android and iOS development. One is an SDK; one is the web API. This post uses the SDK.
Let’s get started with the account setup, and then we’ll get to the good stuff (code) at the end.
1. Amazon Developer Account Setup
Go to https://developer.amazon.com/ and sign in (or sign up for a developer account if you don’t have one already).
Click on “Apps & Services” in the header area.
Click “Login With Amazon.”

2. Amazon Security Profile Setup
What’s a security profile? It is an association between Amazon data, including security credentials, with one or more apps. This is how you get your API key, which you need for the Login With Amazon process. The API key “securely identifies your app to the Login with Amazon authorization service; without it, any time your app tries to log in a user it will fail. After you add your API key to your mobile project, the library will automatically use it to contact the Login with Amazon authorization service.”
Click “Create a New Security Profile.”  Fill out the fields below:
 (The profile and description are just for developers’ eyes, as far as I can tell.)
Once you click “Create,” Amazon will add a few extra fields to your security profile.
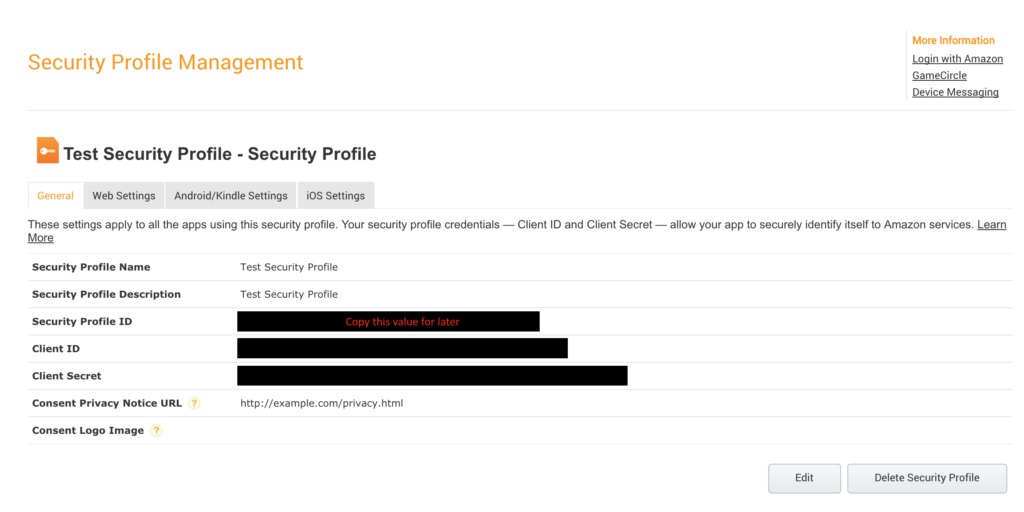
Make note of the Security Profile ID. We’re going to need that in a few steps.
Click on the “Android/Kindle Settings” tab.
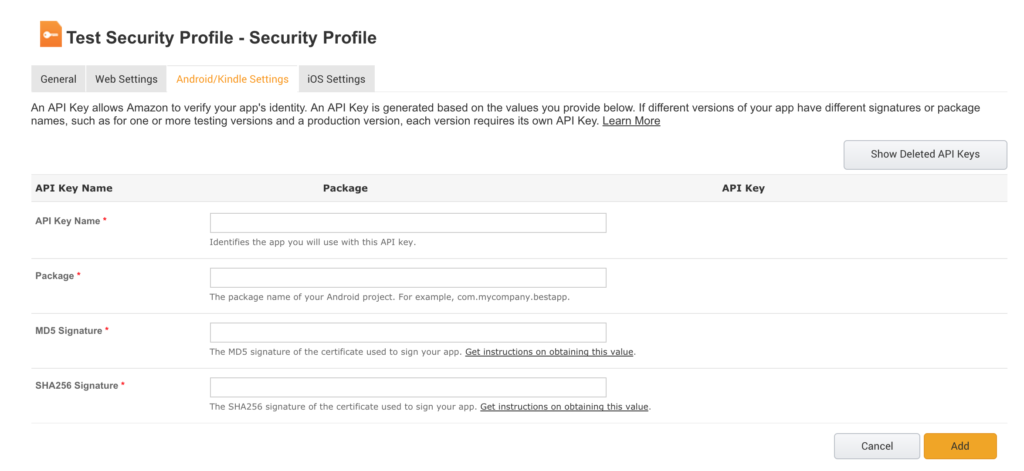
(The API Key Name is again just for developer reference.)
The Package is the package name of your Android project. (I originally had a typo in my package name, and the LWA process threw an exception. Luckily, the exception details included a message about a mismatched package name.)
You also need the MD5 and SHA256 signature of the certificate you’re using to sign your app. You can find instructions on how to do that on this page, under “Determining an Android App Signature.”
After you have those fields filled out, click “Add.” You should then be shown the API Key, a string of a few hundred random characters (not the API Key Name).
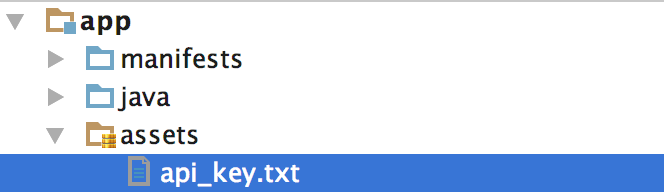
Copy/paste that string into a new file called api_key.txt. That file should be saved in the “assets” folder of your project:
3. AWS Simple Notification Services Setup
Next, we need to create an Amazon Web Services (AWS) Simple Notification Service (SNS) topic. While we won’t be using the SNS functionality in this tutorial, Amazon Dash Replenishment Services (DRS) uses SNS to send messages regarding order status, cancellations, and so on. Amazon has laid out CX requirements that dictate how SNS workflows should happen. But we don’t have to worry about implementation details yet.
Go to AWS at https://aws.amazon.com and sign into the console with your Amazon developer account.
![]()
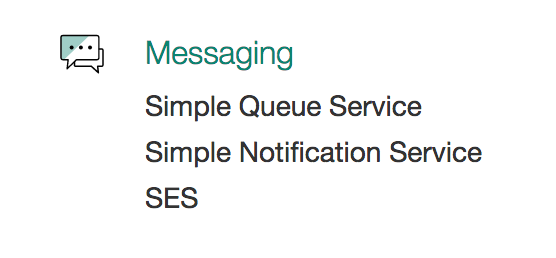
Once you’re logged in, scroll down (or Command-F) to find “Simple Notification Service” under the “Messaging” section.
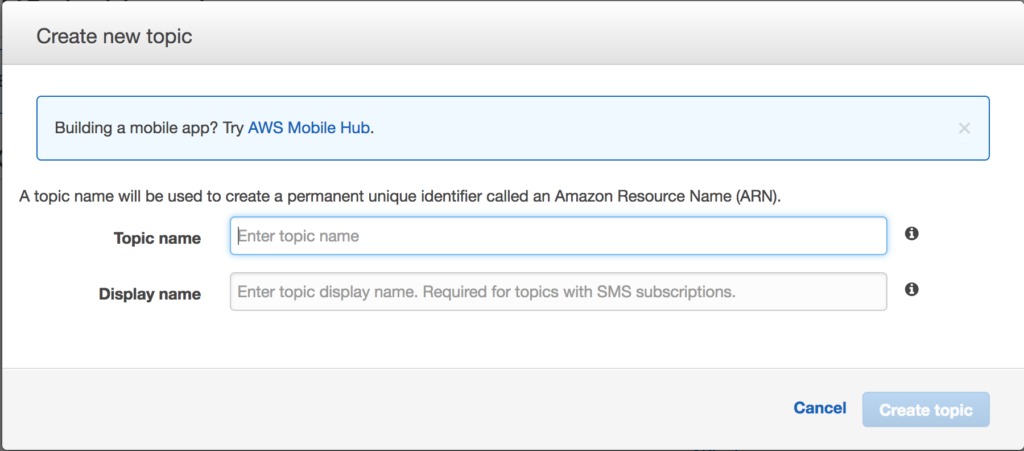
That will take you to the SNS Dashboard. Click “Create Topic.”

Create your topic…
If you want to allow other people to subscribe or publish to your topic, you will need to change some settings. Click on “Other topic actions” and then select “Edit topic policy.” Change settings as desired.

Grab the Topic ARN from the Topic details page and write it down. We’ll need it later.
4. Dash Replenishment Service Product Creation
Next, we’re going to tie everything together and make a DRS product.
Head back over to https://developer.amazon.com/ and sign back in if you need to.
Click “Apps & Services” and then “Dash Replenishment Service” from the header options.

Click “Begin,” and you will be redirected to a “Register with LWA” page. In the first screen, you will need the Security Profile ID that you wrote down earlier:

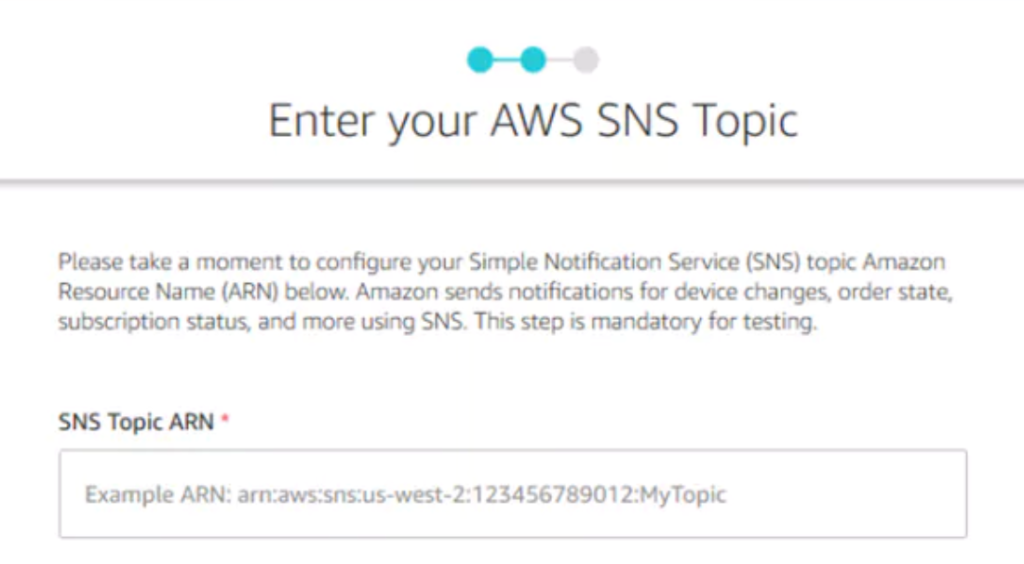
Click “Next,” and you will be asked to put in the AWS SNS topic ARN, which you also wrote down. Way to plan ahead, eh?
Once you’ve completed that, click “Next,” and you should be forwarded to the “Add your device” page. If not, you can go to the Developer Console, navigate to the Dash Replenishment Page, and then click “Create A Device.”
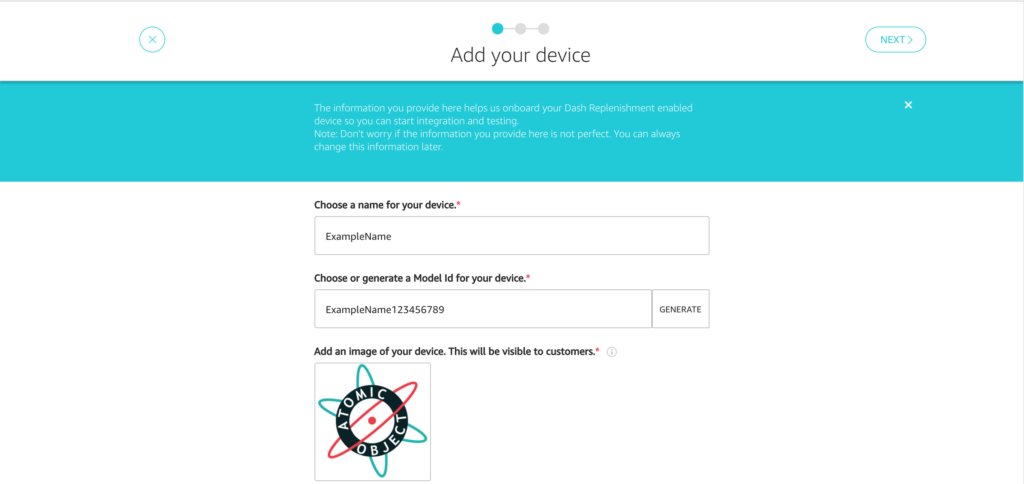
You’ll be asked to choose a name, which will be customer-facing.
Next, you’ll need a model ID. This can be anything. Write this down, too. We’ll need it later.
The last part of this screen is the image. Amazon wants something with a white or transparent background.
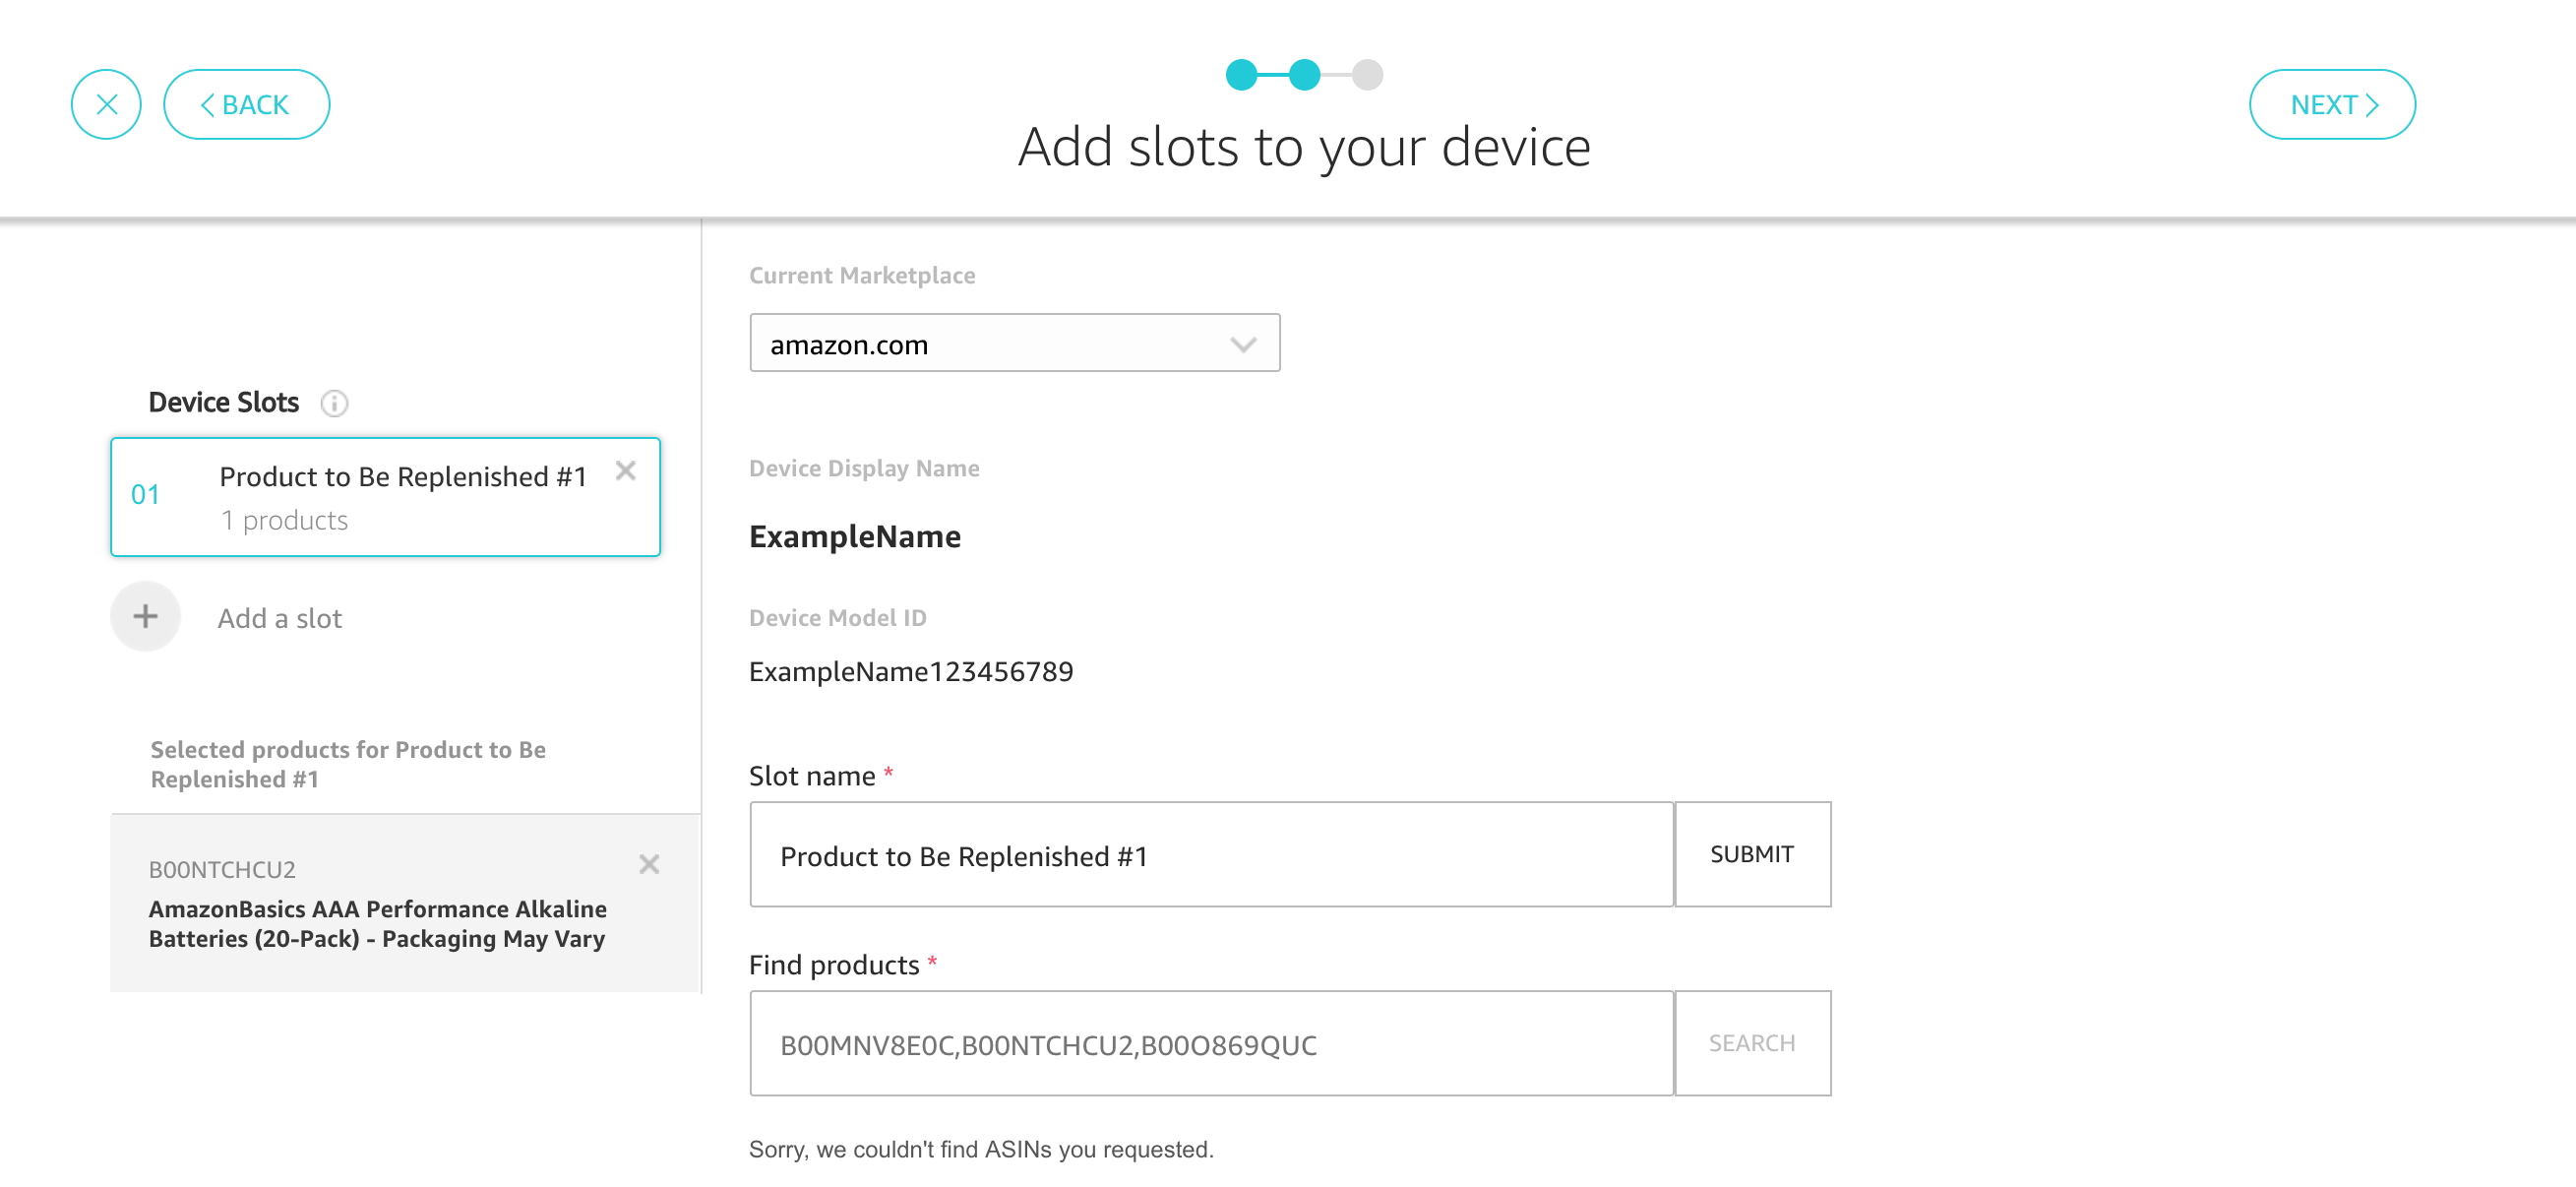
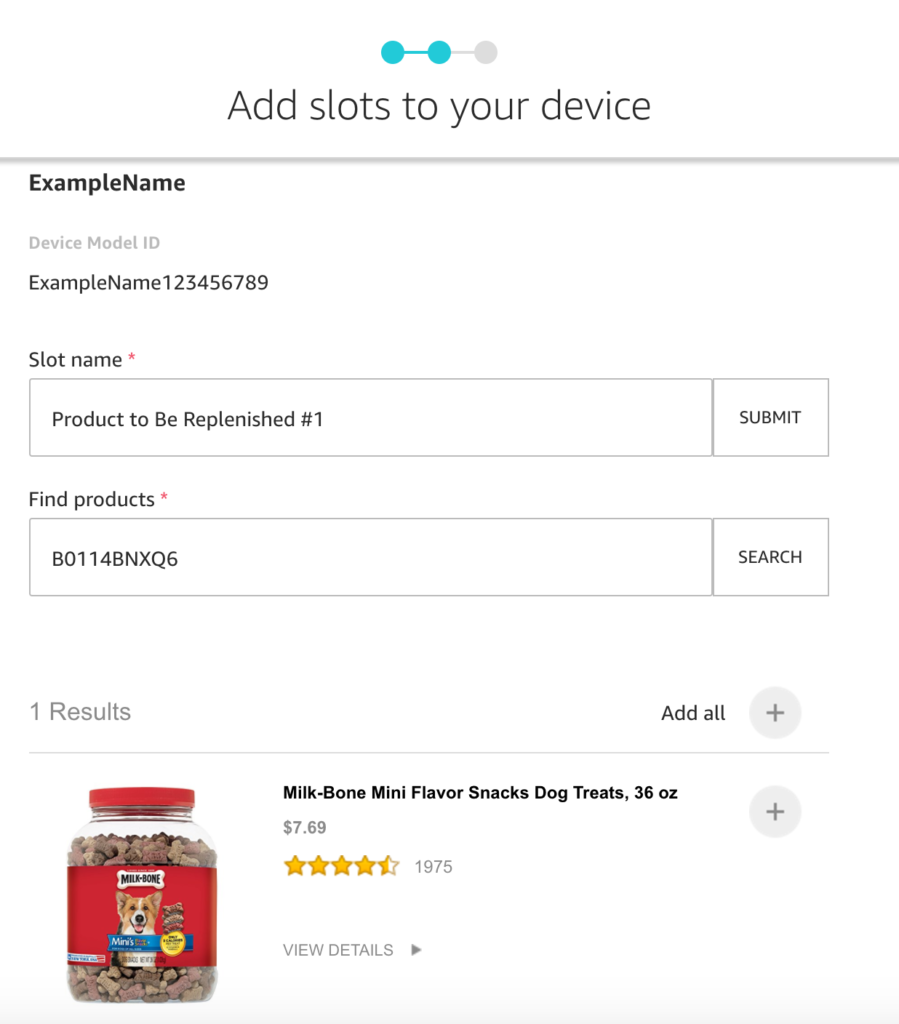
Up next, you’ll need to add some slots and products. You must have at least one slot, with at least one product in each slot. For testing, I decided to just make one slot, with one product: dog treats. Our Atomic Object doggos need their snacks.
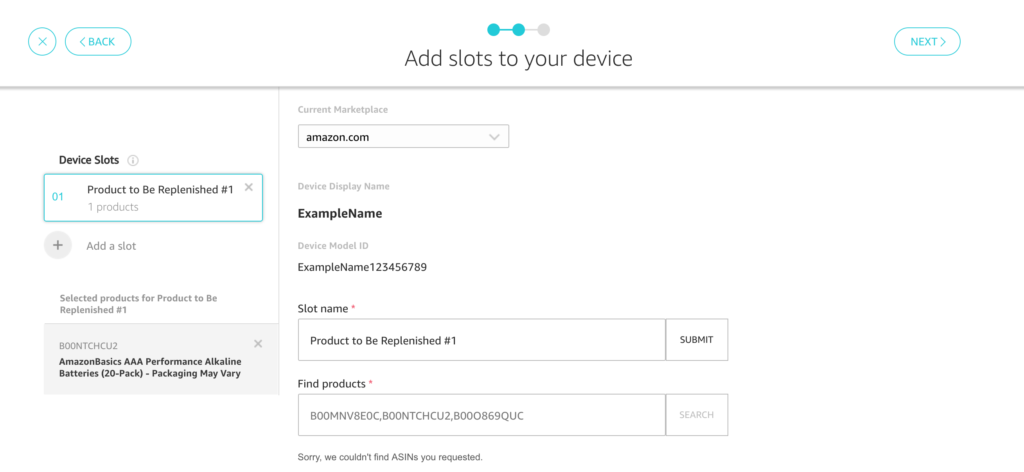
Give each slot a name, and then find products. You have to use the ASIN, which you can get from an Amazon page or URL. In our dog treat example, the ASIN can be found in the URL at the end:
https://www.amazon.com/Milk-Bone-Mini-Flavor-Snacks-Treats/dp/B0114BNXQ6/
Once you’ve found the product(s) you want, search on this page using the ASIN, then click the “+” symbol to add them to your slot.
Click “Next,” and you should see a summary page of your device. Remember, we’ll need the device ID in the next section.
Finally, time to write some code!
5. Adding the Amazon LWA Button to Your Project
LWA SDK
First, you’re going to need some libraries. Download the LoginWithAmazon SDK. Unzip that file, and you should see a login-with-amazon-sdk.jar file. Copy it to the clipboard. Open up Android Studio, and in the Project View, right-click on the parent directory for your project and select Paste.
In the Project View, right-click “login-with-amazon-sdk.jar” and select “Add as Library.”
API Key
Next, if you haven’t already, add the api_key.txt file to your project’s assets directory.
AndroidManifest.xml Changes
Open up your AndroidManifest.xml file. We’re going to add two lines to allow your app to access the internet and network state information.
<uses-permission android:name="android.permission.INTERNET"/>
<uses-permission android:name="android.permission.ACCESS_NETWORK_STATE"/>
When the user clicks the “Login With Amazon” button, the Android app will launch a browser window to complete the auth process. You need to add a Workflow Activity in your AndroidManifest.xml in order for this to work, as provided by Amazon docs:
<activity
    android:name="com.amazon.identity.auth.device.workflow.WorkflowActivity"
    android:allowTaskReparenting="true"
    android:launchMode="singleTask"
    android:theme="@android:style/Theme.NoDisplay">
    <intent-filter>
        <action android:name="android.intent.action.VIEW"/>
        <category android:name="android.intent.category.DEFAULT"/>
        <category android:name="android.intent.category.BROWSABLE"/>
        <!-- android:host must use the full package name found in Manifest General Attributes -->
        <data
          android:host="${applicationId}"
          android:scheme="amzn"/>
    </intent-filter>
</activity>
Adding the Button
Download an official “Login with Amazon” button file from Amazon’s LWA style guide.
Add the button file to the res/drawable directory of your project.
In the XML file of the fragment where you wish to add the button, add the following lines (an ImageButton). The SRC value should be the button file you just added to res/drawable.
<ImageButton android:layout_width="wrap_content"
  android:layout_height="wrap_content"
  android:id="@+id/login_with_amazon"
  android:src="@drawable/btnlwa_gold_loginwithamazon.png"
  android:background="@android:color/transparent"
  android:layout_gravity="center"
  android:contentDescription="Button for authorization through Login with Amazon"/>
Verify that the button shows up in the layout preview.
Changes to the Activity File
Next, we’re going to change the Activity file that corresponds to the screen/fragment that contains the button.
First, declare a RequestContext, and initialize it in onCreate.
private RequestContext requestContext;

@Override protected void onCreate(Bundle savedInstanceState)
{
    super.onCreate(savedInstanceState);
    requestContext = RequestContext.create(this);
}
Next, we’ll need to create an AuthorizeListener on the RequestContext (inside onCreate). It has three methods: onSuccess, onError and onCancel. Add this to onCreate, after initializing the RequestContext. Later, after you’ve verified that the workflow is successful, you can add to the onSuccess, onError and onCancel functions to change UI or save their token.
Note: when users click the “Login With Amazon” button, they will be taken either to a webview, or an Amazon app if they have one installed on their phone. This experience is determined by Amazon.
private static final String TAG = UnderTheHoodActivity.class.getName();
requestContext.registerListener(new AuthorizeListener()
{
    /* Authorization was completed successfully. */
    @Override public void onSuccess(final AuthorizeResult authorizeResult)
    {
        runOnUiThread(new Runnable() {
            @Override public void run()
            {
                Log.d(TAG, authorizeResult.getRedirectURI());
                Log.d(TAG, authorizeResult.getAuthorizationCode());
                Log.d(TAG, authorizeResult.getClientId());
            }
        });
     }
    /* There was an error during the attempt to authorize the application */
    @Override public void onError(AuthError authError)
    {
        runOnUiThread(new Runnable() {
            @Override public void run()
            {
                Log.e(TAG, "Error during authorization. Please try again.");
            }
        });
    }
    /* Authorization was cancelled before it could be completed. */
    @Override public void onCancel(AuthCancellation authCancellation) {
        runOnUiThread(new Runnable() {
            @Override public void run()
            {
                Log.i(TAG, "Authorization cancelled.");
            }
        });
    }
}
Note: The cancel method only handles explicit cancellation by the user. If a user navigates away from the login screen and goes back to your app, the SDK will not detect it. You will need to handle that case yourself.
Add this change to ‘onResume’.
@Override
protected void onResume() {
   super.onResume();
   requestContext.onResume();
}
Next, we’ll add an on-click listener to our login button. First, access it by the ID that you used in the XML fragment file. Then, create an on-click listener. Here, I’m adding my own scope, but there is also the option to access profile, zip code, and email scopes.
private View LoginButton;

// call this in onResume()
private void setupDRS() {
    LoginButton = findViewById(R.id.login_with_amazon);
    LoginButton.setOnClickListener(new View.OnClickListener() {
        @Override
        public void onClick(View view) {
            Scope scope = getScope();
            if (scope != null) {
                AuthorizationManager.authorize(
                        new AuthorizeRequest.Builder(requestContext)
                                .addScopes(scope)
                                .forGrantType(AuthorizeRequest.GrantType.AUTHORIZATION_CODE)
                                // Set your code challenge and code challenge method - "plain" or "S256".
                                .withProofKeyParameters("SWAP_THIS_OUT_FOR_YOUR_CODE_CHALLENGE", "CHOOSE_plain_OR_S256")
                                .build()
                );
            }
        }
    });
}
Our “getScope” function needs the ID of the device we created earlier (in my example, the dog treats). Put this value in for
YOUR_DEVICE_MODEL_NAME.
Note: Specifying a device as a ‘test device’ is supposed to prevent orders from occurring, but I haven’t tested this the entire way through yet.
/**
 * Get the login scope.
 *
 * @return Scope.
 */
private Scope getScope() {
    //YOUR_DEVICE_MODEL_NAME - The model ID of your device obtained from self-service portal.
    //YOUR_DEVICE_SERIAL_NUMBER – The serial number of the device you are trying to register.
    //IS_THIS_A_TEST_DEVICE – Flag that indicates if this a test device or not. Test devices will not place actual orders.
    final String scopeDataString = "{\"device_model\":\"" + YOUR_DEVICE_MODEL_NAME +
        "\", \"serial\":\"" + YOUR_DEVICE_SERIAL_NUMBER +
        "\", \"is_test_device\":\"" + IS_THIS_A_TEST_DEVICE +
        "\"}";
    JSONObject scopeData;
    try {
        scopeData = new JSONObject(scopeDataString);
        return ScopeFactory.scopeNamed("dash:replenish", scopeData);
    } catch (JSONException e) {
        Log.e(TAG, "Error during scope data JSON object creation", e);
    }
    return null;
}
And that should get you the basic LWA workflow. What you will get back as a result is a sort of intermediary token. We aren’t done yet, unfortunately. To get the final LWA tokens, your server will need to send the intermediary token and code challenge to Amazon. But this blog post is long enough already.