Article summary
Being able to resize an HTML element is a handy feature. But implementing the feature isn’t as easy as it looks.
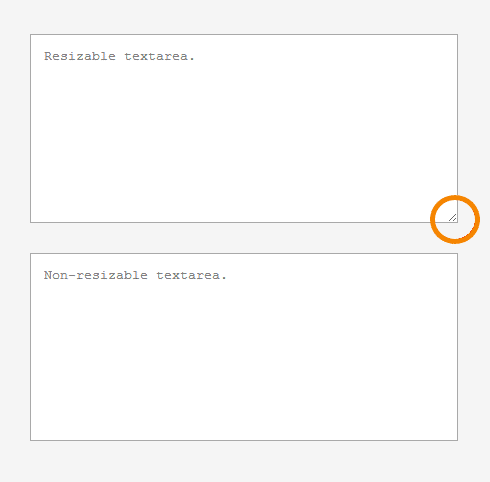
CSS has a built-in resize property, but it’s limited in functionality. The property will add a handle to the bottom right corner of your element. From there, you can expand or shrink the bottom and right side. But you can’t do anything with the left or top side. The handle is very rigid—it can’t be styled or moved, and the element can only resize when you drag that handle.
I want to make a resize handle on the border of an element instead of the corner. I’ll highlight the important parts of getting a width-resize handle to work in this blog post, but the full source code will be included afterward.
We’ll have to make a handle that we can use, set up our event listeners, and finally, resize our element.
Making a Handle
I’ve mentioned the “handle” a few times now, but I want to describe what I want it to do. To make an element wider, I want to be able to click and drag on the right border of the element until I get to the size I want. I also want the mouse cursor to change to an arrow pointing left and right.
For our vertical handle, we want to set the width of the element to 0 and set the height to match the parent element. We’ll set up a 1px border on the right side to give the user a hint that the handle is there. Then we’ll set up a transparent pseudo-element with the cursor we want. This wider hidden element helps the user click and drag the smaller-seeming edge.
#resizeable {
  --resizeable-width: 300px;
  height: 100vh;
  width: var(--resizeable-width);
  background-color: grey;
}

#handle {
  float: right;
  height: 100%;
  width: 1px;
  background-color: blue;
  z-index: 1;
}

#handle::after {
  content: "";
  width: 9px;
  position: absolute;
  top: 0;
  bottom: 0;
  margin-left: -4px;
  background-color: transparent;
  cursor: ew-resize;
  z-index: 2;
}
Resizing the Element
To resize the element, we’ll need to involve some JavaScript. We’ll bind an on-click function to our pseudo-element to start our resizing. In our function, we’ll use the cursor position and our starting width to do some setup.
const startDragging = (event) => {
  event.preventDefault();
  const host = document.getElementById("resizeable");
  const startingPaneWidth = getPaneWidth();
  const xOffset = event.pageX;
We’ll also set up another event listener that listens to all mouse move elements on the body of the webpage. This listener only binds after the user clicks our resize handle. The event listener will calculate the width of our element based on where the mouse began and where it is now.
const mouseDragHandler = (moveEvent) => {
  moveEvent.preventDefault();
  const primaryButtonPressed = moveEvent.buttons === 1;
  if (!primaryButtonPressed) {
    document.body.removeEventListener('pointermove', mouseDragHandler);
    return;
  }

  setPaneWidth(moveEvent.pageX - xOffset + startingPaneWidth);
We need to make sure that we use the body element instead of the element we’re resizing. Otherwise, we’ll end up with some choppy movement when we try to make the element larger.
const remove = document.body.addEventListener('pointermove', mouseDragHandler);
To export this value from JavaScript, we’ll save our value to a CSS variable.
const setPaneWidth = (width) => {
  getResizeableElement().style
    .setProperty('--resizeable-width', `${width}px`);
};
Min and Max
This code will work, but we’re letting our users shrink and expand the element with no restriction. A minimum and maximum width prevent the user from mangling the content within our element. First we’ll leverage the `min-width` and `max-width` CSS properties. We’re complicating the process a little because we need the JavaScript values later.
const minPaneSize = 150;
const maxPaneSize = document.body.clientWidth * .5
getResizeableElement().style.setProperty('--max-width', `${maxPaneSize}px`);
getResizeableElement().style.setProperty('--min-width', `${minPaneSize}px`);
This last line of code will save us from weird behavior that can make the pane feel unresponsive. Without this, the user can pull their cursor past our maximum width and save an un-useable width. The next time the user tries to drag the pane, it won’t shrink until the excess width is used. To avoid all of that, we can constrain the width to our minimum and maximum when the user lets go of the mouse.
 if (!primaryButtonPressed) {
   setPaneWidth(Math.min(Math.max(getPaneWidth(), minPaneSize), maxPaneSize));
   document.body.removeEventListener('pointermove', mouseDragHandler);
   return;
  }
I hope this demystifies the process of making a resizable element. I’ve included all of the source code from this post and some more here. There’s plenty more functionality that can be added! I’ve augmented this code with some CSS and made a pair of elements that shrink and expand in response to each other.
I really like this solution. It works great in Chrome and Opera but not IE. Is there a solution to make it work with IE? Thank you.
exactly what I was looking for, thanks !