
I’ve attempted to solve my photo management problem for a long time now, ever since I started using a digital camera in the year 2000. The result of copying and pasting photos from memory cards onto my computer over the years and then copying from computer to computer as I upgrade my computers has created a huge mess of unorganized files — as well as hundreds of gigabytes of duplicate files. And now, most of my photos and videos originate on my phone, which adds another complication to the process.
Most people rely on Google Photos, iCloud, or other easy-to-use photo hosting providers. This is super convenient and handles all the technical work for you. However, there are serious privacy concerns with doing this, plus the uncertainty of these services’ long-term viability. Google specifically is known for mining as much information as they can from their users while presenting their services as “free.” In addition, they’re also known for shutting down their services when they feel they are no longer a viable business.
When you store and manage your own photos, you can ensure that they’re kept private and that you will have long-term storage without unexpected shutdowns. I’ll show you how to configure some existing tools, and I’ll share a custom tool I wrote to easily and automatically transfer photos from your phone, automatically sort and de-duplicate them, and make them easily accessible.
This is the tenth post in a series about protecting your privacy by self-hosting while attempting to maintain the conveniences of public cloud services. See the bottom of this post for a list.
I’ve organized this process into 4 parts: Transferring, Sorting/Organizing, Viewing, and Backup. Let’s start with getting those photos/videos transferred.
1. Transferring Photos/Videos
I am running a Linux-based server with Docker. This post expects a basic knowledge on how to run containers using `docker-compose`.
Set Up SFTP Docker Container
The first thing we’ll setup is a simple container running an SFTP server. This will give us a destination for our photo transfer as well as prevent access to other data on our filesystem.
I set up a docker-compose.yml in a directory called sftp-photos:
sftp:
  image: atmoz/sftp
  volumes:
    - /vault/Photos/Incoming:/home/photos/Photos
  ports:
      - "2224:22"
  command: photos:your-password
In my case, I have an Incoming directory setup on my storage vault. You can set this to whatever path you’d like. It will be accessible under the /Photos directory in the root of the SFTP share. You’ll also notice that I’ve remapped port 22, the standard SSH/SFTP port, to 2224. This is to avoid a conflict with my normal SSH service running on my server. In addition, you should change your-password to something other than your normal login password. We’ll need this new password in the next step.
To run, simply use docker-compose up.
Next, we’ll set up and configure an app on our phone to transfer photos to this new SFTP share.
Set Up PhotoSync
I have found a great app called PhotoSync that can transfer photos and videos from your phone to an SFTP share (and many other services/protocols). I use iOS, but there’s also an Android version. I purchased the Pro version in-app for about $5. It is well worth the money. The best feature is that it keeps track of what it has already transferred.
Set up the app like so:
- Launch the app and select “Recents.”
- Select the gear icon at the bottom right of the screen.
- Select “Configure.”
- Select “FTP.”
- Select “Add New Configuration.”
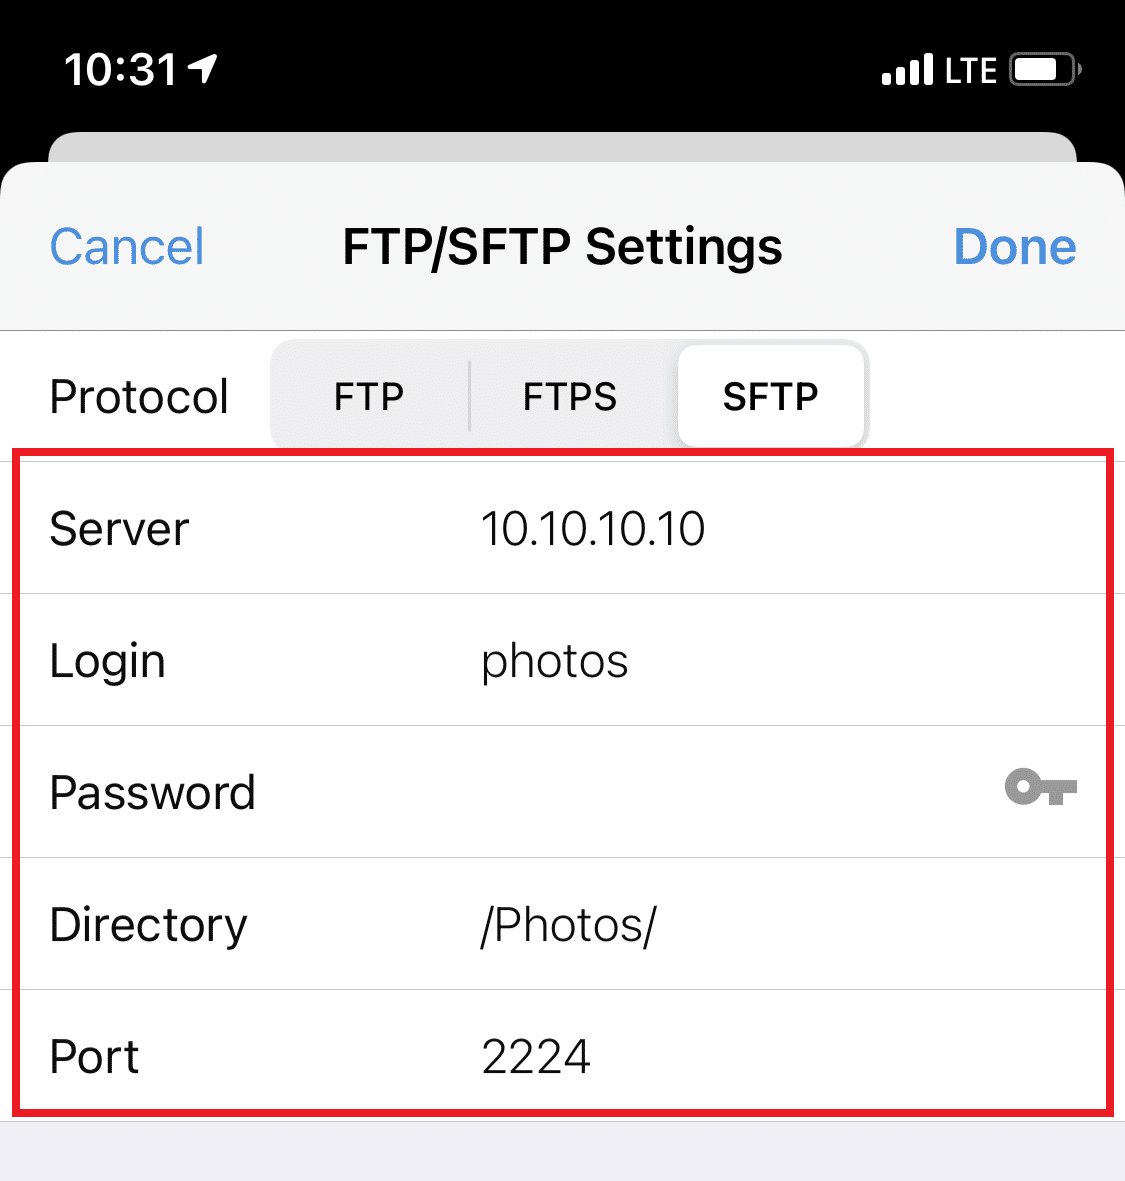
- Enter the IP address of your server. (It’s
10.10.10.10in my case). Enterphotosas the Login (username), and enter the same password you set up earlier for your SFTP container. Enter/Photos/as the Directory and2224as the port.
- Click Done.
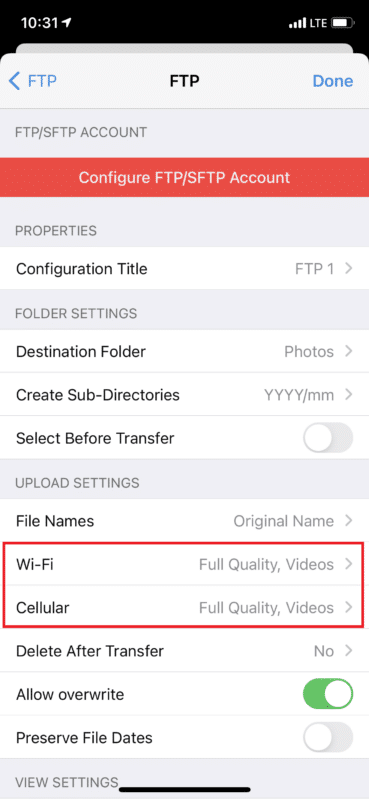
- Configure your upload settings. I’ve set it so full-quality photos and videos transfer on both Wi-Fi and cellular (I transfer over cellular using the Wireguard VPN I described earlier in this series.
Set Up a Shortcut
I also configured a Siri shortcut to initiate the photo transfer (Android instructions may vary). It is even better when you configure an automation. This is really great because when you plug-in your photo to charge at the end of the day, it will automatically copy the photos you took that day over to the SFTP server we just set up. It’s super convenient and ensures that you don’t lose much if your phone crashes.
- In the Shortcuts app, select the + icon on the top right.
- Select “Transfer new photos/videos to FTP.”
- The defaults should be fine, so click “Next” again.
- Name your shortcut and click “Done.” The new Shortcut should now show up:

- To run it automatically, select “Automation” and click the + icon:
- For the When, select “When iPhone is connected to power” And for the Do, select “Transfer new photos/videos to FTP” (or whatever you named your shortcut earlier). Then select Done in the top right.
Now you should see the new automation:
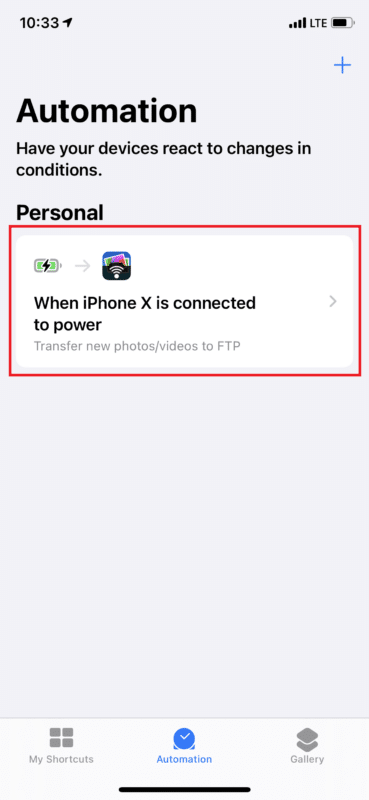
The next time you plug in your phone, it should launch the automation/shortcut, which should run PhotoSync to begin the transfer process.
2. Sorting/Organizing Your Photos/Videos
I’ve written a simple Node.js script to organize photos and videos based on the date and time that the file was created found in the EXIF data. This allows photos with the same timestamp to be de-duplicated and provides a consistent naming convention that can be used for the long-term. Even if every other tool used here becomes obsolete and is discarded, files with a simple naming convention will remain for the long-term.
The naming convention is as follows:
{year}/{year}.{month}/{year}.{month}.{day} {hour}.{minute}.{second}.{millisecond}.{extension}
Some example file names:
2004/2004.08/2004.08.25 18.09.38.000.jpg
2020/2020.12/2020.12.25 07.41.51.746.mov
2021/2021.03/2021.03.05 20.19.38.741.heic
I also run this script inside a Docker container. Clone the repository and edit the docker-compose.yml to configure the path to your photos:
version: '3'

services:
  dev:
    build: docker
    command: /usr/local/lib/tail-and-wait
    volumes:
      - ./dev:/home/dev
      - /vault/PhotosTest:/Photos
My photos are in /vault/PhotosTest. You can change this to whatever works best for you. You’ll also want to set this same location in photo-organizer.env:
# Locations on your host
ACTUAL_PHOTOS_LOCATION=/vault/PhotosTest
ACTUAL_SOURCE_DIRECTORY=$ACTUAL_PHOTOS_LOCATION/Incoming

# Locations within the container
MOUNTED_SOURCE_DIRECTORY=/Photos/Incoming
MOUNTED_DESTINATION_DIRECTORY=/Photos
MOUNTED_IMPORTED_DIRECTORY=/Photos/Imported
Again, you can use docker-compose up to start this container. On startup, the container is simply idle. To start the process, run the process.sh script included. The first time you set this up, you may have a pile of existing photos to work though.
I’d recommend copying a set of photos (not moving them) into the Incoming directory and then running the script to test it out. After you are satisfied with the results, you can run it across your entire library.
As photos are processed, they are copied into the new structure with the date/time naming convention and are also moved into the Imported directory unchanged. This directory can probably be cleared out periodically.
After the initial process, which can take considerable time, you can setup a regular sorting process with cron (crontab -e):
*/5 * * * * /vault/Services/containers/photos/process.sh >> /var/log/photos.log 2>&1I run mine every 5 minutes. Don’t worry, the process script has a lockfile, so if your photos are still processing after 5 minutes, it won’t try to kick off a second process at the same time.
At this point, we have a nice sorted library of photos with the ability to add more automatically.
The next step is being able to get access and view those photos. I’ve found that PhotoPrism works well for very large libraries and provides a nice desktop- and mobile-friendly web interface.
3. Viewing Your Photos/Videos with PhotoPrism
Install PhotoPrism using their provided instructions for using docker-compose.
There is a process to index your photos, which can take a considerable amount of time the first time you run it. I then setup a cron job to index new photos every thirty minutes:
*/30 * * * * /vault/Services/containers/photoprism/process.sh >> /var/log/photoprism-index.log 2>&14. Backup
My photo archive is stored on ZFS pool, which I covered my previous post. In addition, I’m using rsync to back up to another ZFS pool on another machine onsite as well as a third ZFS pool offsite. See my previous post about rsync for more information.
Self-Hosting Your Own Cloud
- Setting up OpenVPN
- SMB File Server with Automated Backups using Rsync/Rclone
- Note-taking with Nextcloud & Syncthing
- Movies and Music using Emby
- Protect Yourself Online with Privacy Tools
- Ad and Tracker Blocking with Pi-Hole
- Building a Personal Private Network with WireGuard
- Monitoring Your Internet Traffic with ntopng
- Building a NAS with ZFS
- Photos and Videos (this post)