Recently, I had a drive failure on my ZFS pool. Thankfully no data was lost because I am using two parity drives. The drive is still under warranty, and I will be sending it back to the manufacturer for replacement. Before I allow drives to leave my possession for replacement or disposal/recycling, I always securely erase the drive to ensure none of my data ends up in anyone else’s hands.
In the past, I had used the excellent Darik’s Boot and Nuke (DBAN), but that requires a dedicated system to run the process. This time, however, I decided to try nwipe, a tool that’s based on DBAN but runs on existing Linux distribution.
Installation was super simple as most Linux distributions have a package available for nwipe. On Ubuntu, I was able to simply use apt to install it:
$ sudo apt install nwipe
Reading package lists... Done
Building dependency tree
Reading state information... Done
The following NEW packages will be installed:
  nwipe
0 upgraded, 1 newly installed, 0 to remove and 104 not upgraded.
Need to get 35.6 kB of archives.
After this operation, 104 kB of additional disk space will be used.
Get:1 http://us.archive.ubuntu.com/ubuntu focal/universe amd64 nwipe amd64 0.26-1 [35.6 kB]
Fetched 35.6 kB in 0s (98.6 kB/s)
Selecting previously unselected package nwipe.
(Reading database ... 137063 files and directories currently installed.)
Preparing to unpack .../nwipe_0.26-1_amd64.deb ...
Unpacking nwipe (0.26-1) ...
Setting up nwipe (0.26-1) ...
Processing triggers for man-db (2.9.1-1) ...
Next, I identified the device corresponding to the drive in question:
$ ls -l /dev/disk/by-id/usb*
lrwxrwxrwx 1 root root  9 Nov 21 18:10 /dev/disk/by-id/usb-ST8000VN_004-2M2101_000000000000-0:0 -> ../../sdh
lrwxrwxrwx 1 root root 10 Nov 21 18:10 /dev/disk/by-id/usb-ST8000VN_004-2M2101_000000000000-0:0-part1 -> ../../sdh1
lrwxrwxrwx 1 root root 10 Nov 21 18:10 /dev/disk/by-id/usb-ST8000VN_004-2M2101_000000000000-0:0-part9 -> ../../sdh9
Now that we’ve got the setup out of the way, we can run nwipe and then follow six easy steps:
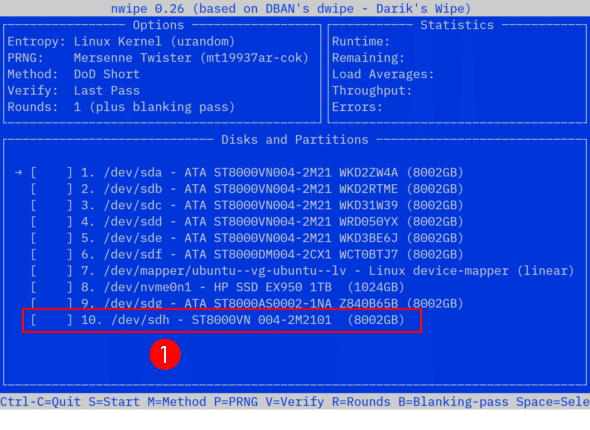
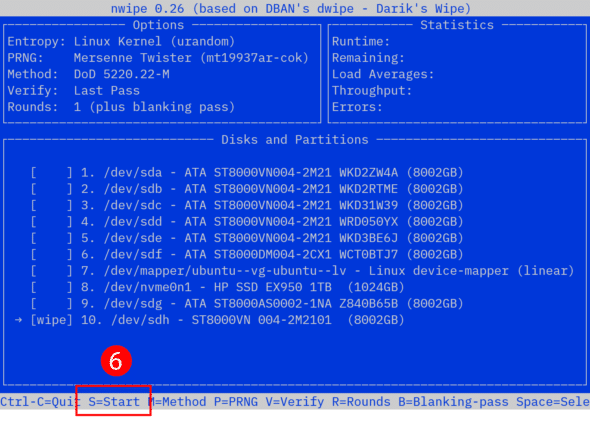
$ sudo nwipeUse the arrow keys to select the drive in question:
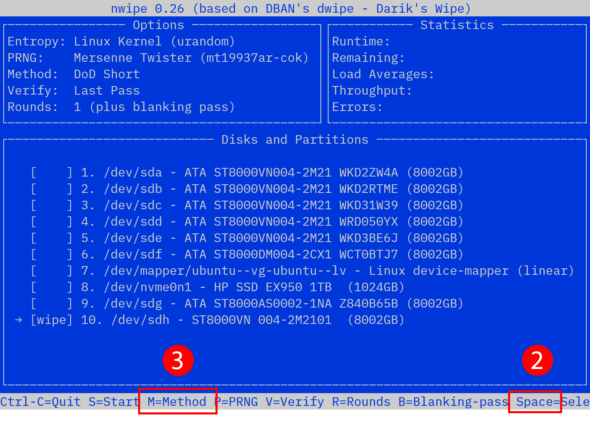
Press the space bar to select the drive to wipe, then press M to select the method for erasure:
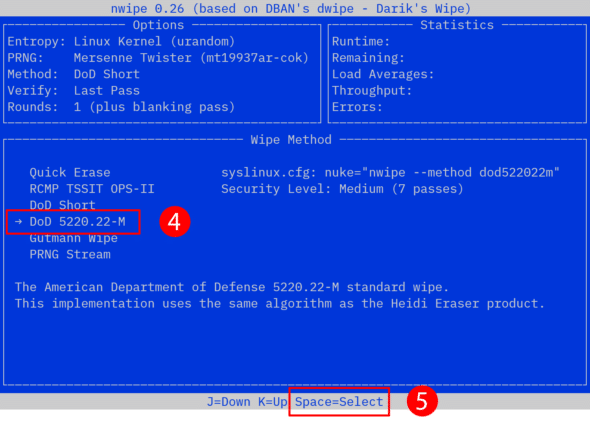
Use the arrow keys to select the method for erasure. I typically use the 7-pass DoD 5220.22-M method. Then press space to select the method and return to the drive list.
Finally, press the S key to start the erasure process:
The erasure process is detailed, complete with an estimated time remaining:
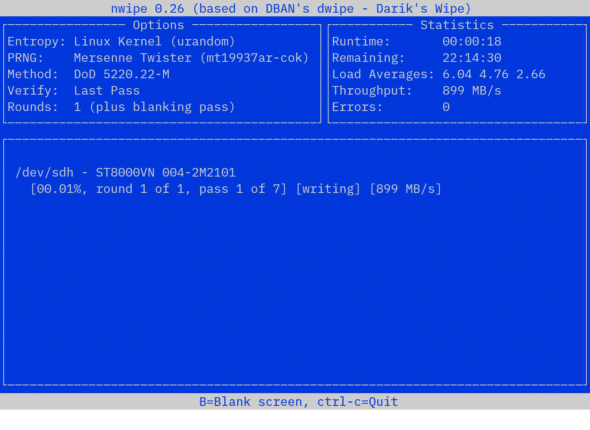
Once the process is complete, you can rest assured that when you recycle the drive no data will be made available to anyone else. Plus, with nwipe, since you don’t a dedicated system, you can just erase the drive on your system while it’s running normally to prepare for removal of the drive and disposal.