Phase one GardenPi has been running well for a while now (aside from some wifi connectivity issues). I can legitimately say that my garden waters itself everyday, unless the forecast calls for rain.
However, there are definitely improvements to be made. Let’s take a look at how to add analog sensor to the Raspberry Pi for soil moisture and light.
Materials
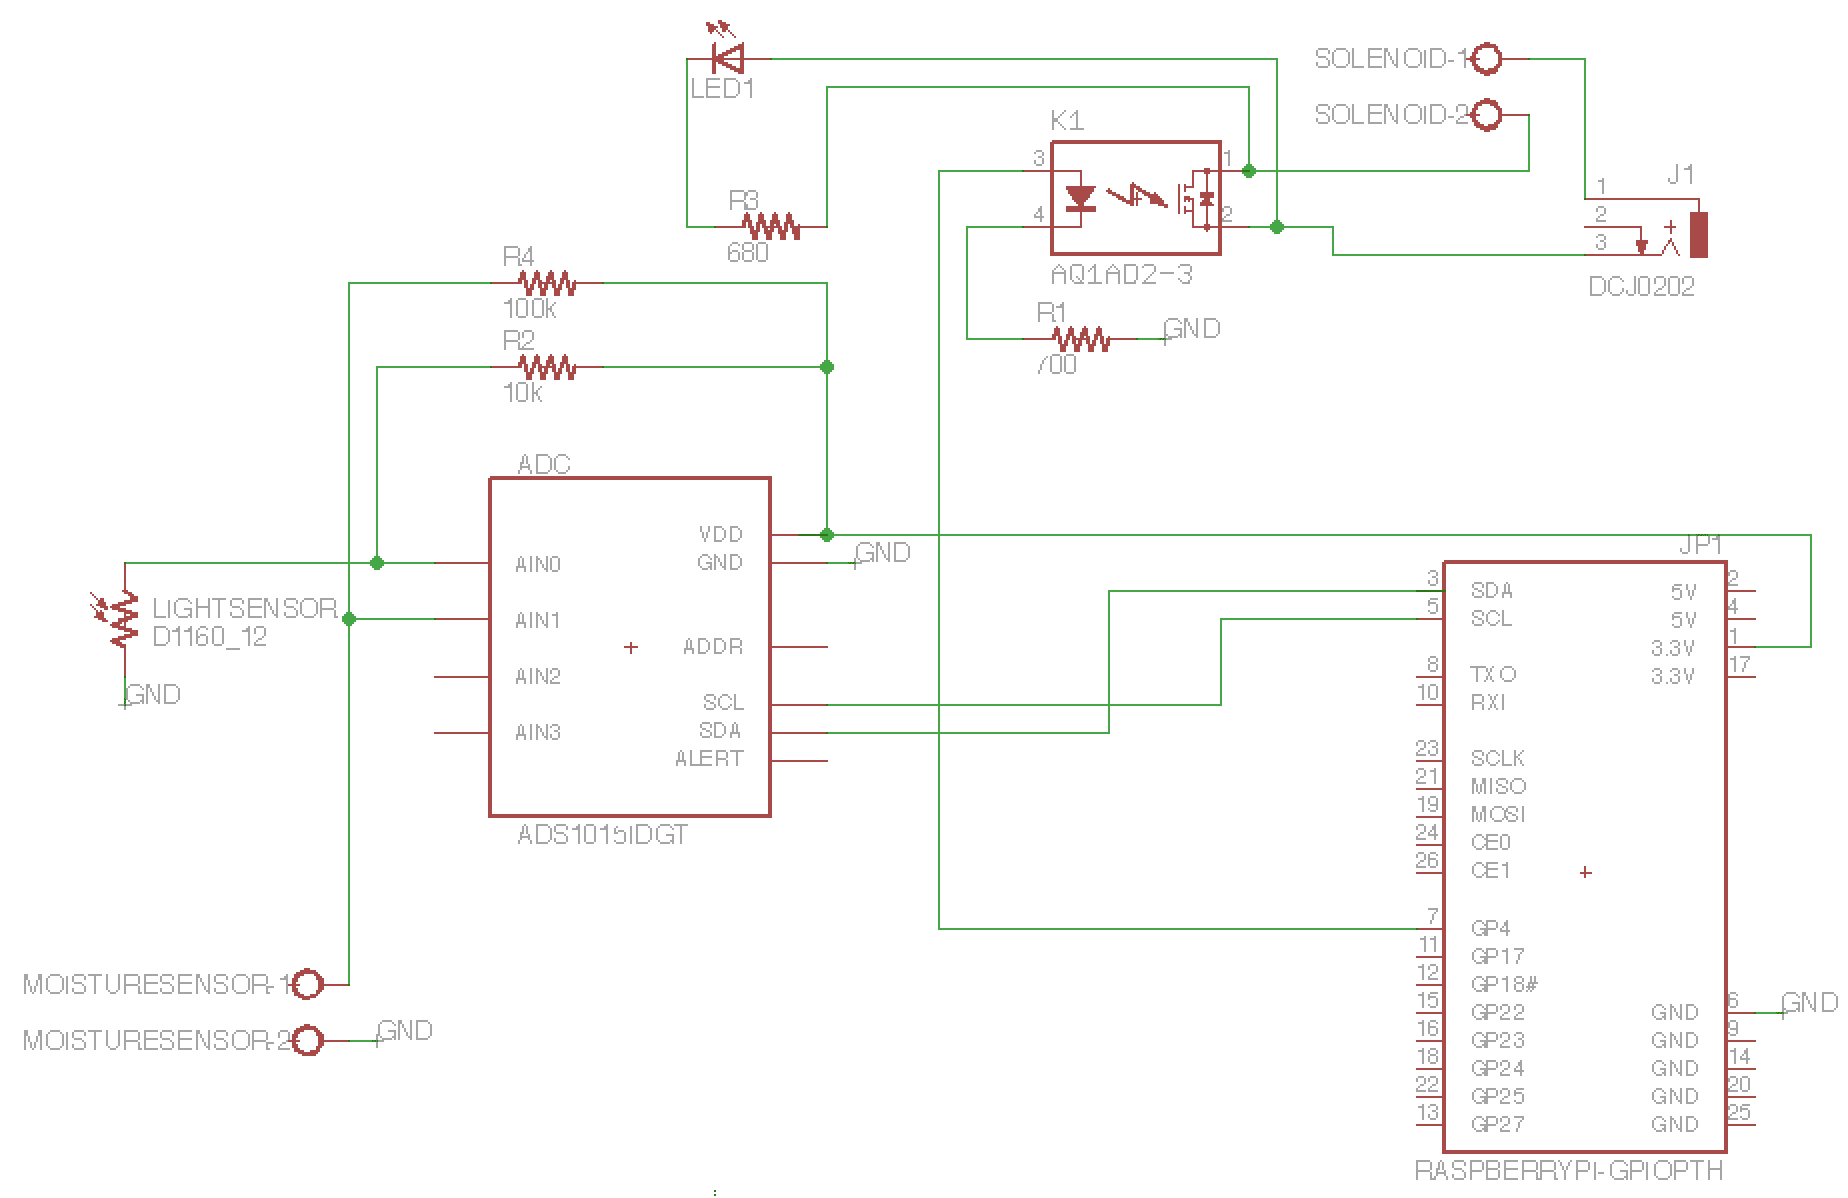
Unlike the Arduino, the Raspberry Pi doesn’t have any built-in support for converting an analog signal to a digital reading. An ADC must be wired up to the GPIO pins on the Pi. Given the plan of having multiple sensors, I went with a 4-channel ADC from Adafruit. Now it just needs sensors: I used a cheap photo-resistor for light, but soil moisture sensors are quite expensive ($20-$100). I decided to follow this guide for building one myself for a fraction of the cost.
Required parts: (approx. cost ~$11)
- 12 bit, 4 channel ADC to convert from analog to digital
- Photocell sensor for picking up light readings
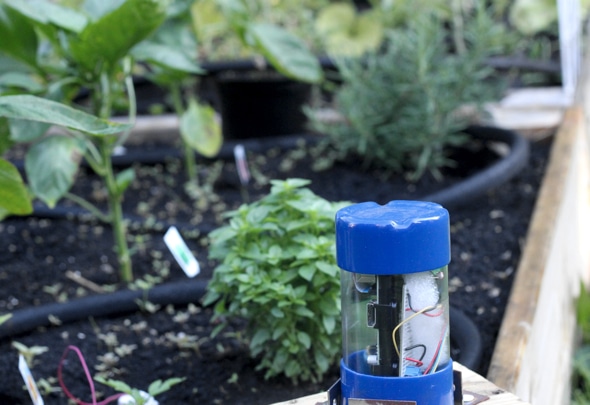
- New Viewtainer case; not completely sealed, but water-proof when on its end
- misc wires, resistors, solder
Code
I’ve updated the code to pull in the sensor data and log it every five minutes. It writes that out to a sqlite database for later reporting.
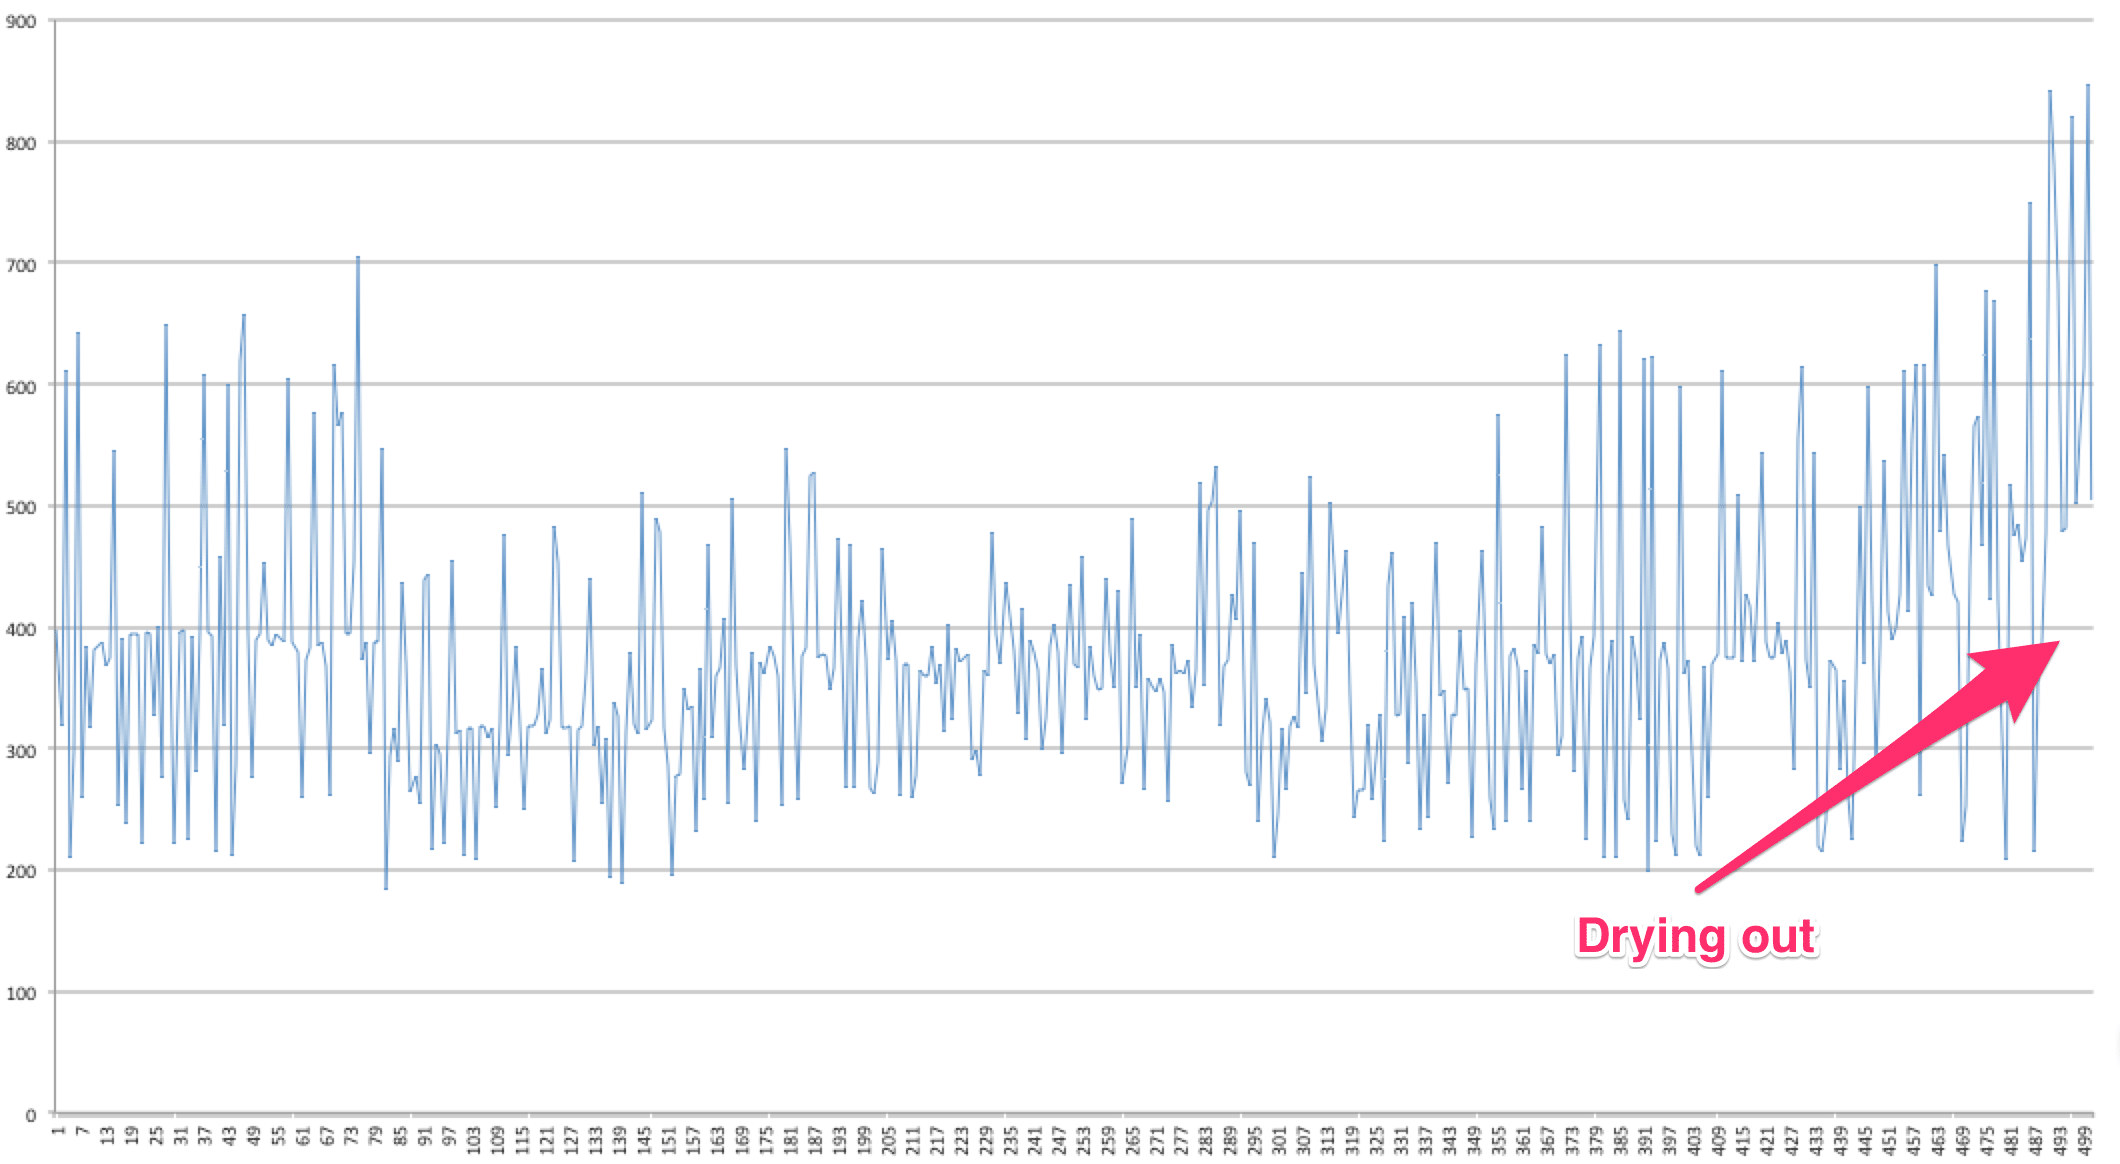
Unfortunately, the soil readings have not been clean and consistent enough to rely on. So soil moisture readings are not factored into the watering decision just yet. I will be changing the soil sensor to be encased in gypsum soon to increase consistency.
Steps:
- Attach the sensors to and ADC per the schematic below. I used screw terminals to allow me to easily connect/disconnect the sensors.
- Pull the latest code from garden_pi_waterer on Github.
- Install Sqlite on the Pi.
- Bundle install in the repository directory; the god configuration from Phase one should not need to be changed.
Results
I can still water my garden based on the daily timer and weather forecast; this feature alone saved my garden while I was on vacation. In addition to that, the GardenPi’s database now tracks the light and moisture readings as well as the time that watering starts and stops.
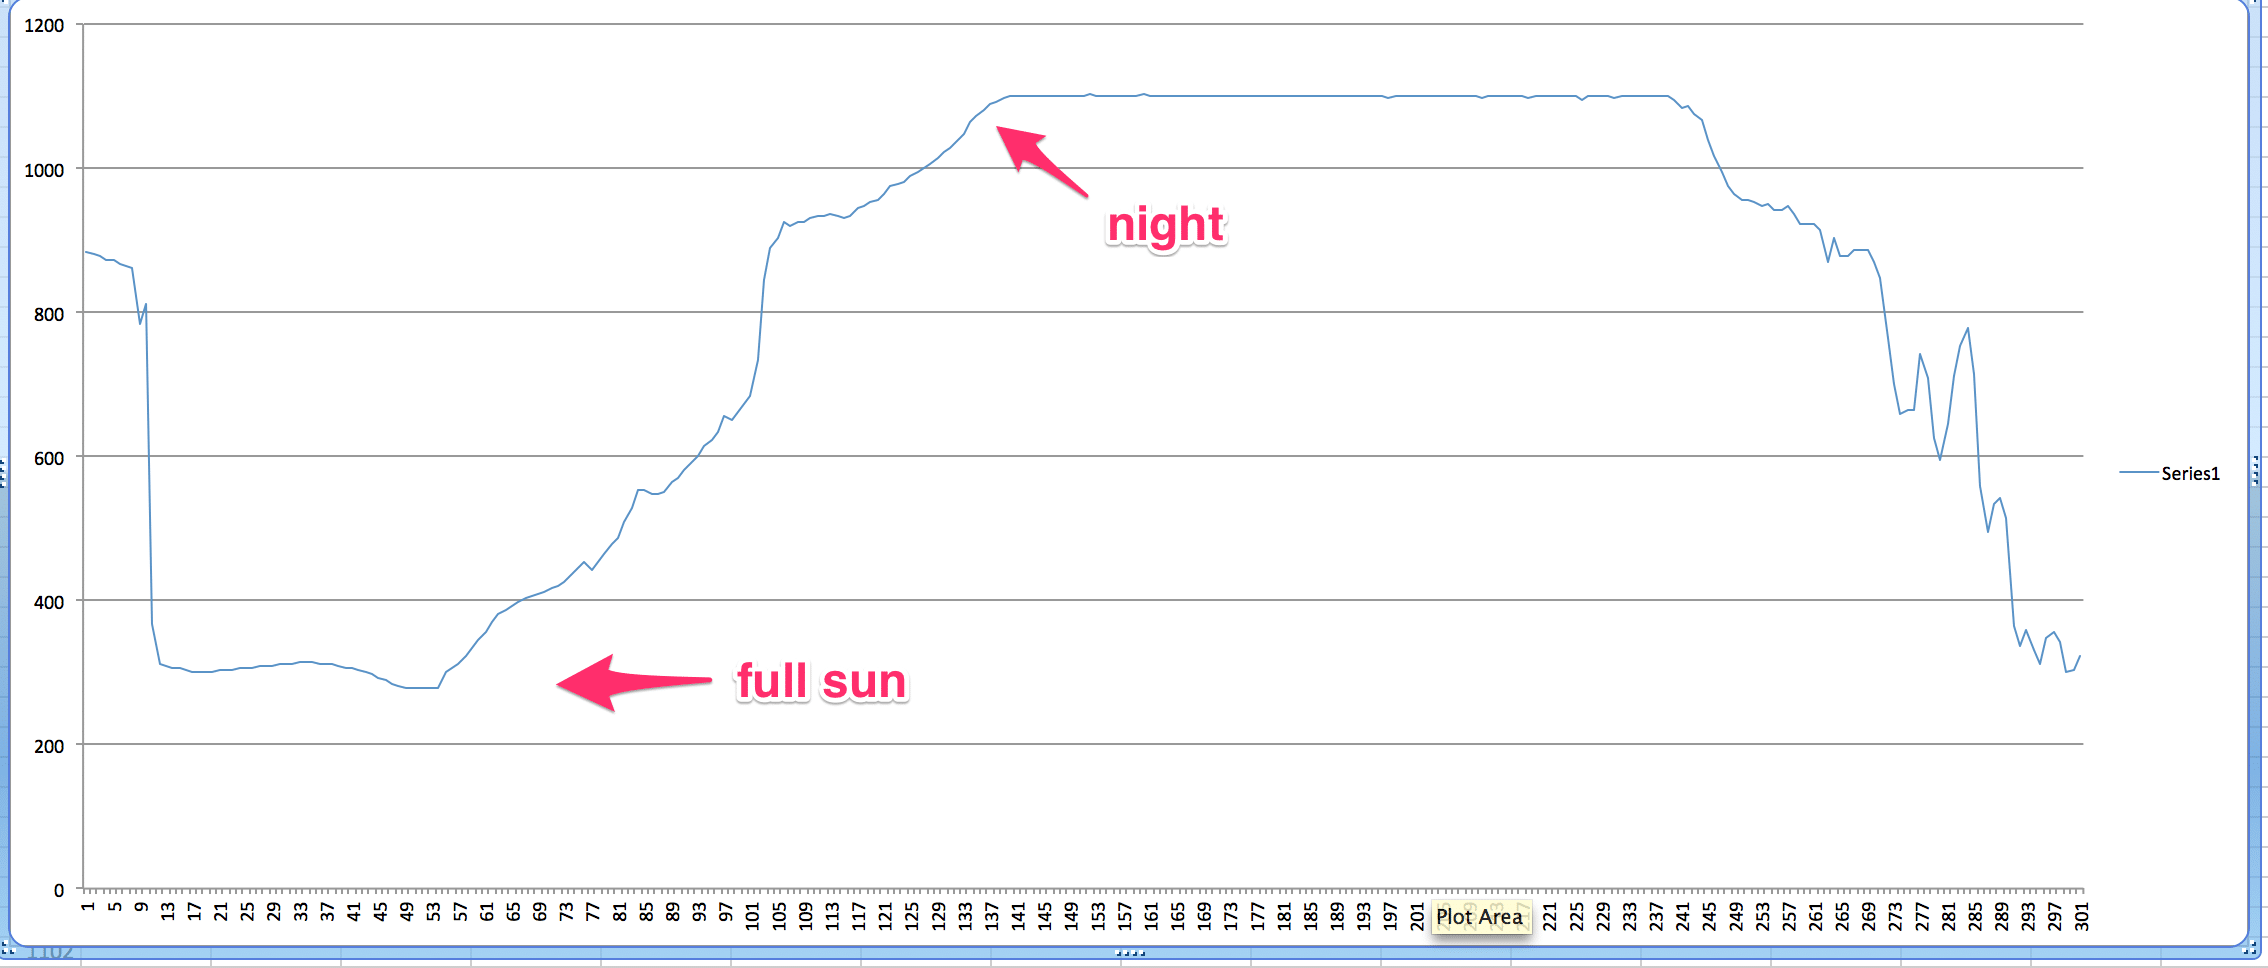
The charts show the difference between the light sensor working well, and the moisture sensor giving very unreliable readings. The next steps will be to improve my soil moisture readings and factor them into the decision process.
I do have to say, even if I have to use SSH for now, it’s pretty cool to water your garden from your phone. More on that in phase three.
Soil Moisture for Two Days
Light Intensity for Approximately One Day
Updated Schematic
Do you have pictures of the construction process, please?
Do you have a schematic on using more than one solenoid? I.e. two to four solenoids, with different irrigation schedules. Or do I have to use the full setup on each solenoid?
To water my garden from my phone? Can’t wait to try that out if I’ll just manage the two first phases!
I would also love to see more on the construction side. Particularly the case. I build a lot of gateways/motes with R-Pi but casing is always a pain. Consider posting a Tool to Farm Hack? -> http://farmhack.net
R.J.
Thanks for the comment. Unfortunately, I didn’t have the foresight to document the construction process. The case here is a small Viewtainer (see link in post). There is no mounting inside the case as it is a pretty snug fit. The only problems I had with it were heat issues when the Pi was in direct sunlight all day.
I hadn’t seen farmhack.net before, looks pretty neat. I may post something on there when I try revision 3 of the GardenPi. I’m considering making the Pi more of a base station near the outside faucet and having the sensors be small satellites that report in via RF or Bluetooth (all things that I know very little about). If you have any advice, I’d love to hear it.
This looks great! And it’s exactly what I’m looking to do. I guess I’ll have to dive in and pull the trigger on the pi! Cool project, look forward to following it.