Article summary
Laying out the user interface of a mobile app (or any app for that matter) is not a simple process. As visual designs get more complex and the number of devices and screen sizes grow, the work of a mobile developer grows more challenging.
Many developers choose to leverage open source tools to help with layout or image rendering. Because those libraries evolve over time, updating to new versions can cause unexpected changes to the look and behavior of the app. That puts the burden on developers to continuously monitor their work for problems that may emerge in the UI.
As any good developer knows, automation of mundane or time-consuming tasks is critical to a productive workflow. We often write automated unit tests and system tests to prove that our app functions the way we we expect, but how can we automate testing that our user interface looks the way we expect? That is a much greater challenge! Fortunately, we came up with a system that ended up being a great help.
Background
We were building an iOS app for a client and wanted to continuously validate the UI. One of the biggest challenges of doing this manually over a long period is that it’s easy to skip over views that are really simple or have been finished for a long time. I often find myself jumping to the more detailed views or most recent work and neglecting the rest. And I have a feeling I’m not the only one!
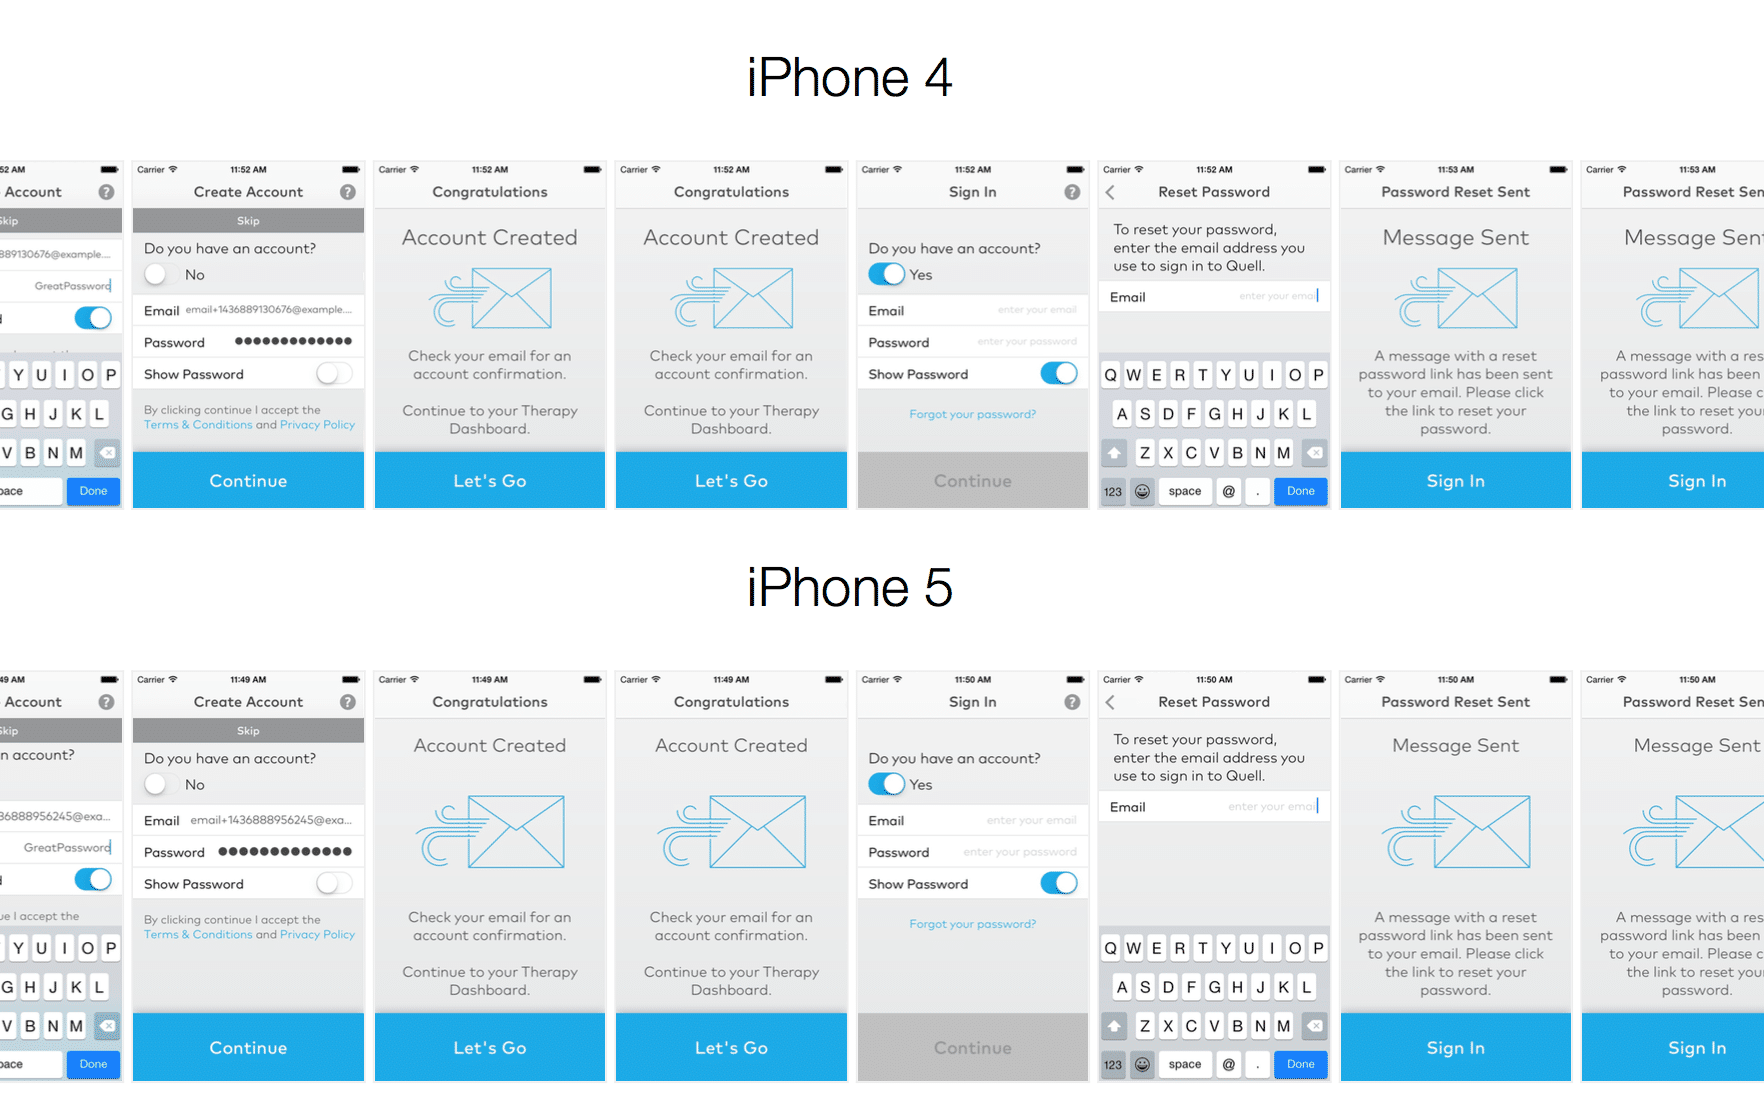
One member of our team came up with a process that we found to be extremely helpful. Rather than attempting to automate the process of analyzing the positions, sizes, colors, etc., of every artifact on every view, we decided to automate taking a screenshot of every view and composing them into a single document. We found that having one document that contains a picture of every screen made it much easier to stay focused on thoroughly inspecting every view.
The following image shows part of the generated document that we ended up with for our app.
Mobile UI Testing Method
Now that I have you convinced of the value of this process I will let you in on how we accomplished it! We started out with an open source library aptly named snapshot, one component of a larger suite of deployment tools for iOS called fastlane. I believe the original purpose of snapshot was to help developers automate the process of capturing preview images of apps in preparation for App Store submission (which can be a rigorous process in and of itself when your app supports multiple languages). We used it for much more than that.
Setting up snapshot is actually really easy. The GitHub Readme has plenty of detailed information about how to install and configure it, so rather than repeat what’s there, I’ll just highlight a few important pieces.
A “snapfile” is snapshot’s configuration mechanism, implemented using a Ruby DSL. We used the snapfile to specify which simulators we wanted the task to run on and which version(s) of iOS to use. For example, the following snippet indicates that screenshots should be captured using the iPhone6, iPhone 6 Plus, and iPhone 4s on iOS 8.4. When snapshot is invoked, it will automatically build your application, start the simulator, load your app, and capture the desired screenshots for each configuration specified.
ios_version('8.4')
devices([
  iPhone 6
  iPhone 6 Plus
  iPhone 4s
])
How do you control which screens are captured? With Javascript. Apple provides a nice feature called UI Automation that uses Javascript functions to allow remote access to user interface elements currently presented in you app running in the simulator. This allows you to write scripts that tap buttons, enter text into forms, or do whatever is necessary to get your app into the desired state. When you want the tool to take a screenshot, call captureLocalizedScreenshot('screenshot-name-1').
The snapshot tool searches your project directory for a snapshot.js file that contains these Javascript commands and executes them on the simulator configurations(s) that you specified in the snapfile. Below are a few examples of these commands:
var target = UIATarget.localTarget();
var mainWindow = target.frontMostApp().mainWindow();
mainWindow.navigationBar().buttons()["Help Button"].tap();
target.frontMostApp().keyboard().typeString("password123");
captureLocalizedScreenshot("sign-in-screen-1");
mainWindow.navigationBar().leftButton().tap();
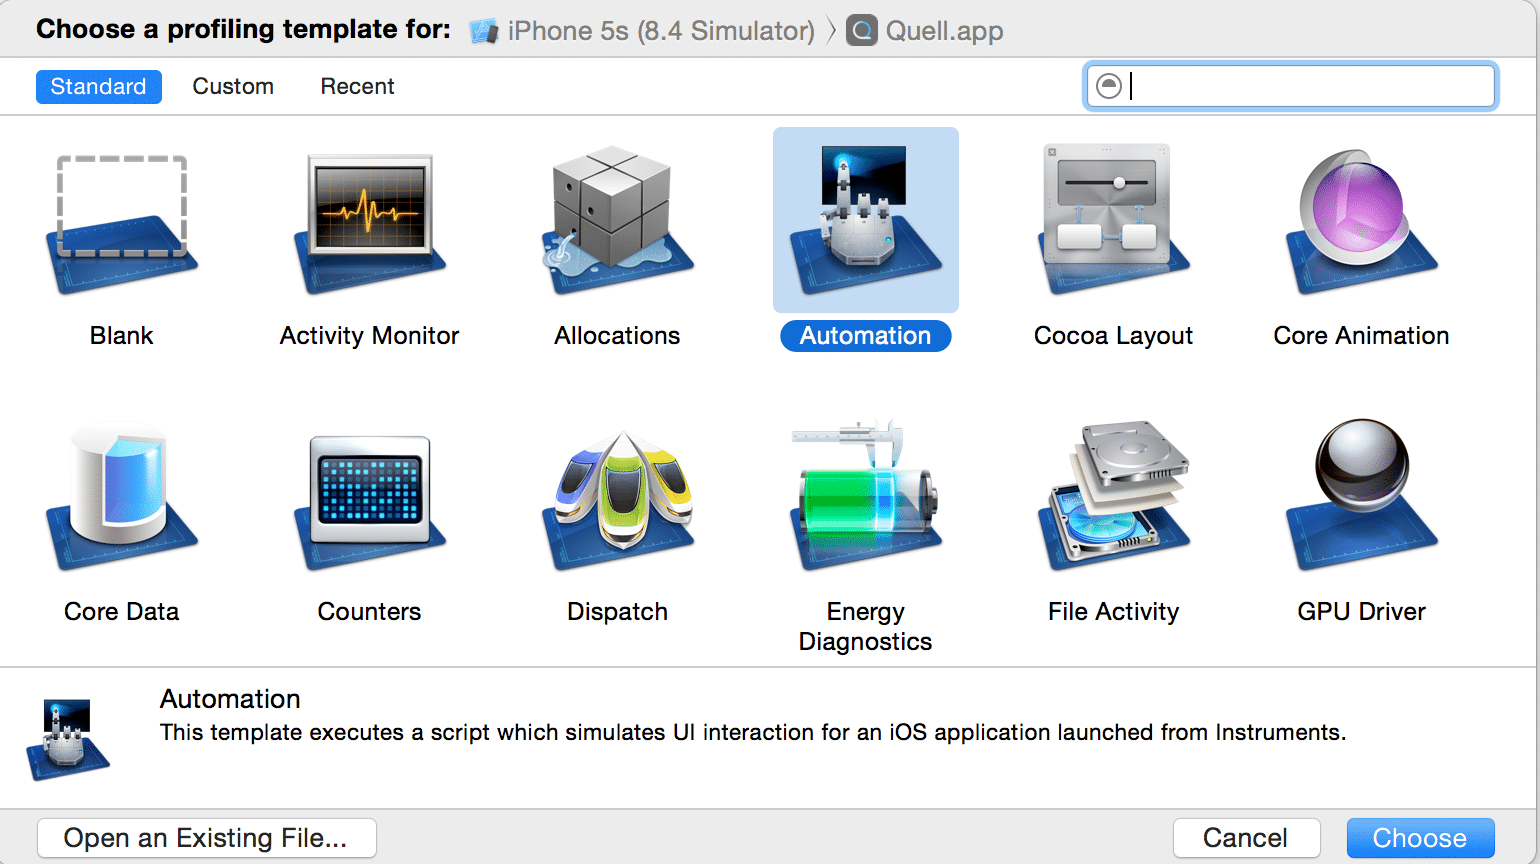
When writing the script to progress through your app, you can usually reference UI elements by their accessibility labels, If that doesn’t work, you can refer to elements using index notation as long as you know where they are in the element tree. If you get stuck, Apple’s Instruments suite has a tool called Automation that will connect to your app running in the simulator. Use it to click through your app, and it will output Javascript that you can use in your snapshot.js file. The snapshot GitHub page demonstrates how to do this.
Takeaway
Throughout the course of our project, we found that capturing screenshots added value in more ways that we originally expected. Running the script not only allowed us to discover UI mistakes before they were delivered to the customer, but it also helped us catch several functional bugs in the app that we had missed in our system/manual testing. The generated document was also a great artifact to deliver to the customer along with our weekly releases.
If you’ve found another way to do mobile user interface testing, I would love to hear your experiences. I am especially interested in hearing if anyone has accomplished this on the Android platform.
That’s really cool. I started using a Google Drawing with screen shots, but the process I used was only semi-automated. People liked seeing a storyboard-like artifact delivered along with the weekly builds. It was a good way to collect copy and analytics changes too.
I’m looking forward to Apple’s new UI testing tool. It should be much easier to create these sorts of automated tools.
How did you accomplish automating the validation of the screen shot process?
@Jelani – We didn’t automate the validation part. We just made it much easier to validate by manual visual inspection. After every iteration we review the generated document containing all the screenshots. We discussed the idea of setting up an approved set of images and then comparing the generated images pixel-by-pixel against them, but we never went that far with it.