On the verge of creating your first Kubernetes deployment? Maybe you’ve created a Dockerfile for your applications, provisioned resources for Kubernetes, or even started up your first single pod application.
To get the real benefit of Kubernetes, you need to bring these parts together and deploy your app. Kubernetes deployments allow for smooth scaling, updating, and removal as your needs change.
To help you create your first deployment, I’ll give examples of Kubernetes deployment and service definitions. I’ll also show you how to launch the configurations on a Google Cloud Platform (GCP) Kubernetes cluster, update the application version, and delete the application when you’re done.
I’m going to assume that you’ve already created a Kubernetes Cluster in GCP, created a Docker image for your application, and pushed the image to the Google Cloud Registry.
Configuring Your Kubernetes Deployment
Before creating your deployment, you will need to get credentials for the cluster you created in Part 1. To make this more flexible, I’ll use the PROJECT\_ID from your Google Cloud Platform project and the CLUSTER\_NAME from your configured Kubernetes cluster.
gcloud container clusters get-credentials ${CLUSTER_NAME}This will create local credentials, allowing you to create, update, and destroy resources on your Kubernetes cluster from the CLI.
Pod Configuration
Now that you have credentials, you will need to define your deployment. In Kubernetes, the single minimum execution unit is a pod, which generally consists of a single image running on a single machine (but can refer to a larger, more complex configuration). A set of updatable pods is a deployment. Defining a deployment will allow you to push updates and maintain service as changes are made.
To create your deployment configuration, open the file deployment\_config.yaml and copy the configuration below, making sure to replace CLUSTER\_NAME and PROJECT\_ID where needed.
apiVersion: apps/v1
kind: Deployment
metadata:
  name: ${CLUSTER_NAME}-prod
spec:
  replicas: 2
  selector:
    matchLabels:
    app: fun-app
  template:
    metadata:
      labels:
        app: fun-app
          spec:
            containers:
             - name: fun-app-image
               image: gcr.io/${PROJECT_ID}/fun-app:v1
               env:
               - name: APP_ENV
                 value: "prod"
Now that you have defined the deployment, you can create it using this command:
kubectl create deployment_config.yamlLoad Balancer Configuration
You need a way to access the deployment from your browser. By default, GCP does not allow public IPs to refer directly to any pod or deployment. For that, you’ll need either an access point, a load balancer, or an ingress. These are considered services by Kubernetes and are defined separately from the underlying deployment. For this tutorial, you will use a load balancer, but these other options can be modified to work.
To create your service configuration, open the file service\_config.yaml and copy the configuration below, making sure to replace CLUSTER\_NAME where needed.
apiVersion: v1
kind: Service
metadata:
  name: ${CLUSTER_NAME}-prod-load-balancer
spec:
  type: LoadBalancer
  selector:
    app: fun-app
  ports:
    - name: http
      protocol: TCP
      port: 80
      targetPort: 3000
    - name: https
      protocol: TCP
      port: 443
      targetPort: 443
Now run this command to create the load balancer:
kubectl create service_config.yamlOnce the service is running, you can find the external IP address either from the cloud console or by using kubectl to find your services:
kubectl get servicesAt this point, you should have a correctly configured application hosted and served from GCP using Kubernetes. And you should have a static IP address your DNS can point to.
Updating Your Kubernetes Deployment
Generally, your application won’t be done the first time you launch. You will inevitably need to make changes and update your application as time goes on — moving to a new version of a core library, adding new content, launching new features, etc.
The first step toward deploying an update is to re-create and push an updated application image. This will follow the same steps as the earlier Docker image creation and can often use the same Dockerfile, unless your project’s underlying structure has changed.
As a quick reference, I built a new image directly to the GCR image name. Note that I incremented the application version to :v2.
docker build -t gcr.io/${PROJECT_ID}/fun-app:v2docker push gcr.io/${PROJECT_ID}/fun-app:v2You can now update your deployment script to use the new image. You’re not changing how the deployment and services interact, so you only need to change the deployment\_config.yaml file to use the new image. For this, you need to change one line:
...
               - name: fun-app-image
                 image: gcr.io/${PROJECT_ID}/fun-app:v2
...
Now update your deployment using kubectl:
kubectl apply -f deployment_config.yamlSince your application is released using a deployment, the kubectl apply command will trigger a rolling update. This will allow your application to remain up and responsive as it moves to the new release image.
If you notice updates being applied very slowly or not at all, check that you have adequate resources in your cluster to allow for the change. If the number of available machines is too few to meet your minimum requirements, the update can stall.
Deleting Your Kubernetes Deployment
Eventually, an application will no longer be needed and should be decommissioned to free up resources and clean your backlog. In this case, we can quickly delete using kubectl. First, delete your deployment:
kubectl delete -f deployment_config.yaml --allThen, delete your load-balancer service:
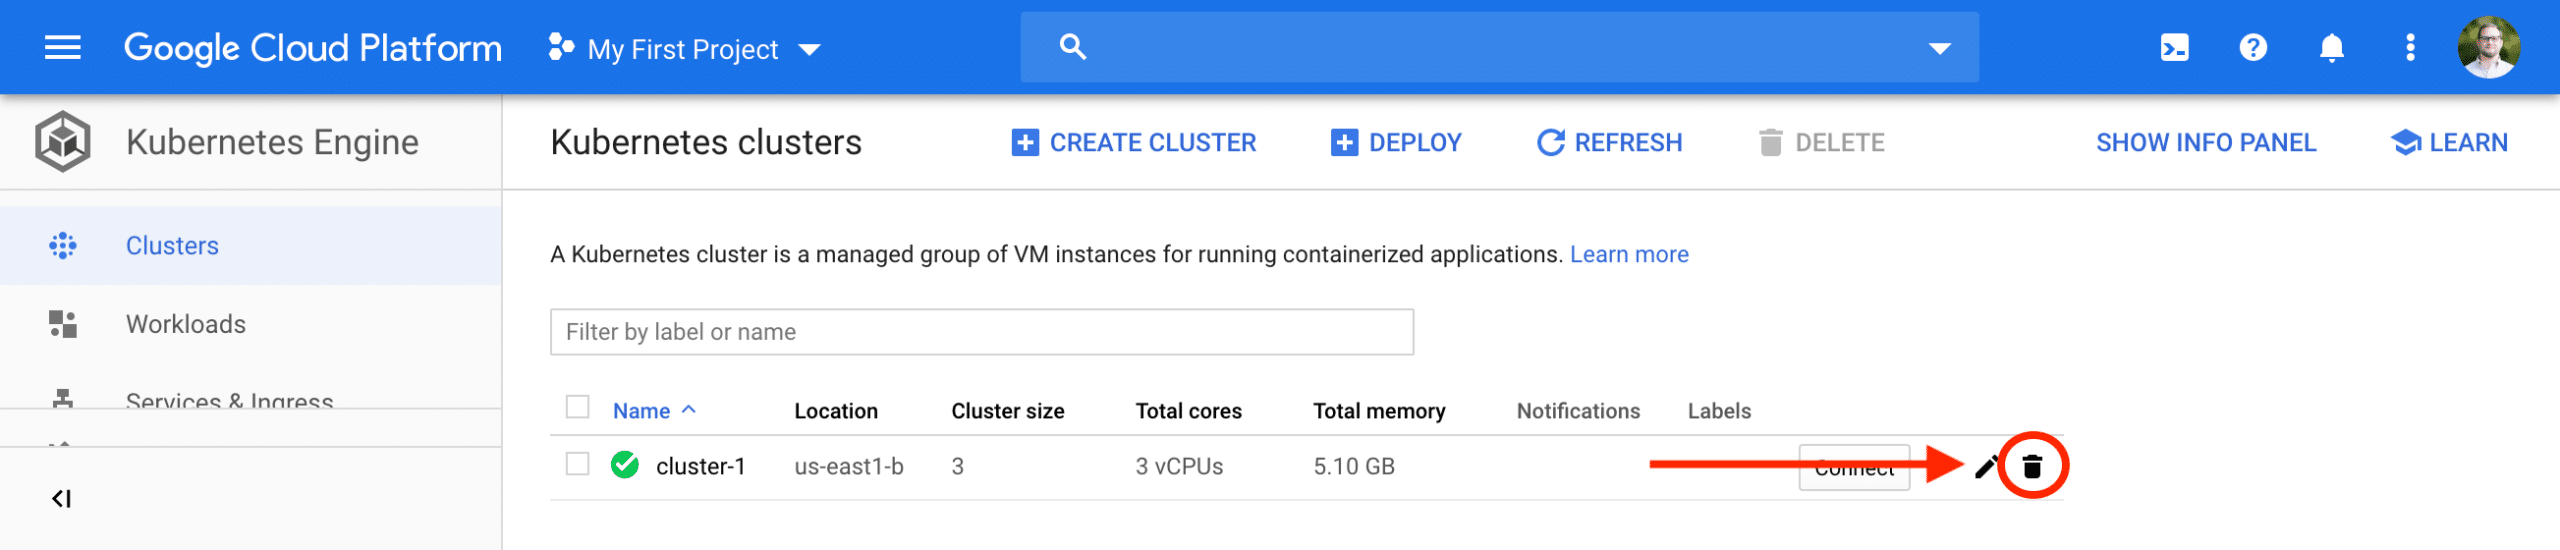
kubectl delete -f service_config.yaml --allIf you are no longer using your Kubernetes cluster, be sure to go to the GCP cloud console and delete the cluster to avoid charges. In the console, you can find your cluster under the Compute -> Kubernetes Engine menu. You should see your cluster listed and a garbage can icon that allows you to delete the cluster.
Conclusions
In this series, you will have configured Google Cloud Platform, created a Kubernetes Cluster, readied your application for deployment, and managed this deployment using Kubernetes on the command line.
- Getting Started with Google Cloud Platform and Creating a Kubernetes Cluster
- Configuring Your Command Line Interface and Preparing Your App for Kubernetes
- Creating Kubernetes Deployments, Rolling out Updates, and Removing Resources
This should have provided you with basic skills and tools to start building out and upgrading your application deployments. Good luck!