
Article summary
In a previous post, I described how to set up an SMB file server with automated backups using Rsync/Rclone. Today, we’ll be moving to a more fault-tolerant and reliable setup using ZFS.
This is the ninth post in a series about protecting your privacy by self-hosting while attempting to maintain the conveniences of public cloud services. See the bottom of this post for a list.
Determine Capacity; Purchase & Install Drives
I used a ZFS / RAIDZ Capacity Calculator to determine what drives I needed to buy to satisfy my storage needs. I ended up purchasing five 8-TB Seagate IronWolf drives because, at the time, they were the lowest price per GB and also designed for a NAS environment. I added these five to three existing 8-TB drives I already had.
I ended up using a RAID-Z2 (double parity) setup because it allows me to lose two drives of the eight at any one time without any data loss.
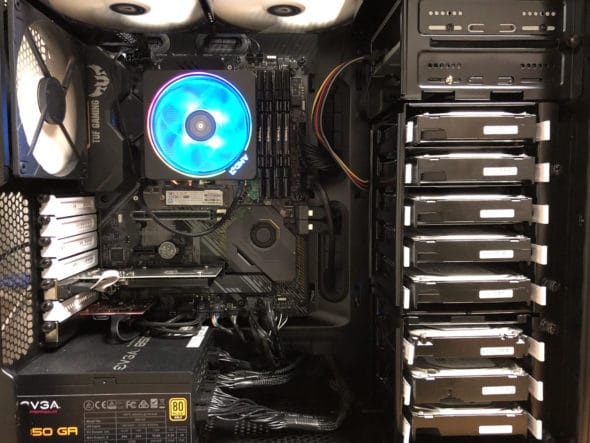
If the hard drive mounting arrangement in your chassis shows the serial numbers of the drives easily, great! Otherwise, make sure to label the other side so you can easily identify the specific drive in the event of a failure.
Setup
I am running Ubuntu 20.04 LTS; your setup may vary slightly.
The first thing to do is to identify the drive devices. I used /dev/disk/by-id because it allows me to easily figure out what device to use based on the serial number (instead of having to guess which device is /dev/sda, /dev/sdb, etc.) Plus, if the device letter ever changes, I won’t have to worry because they are uniquely identified by their serial numbers.
1. Identify Devices
First, we’ll find our new hard drive devices. Simply run an ls on the /dev/disk/by-id directory:
$ /bin/ls -1 /dev/disk/by-id/scsi-SATA*
  /dev/disk/by-id/scsi-SATA_ST8000AS0002-1NA_Z840B65B
  /dev/disk/by-id/scsi-SATA_ST8000AS0002-1NA_Z840B65B-part1
  /dev/disk/by-id/scsi-SATA_ST8000AS0002-1NA_Z840B65B-part9
  /dev/disk/by-id/scsi-SATA_ST8000AS0002-1NA_Z840DRXL
  /dev/disk/by-id/scsi-SATA_ST8000AS0002-1NA_Z840DRXL-part1
  /dev/disk/by-id/scsi-SATA_ST8000AS0002-1NA_Z840DRXL-part9
  /dev/disk/by-id/scsi-SATA_ST8000DM004-2CX1_WCT0BTJ7
  /dev/disk/by-id/scsi-SATA_ST8000DM004-2CX1_WCT0BTJ7-part1
  /dev/disk/by-id/scsi-SATA_ST8000DM004-2CX1_WCT0BTJ7-part9
  /dev/disk/by-id/scsi-SATA_ST8000VN004-2M21_WKD2RTME
  /dev/disk/by-id/scsi-SATA_ST8000VN004-2M21_WKD2RTME-part1
  /dev/disk/by-id/scsi-SATA_ST8000VN004-2M21_WKD2RTME-part9
  /dev/disk/by-id/scsi-SATA_ST8000VN004-2M21_WKD2ZW4A
  /dev/disk/by-id/scsi-SATA_ST8000VN004-2M21_WKD2ZW4A-part1
  /dev/disk/by-id/scsi-SATA_ST8000VN004-2M21_WKD2ZW4A-part9
  /dev/disk/by-id/scsi-SATA_ST8000VN004-2M21_WKD304W2
  /dev/disk/by-id/scsi-SATA_ST8000VN004-2M21_WKD304W2-part1
  /dev/disk/by-id/scsi-SATA_ST8000VN004-2M21_WKD304W2-part9
  /dev/disk/by-id/scsi-SATA_ST8000VN004-2M21_WKD31W39
  /dev/disk/by-id/scsi-SATA_ST8000VN004-2M21_WKD31W39-part1
  /dev/disk/by-id/scsi-SATA_ST8000VN004-2M21_WKD31W39-part9
  /dev/disk/by-id/scsi-SATA_ST8000VN004-2M21_WRD050YX
  /dev/disk/by-id/scsi-SATA_ST8000VN004-2M21_WRD050YX-part1
  /dev/disk/by-id/scsi-SATA_ST8000VN004-2M21_WRD050YX-part9
You may see partitions here (listed as *-part*). We’ll ignore those and just use the device names straight up.
2. Create ZFS Pool
Next, we’ll set up our new ZFS pool:
$ sudo zpool create vault raidz2 \
  /dev/disk/by-id/scsi-SATA_ST8000AS0002-1NA_Z840B65B \
  /dev/disk/by-id/scsi-SATA_ST8000DM004-2CX1_WCT0BTJ7 \
  /dev/disk/by-id/scsi-SATA_ST8000VN004-2M21_WKD2RTME \
  /dev/disk/by-id/scsi-SATA_ST8000VN004-2M21_WKD2ZW4A \
  /dev/disk/by-id/scsi-SATA_ST8000AS0002-1NA_Z840DRXL \
  /dev/disk/by-id/scsi-SATA_ST8000VN004-2M21_WKD304W2 \
  /dev/disk/by-id/scsi-SATA_ST8000VN004-2M21_WKD31W39 \
  /dev/disk/by-id/scsi-SATA_ST8000VN004-2M21_WRD050YX
I named mine vault, but you can name yours anything you’d like.
Once this is complete, you can see the status of your new pool:
$ zpool status
  pool: vault
 state: ONLINE
  scan: none requested
config:

        NAME                                     STATE     READ WRITE CKSUM
        vault                                    ONLINE       0     0     0
          raidz2-0                               ONLINE       0     0     0
            scsi-SATA_ST8000AS0002-1NA_Z840B65B  ONLINE       0     0     0
            scsi-SATA_ST8000DM004-2CX1_WCT0BTJ7  ONLINE       0     0     0
            scsi-SATA_ST8000VN004-2M21_WKD2RTME  ONLINE       0     0     0
            scsi-SATA_ST8000VN004-2M21_WKD2ZW4A  ONLINE       0     0     0
            scsi-SATA_ST8000AS0002-1NA_Z840DRXL  ONLINE       0     0     0
            scsi-SATA_ST8000VN004-2M21_WKD304W2  ONLINE       0     0     0
            scsi-SATA_ST8000VN004-2M21_WKD31W39  ONLINE       0     0     0
            scsi-SATA_ST8000VN004-2M21_WRD050YX  ONLINE       0     0     0

errors: No known data errors
Also, the new pool is automatically mounted in the root:
$ df -h
Filesystem                         Size  Used Avail Use% Mounted on
vault                               41T    0T   41T   0% /vault
All of the space for the drive is combined into one volume, which can make for an impressive amount of capacity.
3. Load it Up
I used rsync to copy data from my old drives onto my new vault ZFS pool. It actually took close to a week of copying to get it all moved over, but once it did, it ran as smooth as butter.
Until one day, one of my drives started to fail…
Handling Failures
One morning, I looked at my pool status:
$ zpool status
  pool: vault
 state: DEGRADED
status: One or more devices are faulted in response to persistent errors.
        Sufficient replicas exist for the pool to continue functioning in a
        degraded state.
action: Replace the faulted device, or use 'zpool clear' to mark the device
        repaired.
  scan: scrub repaired 5.24M in 0 days 09:16:23 with 0 errors on Sun Dec 13 09:40:25 2020
config:

        NAME                                     STATE     READ WRITE CKSUM
        vault                                    DEGRADED     0     0     0
          raidz2-0                               DEGRADED     0     0     0
            scsi-SATA_ST8000AS0002-1NA_Z840B65B  ONLINE       0     0     0
            scsi-SATA_ST8000DM004-2CX1_WCT0BTJ7  ONLINE       0     0     0
            scsi-SATA_ST8000VN004-2M21_WKD2RTME  ONLINE       0     0     0
            scsi-SATA_ST8000VN004-2M21_WKD2ZW4A  ONLINE       0     0     0
            scsi-SATA_ST8000AS0002-1NA_Z840DRXL  FAULTED    250     0     0  too many errors
            scsi-SATA_ST8000VN004-2M21_WKD304W2  ONLINE       0     0     0
            scsi-SATA_ST8000VN004-2M21_WKD31W39  ONLINE       0     0     0
            scsi-SATA_ST8000VN004-2M21_WRD050YX  ONLINE       0     0     0

errors: No known data errors
I noticed that one of the drives was FAULTED because of too many read errors. However, there were no known data errors, meaning everything was still accessible. ZFS puts itself into a degraded mode and still allows full operation until you correct the error.
1. Pull Drive
I shut down my system and removed the faulted drive. Because I had created my pool using the serial number-named devices, it was easy to know which drive to pull out. I replaced the drive with a new IronWolf 8 TB and powered my system back up.
This is what I saw when looking at my pool status:
$ zpool status
  pool: vault
 state: DEGRADED
status: One or more devices could not be used because the label is missing or
        invalid.  Sufficient replicas exist for the pool to continue
        functioning in a degraded state.
action: Replace the device using 'zpool replace'.
   see: http://zfsonlinux.org/msg/ZFS-8000-4J
  scan: scrub repaired 5.24M in 0 days 09:16:23 with 0 errors on Sun Dec 13 09:40:25 2020
config:

        NAME                                     STATE     READ WRITE CKSUM
        vault                                    DEGRADED     0     0     0
          raidz2-0                               DEGRADED     0     0     0
            scsi-SATA_ST8000VN004-2M21_WKD2ZW4A  ONLINE       0     0     0
            scsi-SATA_ST8000VN004-2M21_WKD2RTME  ONLINE       0     0     0
            scsi-SATA_ST8000VN004-2M21_WKD31W39  ONLINE       0     0     0
            scsi-SATA_ST8000VN004-2M21_WRD050YX  ONLINE       0     0     0
            16196138140058538093                 UNAVAIL      0     0     0  was /dev/disk/by-id/scsi-SATA_ST8000AS0002-1NA_Z840DRXL-part1
            scsi-SATA_ST8000DM004-2CX1_WCT0BTJ7  ONLINE       0     0     0
            scsi-SATA_ST8000AS0002-1NA_Z840B65B  ONLINE       0     0     0
            scsi-SATA_ST8000VN004-2M21_WKD304W2  ONLINE       0     0     0

errors: No known data errors
The old drive was now missing, and ZFS was indicating as such.
2. Bring Old Drive Offline & Replace Disk
Simply tell ZFS to bring the old drive offline:
$ sudo zpool offline vault 16196138140058538093And then replace the old drive with the new drive (using the by-id device):
$ sudo zpool replace vault 16196138140058538093 /dev/disk/by-id/scsi-SATA_ST8000VN004-2M21_WKD3BE6JThis process is known as “resilvering” and can take a long time, depending on how much data you have. In my case, it ran only in about ten and a half hours, which was a very nice surprise.
You can check on the status of the resilvering process by running:
$ zpool status
  pool: vault
 state: DEGRADED
status: One or more devices is currently being resilvered.  The pool will
        continue to function, possibly in a degraded state.
action: Wait for the resilver to complete.
  scan: resilver in progress since Sat Dec 26 13:44:13 2020
        2.77T scanned at 36.0G/s, 340M issued at 4.30M/s, 29.1T total
        0B resilvered, 0.00% done, no estimated completion time
config:

        NAME                                       STATE     READ WRITE CKSUM
        vault                                      DEGRADED     0     0    0
          raidz2-0                                 DEGRADED     0     0    0
            scsi-SATA_ST8000VN004-2M21_WKD2ZW4A    ONLINE       0     0    0
            scsi-SATA_ST8000VN004-2M21_WKD2RTME    ONLINE       0     0    0
            scsi-SATA_ST8000VN004-2M21_WKD31W39    ONLINE       0     0    0
            scsi-SATA_ST8000VN004-2M21_WRD050YX    ONLINE       0     0    0
            replacing-4                            DEGRADED     0     0    0
              16196138140058538093                 OFFLINE      0     0    0  was /dev/disk/by-id/scsi-SATA_ST8000AS0002-1NA_Z840DRXL-part1
              scsi-SATA_ST8000VN004-2M21_WKD3BE6J  ONLINE       0     0    0
            scsi-SATA_ST8000DM004-2CX1_WCT0BTJ7    ONLINE       0     0    0
            scsi-SATA_ST8000AS0002-1NA_Z840B65B    ONLINE       0     0    0
            scsi-SATA_ST8000VN004-2M21_WKD304W2    ONLINE       0     0    0
After the process had completed, ZFS was no longer running in a degraded state. Another status check revealed that things were back to normal:
$ zpool status
  pool: vault
 state: ONLINE
  scan: resilvered 3.56T in 0 days 10:25:34 with 0 errors on Sun Dec 27 00:09:47 2020
config:

        NAME                                     STATE     READ WRITE CKSUM
        vault                                    ONLINE       0     0     0
          raidz2-0                               ONLINE       0     0     0
            scsi-SATA_ST8000VN004-2M21_WKD2ZW4A  ONLINE       0     0     0
            scsi-SATA_ST8000VN004-2M21_WKD2RTME  ONLINE       0     0     0
            scsi-SATA_ST8000VN004-2M21_WKD31W39  ONLINE       0     0     0
            scsi-SATA_ST8000VN004-2M21_WRD050YX  ONLINE       0     0     0
            scsi-SATA_ST8000VN004-2M21_WKD3BE6J  ONLINE       0     0     0
            scsi-SATA_ST8000DM004-2CX1_WCT0BTJ7  ONLINE       0     0     0
            scsi-SATA_ST8000AS0002-1NA_Z840B65B  ONLINE       0     0     0
            scsi-SATA_ST8000VN004-2M21_WKD304W2  ONLINE       0     0     0

errors: No known data errors
Because I’d configured my pool for double parity, the failure didn’t affect me adversely. Actually, the timing couldn’t have been better for my switch to ZFS. If this had happened to me just a couple of months before, I would have lost a lot of data.
See Also
Self-Hosting Your Own Cloud
- Setting up OpenVPN
- SMB File Server with Automated Backups using Rsync/Rclone
- Note-taking with Nextcloud & Syncthing
- Movies and Music using Emby
- Protect Yourself Online with Privacy Tools
- Ad and Tracker Blocking with Pi-Hole
- Building a Personal Private Network with WireGuard
- Monitoring Your Internet Traffic with ntopng
- Building a NAS with ZFS (this post)
- Photos and Videos
Nice article and example. Entourages us to try ZFS for backups/NAS.
I wonder whether the lower spec (MTBF) of the Iron wolf vs IronWolf Pro is justified by the price difference. I think on going with Seagate Exos or Toshiba MG04ACA.
In a non-backup sceanrio, I haven’t figured out how to tune ZFS for databse RocksDB (MyRocks). Both use similar compression algorithms, so the compression should be handled in one place; 128k record size seems too big for R-M-W pattern though. Also COW file-systems tend to fragment badly when used with databases. I guess choosing rec size around 32-64k for both ZFS and MyRocks will give the best performance, not sure aboit the compression though. Probably it should be turned off in ZFS and kept in RocksDB.