Article summary
Small screen recordings can be an extremely effective way to demonstrate motion or interactivity, and they’re easy to produce on recent versions of OS X. Below is the workflow I use when the need arises.
Record the Screen
OSX’s Quicktime Player has easy, reliable screen recording built in:
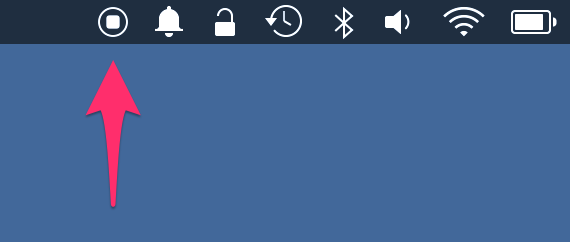
Start with File -> New Screen Recording, then click the record button. From here you can either select a rectangular region of the screen to record, or tap to record the whole screen. If you clicked through the process too hastily, you may have missed the instructions telling you how to stop: press this small button in the menu bar:
Quicktime then opens the video for editing, allowing you to review and edit it before saving. You probably want to trim the start and end of your recording to keep just the interesting middle. From here you can save as a full-resolution .mov or export at a lower resolution.
A Note on Formats
Quicktime’s .mov files have high fidelity, a high frame rate, and reasonably good compression. Depending on what you recorded and how you intend to use it, though, you may wish to convert to another format. If you’re presenting from your laptop or uploading to YouTube, Quicktime’s output is great. For embedding in written communication, I usually prefer to create a GIF.
The venerable Graphics Interchange Format is old and obsolete, but it has one major strength: ubiquity. HTML5 video video is technically superior but is not yet ubiquitous. As evidence, Gfycat, which provides HTML5 video hosting, encodes six different formats to cover most browsers. And they still fall back to GIF. Incidentally, if you’re publishing a short, silent video to the web, Gfycat is a fantastic host.
For the purposes of this post, let’s say you need to host the image yourself and you want GIF’s broad compatibility.
Convert to GIF
Quicktime’s .mov recordings can be converted to GIF with ffmpeg like this:
ffmpeg -i in.mov out.gif
…but that won’t give you very good results. GIF is limited to a palette of 256 colors, and by default ffmpeg will use one standard palette that covers the whole color space. This results in ugly dithering:

Recent versions of ffmpeg are able to generate a tailored palette, but it requires two passes, so it can be a bit cumbersome. I used the following script, which is based on one provided by the feature’s author here.
#!/bin/sh
palette="/tmp/palette.png"
filters="fps=10,crop=530:533:16:14,scale=350:-1:flags=bicubic"
ffmpeg -v warning -i $1 -vf "$filters,palettegen" -y $palette
ffmpeg -v warning -i $1 -i $palette -lavfi "$filters [x]; [x][1:v] paletteuse" -y $2
(invoke with e.g. ./go.sh in.mov out.gif)
A 60fps full-resolution GIF came out to 3.6MB. By tightly cropping to the region I’m interested in, resizing down to a width of 350 pixels, and dropping to 10 frames per second, we get the file size down to ~500k, and it still looks pretty good:
Going Further
If for some reason you wish to make a recording of making a recording, that’s somewhat more difficult. Another great tool that comes with OSX is the screencapture command; I called it repeatedly from a small script to “record” the animation at the top of this post, fed the resulting images into ffmpeg with ffmpeg -framerate 8 -i %03d.png -c:v huffyuv out.avi, and then processed into a GIF as above.
For more command-line control over your GIFs, see gifsicle.
For further reading, check out a few of my favorite GIF-using spin posts:
- Drawing Objects around an SVG Circle with D3.js
- Creating Scroll Animations with Waypoints and Animate.css
- Visualizing Garbage Collection Algorithms