
Article summary
Browser DevTools, or Developer Tools, provides web developers with powerful development capabilities. They enable quick editing, testing, and debugging of software in real-time. Best of all, nearly every modern browser includes DevTools right out of the box! In the first part of this guide, I will talk about the first developer tool, the inspector.
Accessing the Inspector
There are two easy methods to open your browser DevTools to access the inspector:
1. Right-click on any element on the web page and click on inspect. This should pop open your browser DevTools.
2. You can use the following keyboard shortcuts:
- Windows/Linux: Press
Ctrl + Shift + IorF12 - Mac: Press
Cmd + Option + I
If you have done all of this correctly you should see something that looks like this:

The first tab (This could show up as either Elements or Inspector depending on your browser) that is open by default is the Inspector. Let’s break down how to make sense of and use the inspector in our workflows!
Inspecting an Element
To get us started, I spun up a very basic react app to run this demonstration. On my app, I’m going to follow the steps above to open my Inspector tool. You should see something like this:

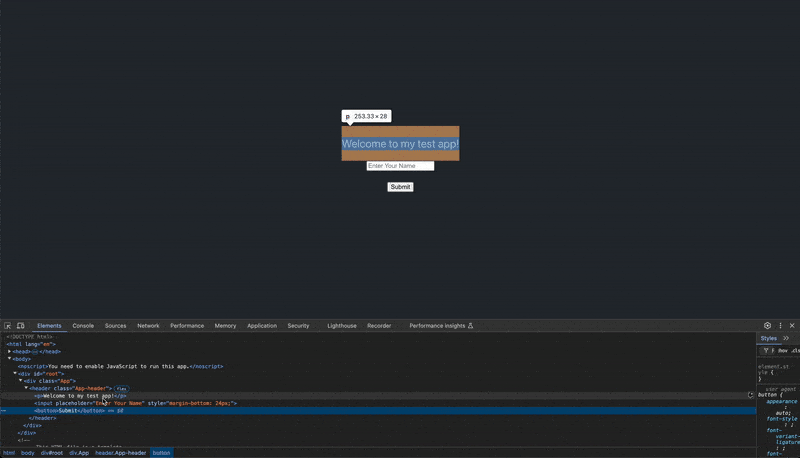
The DOM Tree
Let’s start by looking at the left side of the inspector. This shows us the DOM tree or HTML structure of the web page. Each element of the web page corresponds with its component on the DOM.


This structure can help us get a better understanding of how our web page is structured and laid out. For each element you can traverse through the DOM by clicking on the small arrow icons next to each item.
The cool thing with the Inspector DOM tree, is that you can hover over each item on the DOM and see that element highlighted on your web page.
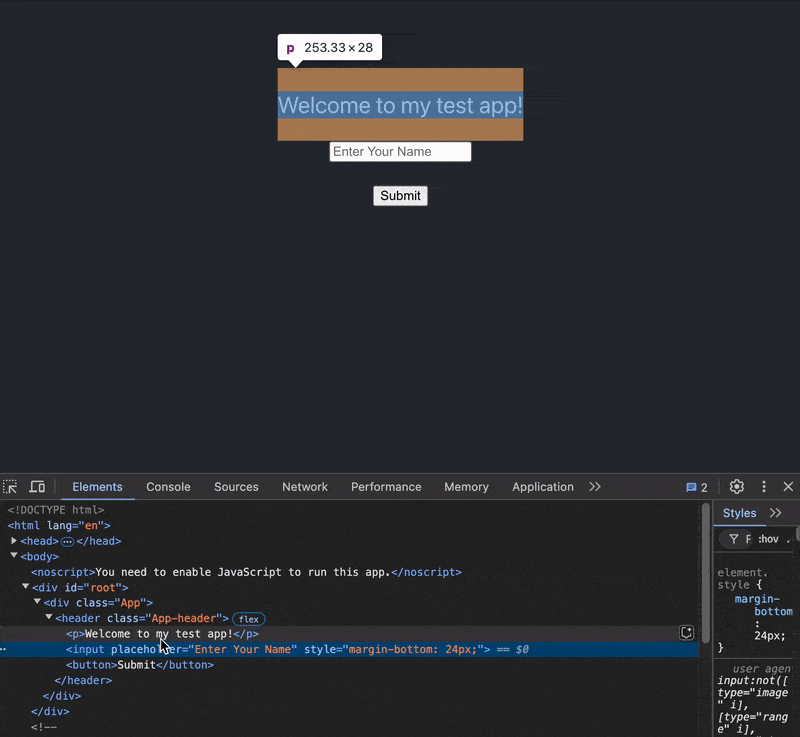
This helps us to associate each element in the DOM with the element on your web app. It also gives us some handy information such as the size of the element that you hovered over.
The inspector also acts as a mini code editor. You can directly edit the values and see the changes apply live in your application. This gives us tools to make changes easily on the fly.
Bonus tip: If you open the inspector with the right-click inspect method, depending on the element you right-click on, it will automatically open to that element in the DOM tree!
Style Editor
The next aspect of the inspector is the built-in style editor. This exists in the section next to the DOM tree and similarly gives us the functionality to edit the style of your web page in real-time!

As we can see above, the style editor exposes the styles applied to our web page and shows us the specific CSS classes and styles that are used. We can now edit these styles like a text editor.
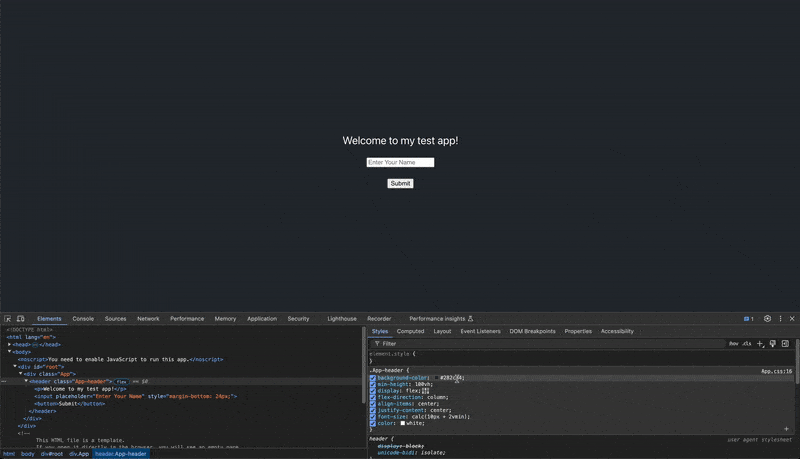
This allows us to preview different styles and make adjustments to the style of our web page on the fly without having to edit your code. This is a helpful tool that can help save a lot of time when making style changes.
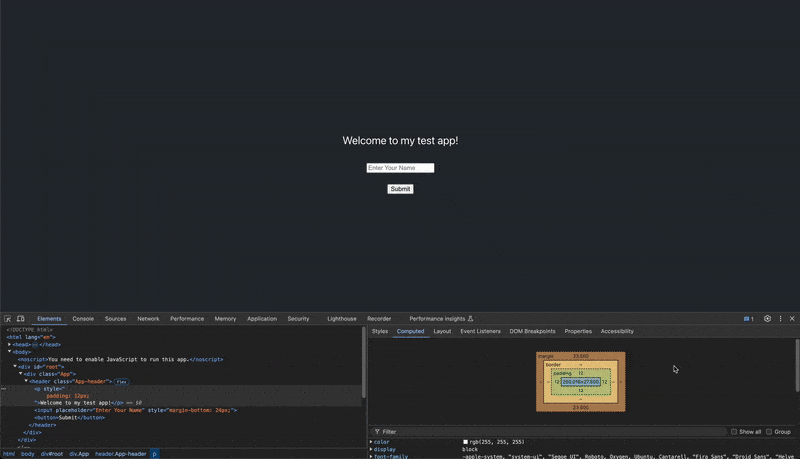
The other useful tool that we can use is the Computed or Layout tab depending on your browser. This tab will give us an even more detailed view of what the DOM tree shows us. Information such as the size of the element, padding, border widths, and margins can all be seen and highlighted here.
The built-in inspector tools are powerful for all developers who need to make and preview changes. These are just some of the tools every developer can build into their workflows to save time and make changes more efficiently.