Image optimization is the process of reducing image file sizes as much as possible while maintaining an acceptable level of visual quality. It can be a complex topic; there are endless ways to optimize images for the web, and the best technique for a given image depends on its content and context.
In this two-part series, I’ll offer some compelling reasons about why you should use image optimization, and I’ll cover our approach for choosing techniques.
Why is Image Optimization Important?
Simply put, optimizing your images allows your webpages to load faster. Faster web pages lead to lower bounce rates, higher user engagement, and increased conversions.
Images often make up the bulk of a webpage’s downloaded bytes. Even a modest reduction in file sizes on an image-heavy webpage has the potential to dramatically decrease loading time. These savings can be especially valuable to mobile users who are often on slower internet connections.
If that isn’t enough to make image optimization a priority, Google has started to consider page speed in its search rankings. A faster website not only helps you engage with current users—it can also help bring you new ones.
Our Process
This past year, Atomic Object introduced a new website that makes heavy use of photography. Many pages feature full-width photographs and large illustrations of the software we create. With such an extensive use of images, we knew we had to emphasize image optimization to ensure a fast, enjoyable user experience for visitors.
To make sure all Atoms working on the website follow best practices, we developed a set of image optimization guidelines. These guidelines aren’t meant to be an exhaustive list of optimization methods. Rather, we wanted to introduce simple techniques that would net us substantial file size reductions without requiring expert technical knowledge or an unreasonable amount of time.
Our basic process follows these four steps:
- Eliminate unnecessary images
- Choose the appropriate image format
- Scale image to the correct dimensions
- Apply compression
Step 1: Decide If an Image is Needed
Before deciding on the best file format for your image, you should first ask yourself whether an image is necessary to achieve the desired effect.
In the earlier days of the web, effects like gradients, shadows, and custom text effects were often achieved through the use of images. Luckily, web technologies have progressed to the point where we can create these effects with just a few lines of CSS.
Replacing image resources with CSS yields huge savings; not only does CSS pale in download size compared to image files, but it also eliminates the HTTP requests needed to fetch the images.
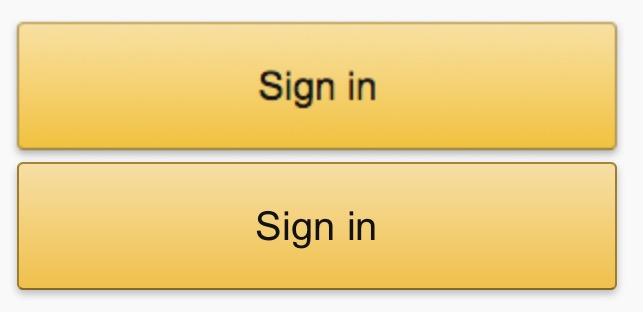
Take these two buttons, for example:

The first button above is an image, while the second was created using pure HTML and CSS. The image file weighs in at 11.2KB and requires a separate connection and download. The CSS version requires just 500 bytes of CSS, and it can be included in our existing stylesheet.
Step 2: Choose the Appropriate Image Format
If we do need an image, then our next step is choosing the correct file format. The greatest reductions in file size can often be achieved just by selecting the correct file type for the image at hand. Each image format has strengths and weaknesses that make it ideal for certain uses and a poor choice for others.
Vector versus raster
There are two fundamental categories of image file formats:
- Vector formats represent an image by defining its underlying shapes using mathematical points, paths, and polygons.
- Raster formats represent an image by defining individual pixel values on a rectangular grid.
Vector formats are ideal for defining images made up of simple, geometric shapes like logos, icons, and diagrams. Because vector images are defined mathematically, they offer the advantage of being resolution- and size-independent. They can be displayed at any size or resolution with no loss in sharpness.
Raster images are ideal for representing complex content with a large number of underlying colors and shapes, such as real-life photographs. Raster images can’t be enlarged without losing sharpness.
Common image formats
Now, let’s take a closer look at the most commonly used image formats and when they should be used:
SVG
SVG, short for Scalable Vector Graphics, is a vector-based image format that uses XML to define images.
The vector-based nature of SVGs allows images to maintain their sharpness at any display dimension and resolution. For geometric images, such as logos and icons, SVGs can also lead to dramatically smaller file sizes compared to JPEG, PNG, and GIF. The simpler the underlying shapes represented in the image, the smaller the file size.
SVGs also offer a number of unique advantages over other file formats: SVGs can be embedded directly into HTML or CSS, thereby eliminating the need for an HTTP request to fetch the image. Additionally, CSS can be used to style SVGs, which can eliminate the need to create duplicate images in different colors.
Advantages:
- Resolution- and size-independent
- Dramatically smaller file sizes for certain images
- Embeddable directly into HTML and CSS
- Stylable with CSS
Disadvantages:
- Not supported on very old browsers
- Display bugs on Internet Explorer require CSS workarounds
Best used for: logos, icons, charts, graphs, diagrams
Examples:
JPEG
JPEG is an image format designed to compress photographic and photorealistic images. In its normal usage, JPEG is a lossy format, meaning the compression causes some loss of image fidelity.
Most image editing software allows the user to adjust the level of compression. More aggressive compression creates smaller file sizes but also leads to noticeably lower quality images.
Advantages:
- Adjustable levels of compression and resulting image quality
- Excels at displaying photographic/photorealistic images
Disadvantages:
- Lossy compression can lead to noticeable decreases in image quality
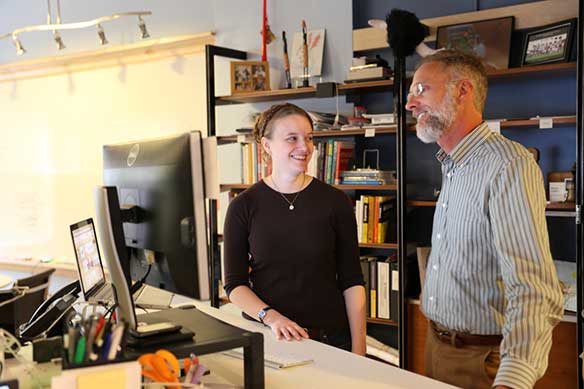
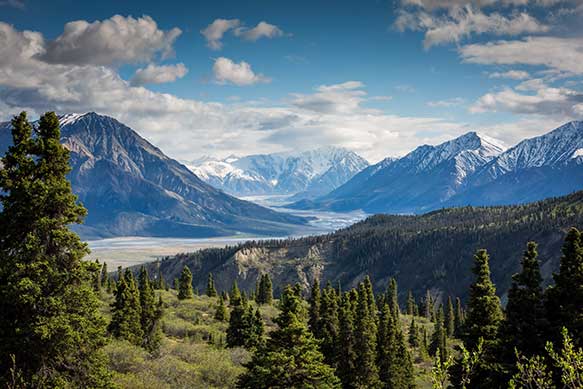
Best used for: real life photographs of people, places and objects
Examples:
PNG
PNG, short for Portable Network Graphics, is a lossless format created to improve upon the GIF (Graphics Interface Format).
PNG is a flexible format that allows for pallette-based images, grayscale, and full-color images. In contrast to other raster formats like JPEG, PNGs allow for transparency. Unlike their predecessor GIF (discussed below), PNGs don’t allow for animation.
Advantages:
- Lossless quality (no compression artifacts)
- Supports transparency
Disadvantages:
- Large file sizes due to lossless compression
- No animation
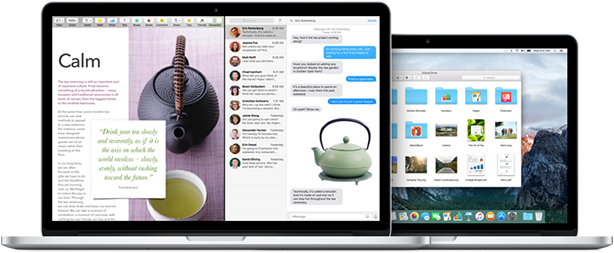
Best used for: when transparency is needed, when lossless quality is needed
Examples:
GIF
GIF, short for Graphics Interchange Format, is a bitmap image format that has been in use since the early days of the web.
GIFs use a limited color palette of up to 256 colors and support both animation and transparency. GIFs are best used for simple graphics with limited colors, such as logos, icons and charts. However, with the rise in support of the SVG format, GIFs are no longer the ideal choice for this type of image.
Advantages:
- Animation
- Transparency
- Ability to compress file sizes by limiting color palette
Disadvantages:
- Limited palette of 256 colors
- Larger, complex images lead to bloated file sizes
Best used for: cat animations
Examples:


Stay Tuned…
By now, you should have a good idea of situations where images can be replaced with CSS or custom fonts, as well as which image format is best suited to your content.
Stay tuned for Part 2 of my Website Image Optimization series, where I’ll discuss how to properly scale your images and compression tools and techniques.
Bomb