
As developers, we tend to put a lot of thought into the tools we use. Where and how we write code tends to get a lot of focus, as that’s where most of the work gets done. But when working with other developers, I notice they don’t pay attention to the one tool we probably end up using the most: a web browser.
That’s not to say people outright ignore ways to use their browsers better. People use plenty of handy shortcuts, extensions, and settings to navigate pages and find information. But I see plenty of people neglecting browser organization. From dozens of open tabs to leaving windows open all night for fear of losing where you are, there’s room for improvement. Here, I’ll share a few tips for how I stay organized while using my personal browser of choice, Google Chrome.
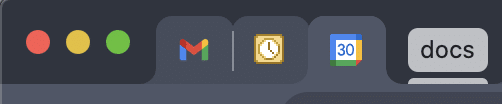
Pinned and Grouped Tabs
It’s easy to accidentally end up with dozens of open tabs. To solve this problem, I’ve taken advantage of two features. The first is pinned tabs, and the second is a newer feature for grouped tabs.
I use pinned tabs to keep my most frequently visited pages available but slightly hidden at all times. Pinning makes tabs smaller and makes them hang to the left edge of the browser. That way, you can always find them, but they don’t take up the same space as normal tabs. Just right-click and select “Pin” to do it.
Grouped tabs are a handy new feature I’ve just gotten used to using. By selecting one or multiple tabs (using shift + click), you can right-click the tabs to see an option for “Add Tab to New Group.” You can name and color code the group, and then you’ll see it among your other tabs.
It’s especially handy after changing to a tab that isn’t in the group. The group collapses, leaving you just the label to remind you the group is there. I’ve found this particularly useful when finding documentation, and I want to have lots of similar pages open without crowding out my other open tabs.
Bookmarks, Bookmark Folders, and the Reading List
Bookmarks feel like an obvious tip here. You add a bookmark so you can use it to more easily find pages later. Simple! However, there’s still some strategy here. First, use the bookmarks bar. It may not be on by default, but you can turn it on in the settings page.
This is where I keep all the links I use every day or almost every day. Email, internal company links, weather, and so on fit here for me. They are more accessible in the bar than buried in a folder that requires a few more clicks to find.
Second, take advantage of bookmark folders. This seems counterintuitive to what I just said about avoiding digging for links in another folder. But these come in handy, especially as a consultant. In particular, I use folders for project-specific links. I’m generally on a project for a few months at a time, and during that time there are usually links I need to use more frequently.
So I use bookmark folders for individual projects to isolate them from bookmarks I use for other purposes. Especially handy is having my current project’s folder in the bookmarks bar for easy access. After a project wraps up, I throw the folder back into Other Bookmarks. Then, if I need to come back to a project later, it’s easy for me to find all the links in a nicely labeled folder.
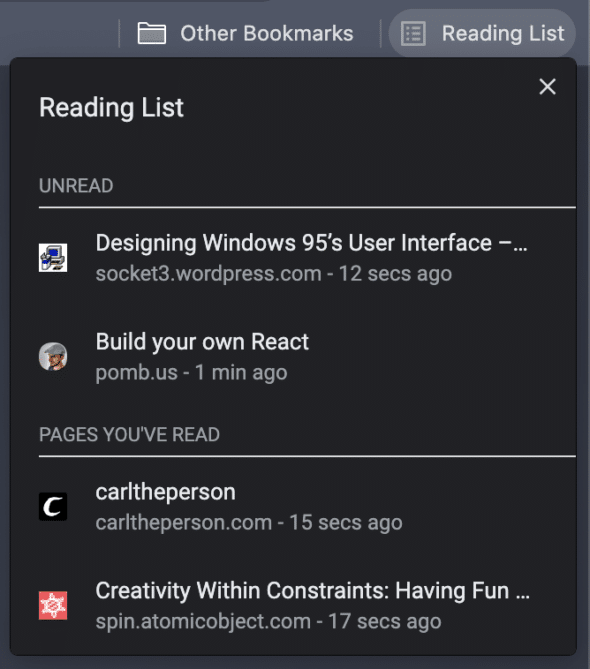
Third, consider using the handy new feature called the Reading List. I used to find articles I’d want to read, start them, then get pulled away, leaving the article in an open tab. Now with the Reading List, I can save it for later through the bookmarking button to a separate list from other bookmarks. This keeps my open tabs more focused. It helps me worry less about closing a blog post I want to read and wondering if I’ll ever remember where to find it again.
On Startup Settings
One final problem was opening up the same tabs every day and leaving them open. I’d then repeat the process each day unless I left my tabs open all night. It’s a small inconvenience, but it adds up each day.
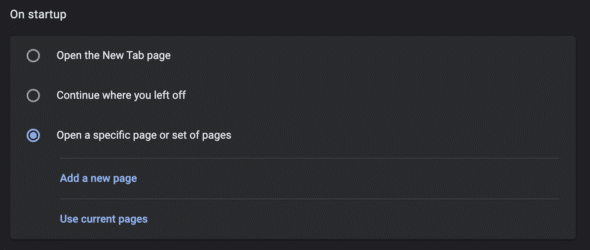
Fortunately, there’s a handy setting to help you control this. There’s an “On Startup” section in Chrome’s settings, where you can pick from three options. One, the default, is to open a new tab when you open Chrome the first time. This is what I’d try to avoid by leaving things open all night.
Second, though, is a handy option to continue where you left off. You can be assured that when you open Chrome back up in the morning, all your tabs will be open, from your email to the thirty-first StackOverflow answer about that bug you’re trying to fix.
The third option is for those who want a fresh start each day without worrying about opening the same tabs you do each day. When you pick this third option, you can set some pages (manually or based on what you have open already) so that you always get those pages when opening Chrome for the first time.
Taking advantage of all of these small tips vastly improves my web browsing experience, not just in the day-to-day, but long term as I move from project to project. These are just a small subset of the options you can use to make your own browsing experience that much easier.