
Over the last couple of years, I’ve developed a simple workflow to run builds, tests, and other operations during development that allows me to easily and efficiently examine results. Rather than struggling to find the output in a wall of text in a terminal with limited keyboard support, I simply log each build and test run to a file. Adding a timestamp to each line helps me to avoid stale data.
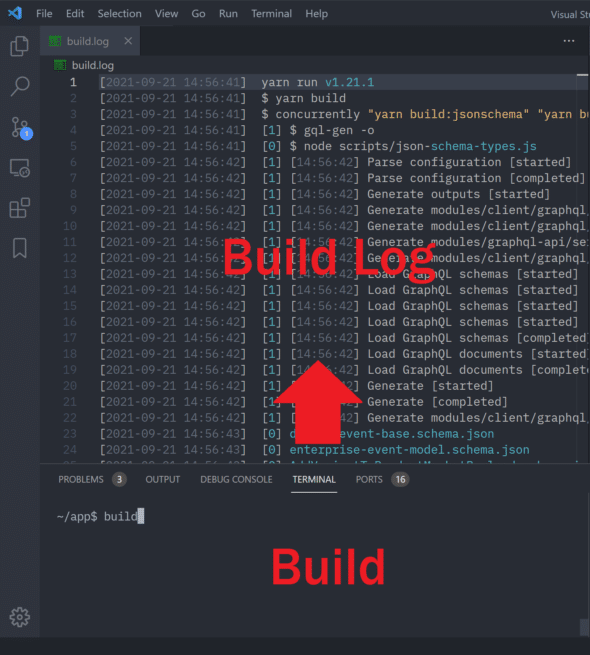
Build
I simply open a terminal and run build, which is an executable script in my path. I keep a tab open for the build.log and can see the timestamped output appear in the editor tab as the build progresses.
Here’s my build script:
#!/usr/bin/env bash

yarn build $* 2>&1                        |  # Run build with params and redirect stderr to stdout
  ts "[%Y-%m-%d %H:%M:%S] "               |  # Prefix each line with a timestamp
  stdbuf -o0 sed -E "s/.\[[0-9]{0,2}m//g" |  # Flush buffer for each line and remove ANSI color codes
  tee ~/app/build.log                        # Log to file and write to console
In this example, I’m using a node build environment. You can easily adjust to your needs.
Run
I also run my apps the same way as with the build script. This is especially nice since the timestamps can help me to focus on the right timeline since many errors/debug output can appear over time.
Here’s my dev script:
#!/usr/bin/env bash

yarn dev $* 2>&1                          |  # Run dev server with params and redirect stderr to stdout
  ts "[%Y-%m-%d %H:%M:%S] "               |  # Prefix each line with a timestamp
  stdbuf -o0 sed -E "s/.\[[0-9]{0,2}m//g" |  # Flush buffer for each line and remove ANSI color codes
  tee ~/app/dev.log                          # Log to file and write to console
Test
For running tests, it gets a bit more interesting. I have two modes — one for running all the test modules in the suite and one for running a single module (file).
We can run all tests by running rt (run test):
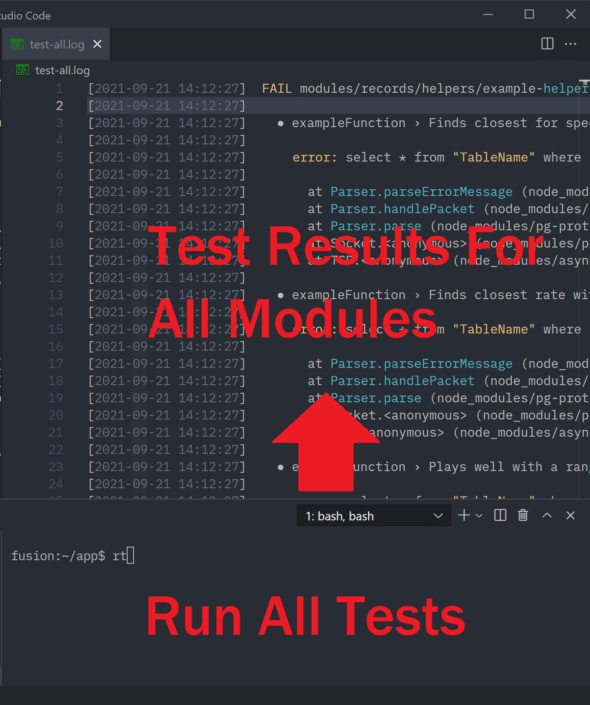
When running all tests, I output to a log file called tests-all.log. I name it specifically so I don’t overwrite this file when running a single test module as I am narrowing down the test failures.
Here’s my rt script:
#!/usr/bin/env bash

# Environment variables
NODE_ENV=test
CLEANUP=0

if [[ -z "$1" ]]; then
  # No parameters specified: run all tests

  yarn jest 2>&1                            |  # Run test and redirect stderr to stdout
    ts "[%Y-%m-%d %H:%M:%S] "               |  # Prefix each line with a timestamp
    stdbuf -o0 sed -E "s/.\[[0-9]{0,2}m//g" |  # Flush buffer for each line and remove ANSI color codes
    tee ~/app/test-all.log                     # Log to file and write to console

else
  # Test file specified: run single file

  # Environment variables enable more test verbosity
  # when running a single test file:
  LOG_LEVEL=debug
  DEBUG=knex:query,knex:bindings

  jest $* 2>&1                              |   # Run test and redirect stderr to stdout
    ts "[%Y-%m-%d %H:%M:%S] "               |   # Prefix each line with a timestamp
    stdbuf -o0 sed -E "s/.\[[0-9]{0,2}m//g" |   # Flush buffer for each line and remove ANSI color codes
    tee ~/app/test.log                          # Log to file and write to console
fi
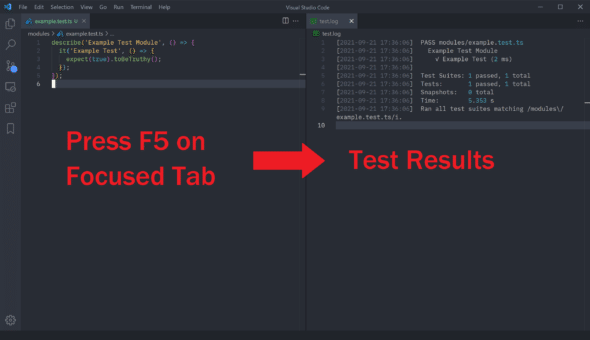
We can run a single test module (file) very easily by binding a key to tell VSCode to execute the script for the currently-selected tab. This outputs to another file (test.log) to avoid overwriting the full test run log.
Just add a task to tasks.json like the following:
{
  "version": "2.0.0",
  "tasks": [
    {
      "label": "Run Test",
      "type": "shell",
      "command": "cd ~/app && rt ${relativeFile}",
      "problemMatcher": [],
      "group": {
        "kind": "test",
        "isDefault": true
      },
      "presentation": {
        "echo": true,
        "reveal": "never",
        "focus": false,
        "panel": "shared",
        "showReuseMessage": true,
        "clear": false
      }
    }
  ]
}
The ${relativeFile} gets replaced with the relative path to the file/tab you currently have selected.
Then to run the script easily, you can find a key (like F5) to kick off the task automatically:
Just add a task to keybindings.json like the following:
{
  "key": "f5",
  "command": "workbench.action.tasks.test"
}
This is great because you don’t even have to have your terminal open to kick off a test of a single module. I just keep my test file on the left and the output log on the right.
I currently use VSCode for development, but this can apply to other environments as well.