
In Visual Studio Code, I used plantUML to describe a database schema for my most recent project. I was able to define the proposed schema in text and then have the tool generate the visual representation of the diagram. I could then check these text files into the codebase to have database diagrams available in the project.
Getting Started
First, install plantUML extension in VS Code.

Then, create a new file in the project that you’ll use to hold the text-based format of the diagram.
In that file add `@startuml` and `@enduml`. These are necessary for the tool to render the content.
You can then click option + D to open the preview pane to view the diagram. There is no content yet so nothing should show up.
For database tables, I used the object type.
Creating Objects
If you want to add rows to the diagram you can add:
@startuml

object Responses {
Id
UserID
Question
}


object Question {
Id
Description
}
@enduml

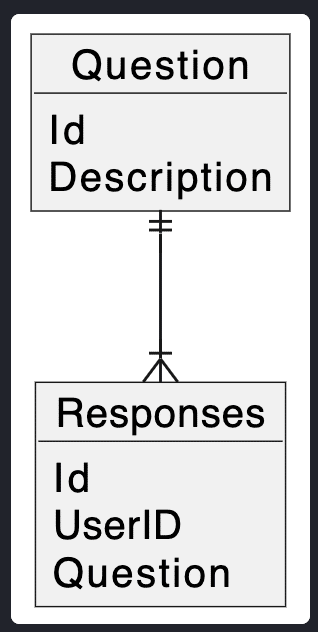
Linking objects:
Finally, to show connections between tables, like when we may want to use foreign key linking, you can use entity-relationship diagraming in plantUML.
@startuml

object Responses {
Id
UserID
Question
}


object Question {
Id
Description
}
Question ||--|{ Responses

@enduml
Creating UML Database Diagrams in VS Code
Although the thought of creating a UML diagram may sound formal and intimidating, it doesn’t have to be when you use plantUML. I was able to commit the plant file to my project and have the UML diagram act as documentation right alongside the code. This might be a good activity to do early during a project when deciding on a database schema. Or, use it in a well-established project to help document what has grown organically over time.