
I recently started working on a project using Clojure. Since it’s my first experience with the language, I decided to invest a bit a of time setting up Sublime Text so that my editor would be tuned to conquer the oh-so-many parens and the build-and-test workflow provided via Leiningen. I wanted to capture and share this setup to help others get off the ground more quickly, since it took a bit of hunting for plugins and fiddling with Sublime.
Basic Setup
My setup is based on Sublime Text 3, though the general ideas and plugins should work for Sublime Text 2, as well. Though Sublime Text 3 is still technically still in beta, it is very stable, and most users have migrated to it. I would recommend making the jump, since ST3 has some nice new features built in, like navigation to definitions of functions and variables.
One special tweak is needed for selecting identifiers in Clojure, since unlike many languages, it allows identifiers to contain the hyphen (-) character. In order to fix this, you can do the following:
- Open any Clojure source file (for example, foo.clj)
- Goto: “Sublime Text->Preferences->Settings – More->Syntax Specific – User”
- Paste the following into the Clojure.sublime-settings, and save the changes:
    {
        "word_separators": "./\\()\"':,.;<>~!@#$%^&*|+=[]{}`~?"
    }
Tackling Those Pesky Parens and Brackets
In LISPy languages, parentheses must wrap any statement/context, and the necessary nesting leads to streams of closing parens that can cause much frustration. Sublime’s built-in support for identifying the matching paren or bracket is actually fairly decent, but the way Sublime highlights the bracket isn’t quite obvious enough to the eye at times.
After searching through plugins supplied via the invaluable Package Control plugin, I found BracketHighlighter does the trick and even supports multi-cursors, as well. It makes the matching bracket underscore much more prevalent and also shows an image of the actual bracket type being matched in the gutter where the line numbers show up.
Bringing the Rainbow Magic
While this plugin is great, using rainbow bracket plugins to help visualize the nesting has become a popular option, as well. It took me a while to track it down, but I finally found the Rainbowth package–though it did take a bit of head scratching to get it to work properly. Rainbowth does its bracket magic by by actually modifying your color scheme file due to limitations in the plugin API in Sublime. The dilemma here, though, is that the color schemes are not easily edited by a plugin, since they are stored in ZIP archives in the Sublime Text installation folder.
In order to get the plugin to work with a given color scheme after installing it, you need to extract the desired color scheme into your user Packages folder so it can be edited by Rainbowth. For example, In OSX, you would do the following:
- In a terminal, go into the Sublime Text app bundle: > cd /Applications/Sublime\ Text.app/
- Make a copy of the color scheme archive file to get the color scheme out of it: > cp Contents/MacOS/Packages/Color\ Scheme\ -\ Default.sublime-package ~/
- Extract the scheme into a temporary location: > cd ~/; mkdir tmp; cd tmp; unzip ../Color\ Scheme\ -\ Default.sublime-package
- Copy the desired scheme into your user Packages folder (e.g Monokai): > cp Monokai\ Bright.tmTheme ~/Library/Application\ Support/Sublime\ Text\ 3/Packages/
You should then be ready to roll with Rainbowth. I did discover a rendering bug that causes the colorized brackets to slice a sliver off of the preceding character, which is a bit annoying. Hopefully, this will be fixed at some point.
Rock the REPL
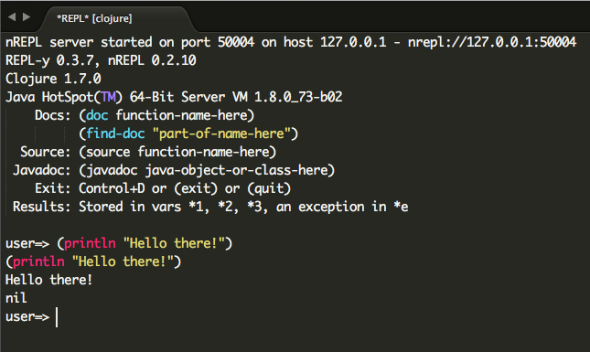
When developing in Clojure, the REPL is your main tool. It’s how tests are run and also auto-run upon source files changing. Using a separate terminal window is definitely a viable solution, but switching between windows may be a bit annoying for some.
Though it isn’t perfect, SublimeREPL lets you actually open the Leinengen REPL right in a Sublime window! There are a couple of quirks, but it’s definitely worth trying it out.
Hope that works for you!
Another nice plugin is Parinfer:
https://github.com/shaunlebron/parinfer
I had not run across that yet. Nice plugin! I was hoping this would spark some more goodness to add.
Thanks,
Greg
Very helpful article
Slight correction to step 3 of Rainbowth to access the file in ~/
cd ~/; mkdir tmp; cd /tmp; unzip ../Color\ Scheme\ -\ Default.sublime-package
Mike,
Glad you found the article useful. Thanks for the catch! I have made the correction.
Thanks,
Greg
Thanks for your article! I had a lot of trouble getting Rainbowth to work with the popular Cobalt2 theme. After much trial and error I got it to work by:
– instead of extracting the “Color Scheme – Default.sublime-package”, find and extract the “Theme – Cobalt2.sublime-package” which (in ST3) should be under “~/Library/Application Support/Sublime Text 3/Installed\ Packages” and not “~/Library/Application Support/Sublime Text 3/Packages”
– find the “cobalt2.tmTheme” in the extracted files
– create a subfolder called “Theme – Cobalt2” under “~/Library/Application Support/Sublime Text 3/Packages” and copy cobalt2.tmTheme there
Tommi,
My instructions are specific to the Mac OSX installation. I am guessing that your instructions are from a Windows installation? I just double-checked the location of the bundled package files, and the location I noted is where they are indeed located for OSX. Can you clarify your platform?
Thanks,
Greg
Thanks for the step-by-step on Rainbowth. Very helpful.
Thanks Greg really helpful guide!
Andrew,
Glad it is helpful! I know I had trouble tracking these things down, and glad to hear I can help bridge the gap.
Thank you so much for the installation guide. I downloaded it through Package Control but the instructions of the readme really weren’t clear on what they meant by “unpacking the color scheme”. This should make my Scheme assignment just teeny bit more bearable