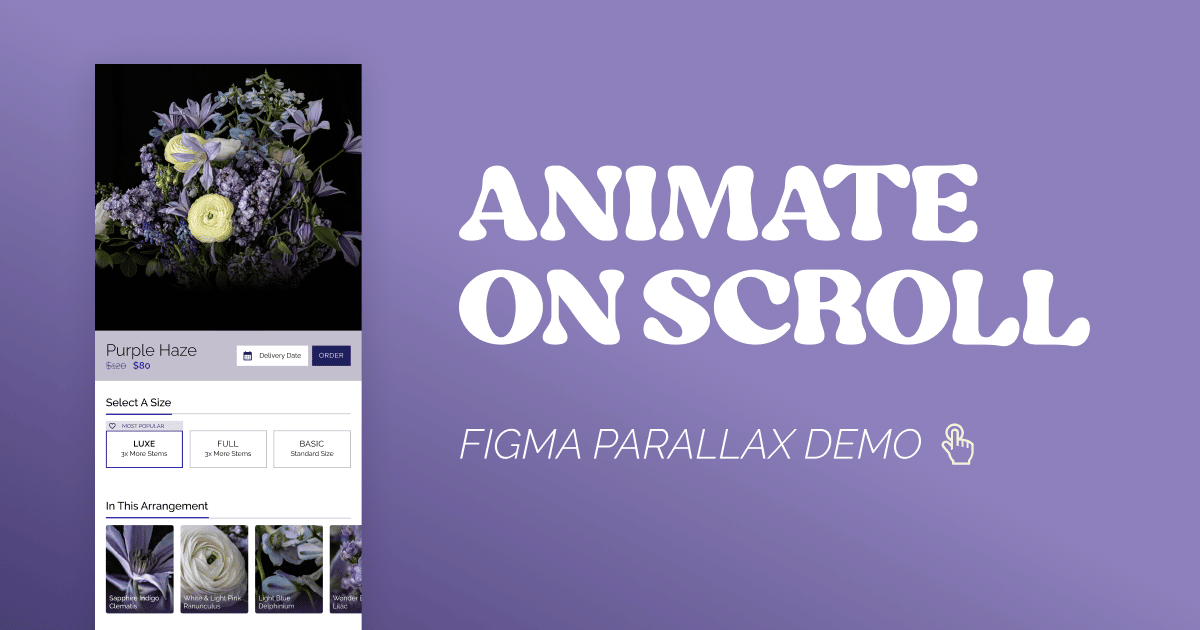
Welcome back to the Animate On Scroll in Figma tutorial series! In the first part, we covered the basics of scroll effects and learned how to create an animated sticky-navigation (on scroll) in Figma. Today we will be creating something a bit more advanced: a parallax effect that animates on scroll. Download the demo file from Figma Community and follow along.
Parallax Effect & Scrolling
Parallax scrolling can add depth and dimension to designs by making background elements move at a slower pace than foreground elements, creating an illusion of distance and perspective.
While parallax scrolling was once a popular trend in web design, it quickly became overused. If used in excess, it can detract from the overall user experience. However, when used with moderation and intention, adding a touch of animation and interactivity can bring an extra layer of engagement to your designs and help guide the user’s focus.
In this tutorial, I’ll show you how to create two sections that utilize parallax animation for a product page in an online floral boutique:
- A product image header with a simple animation.
- A profile section further down the page where we will experiment with animating multiple layers.
Similar to Part 1 in this series, these effects will leverage Figma’s smart animations to transition between multiple artboards, easing from one state into the next.
Let’s go build some components!
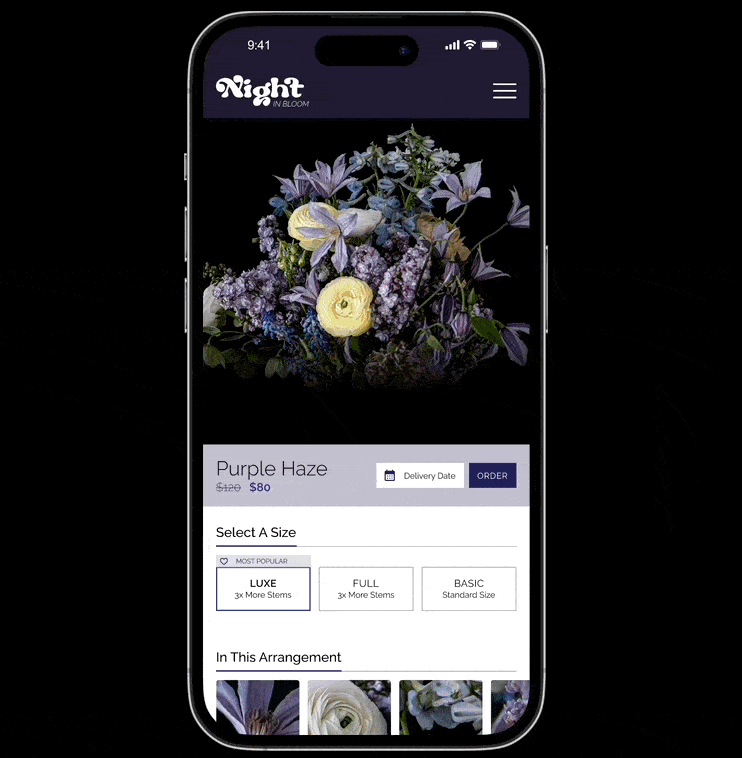
Step 1: Parallax-Header
- In your Figma file, start by importing an image to use for your product photo (or use the example provided).
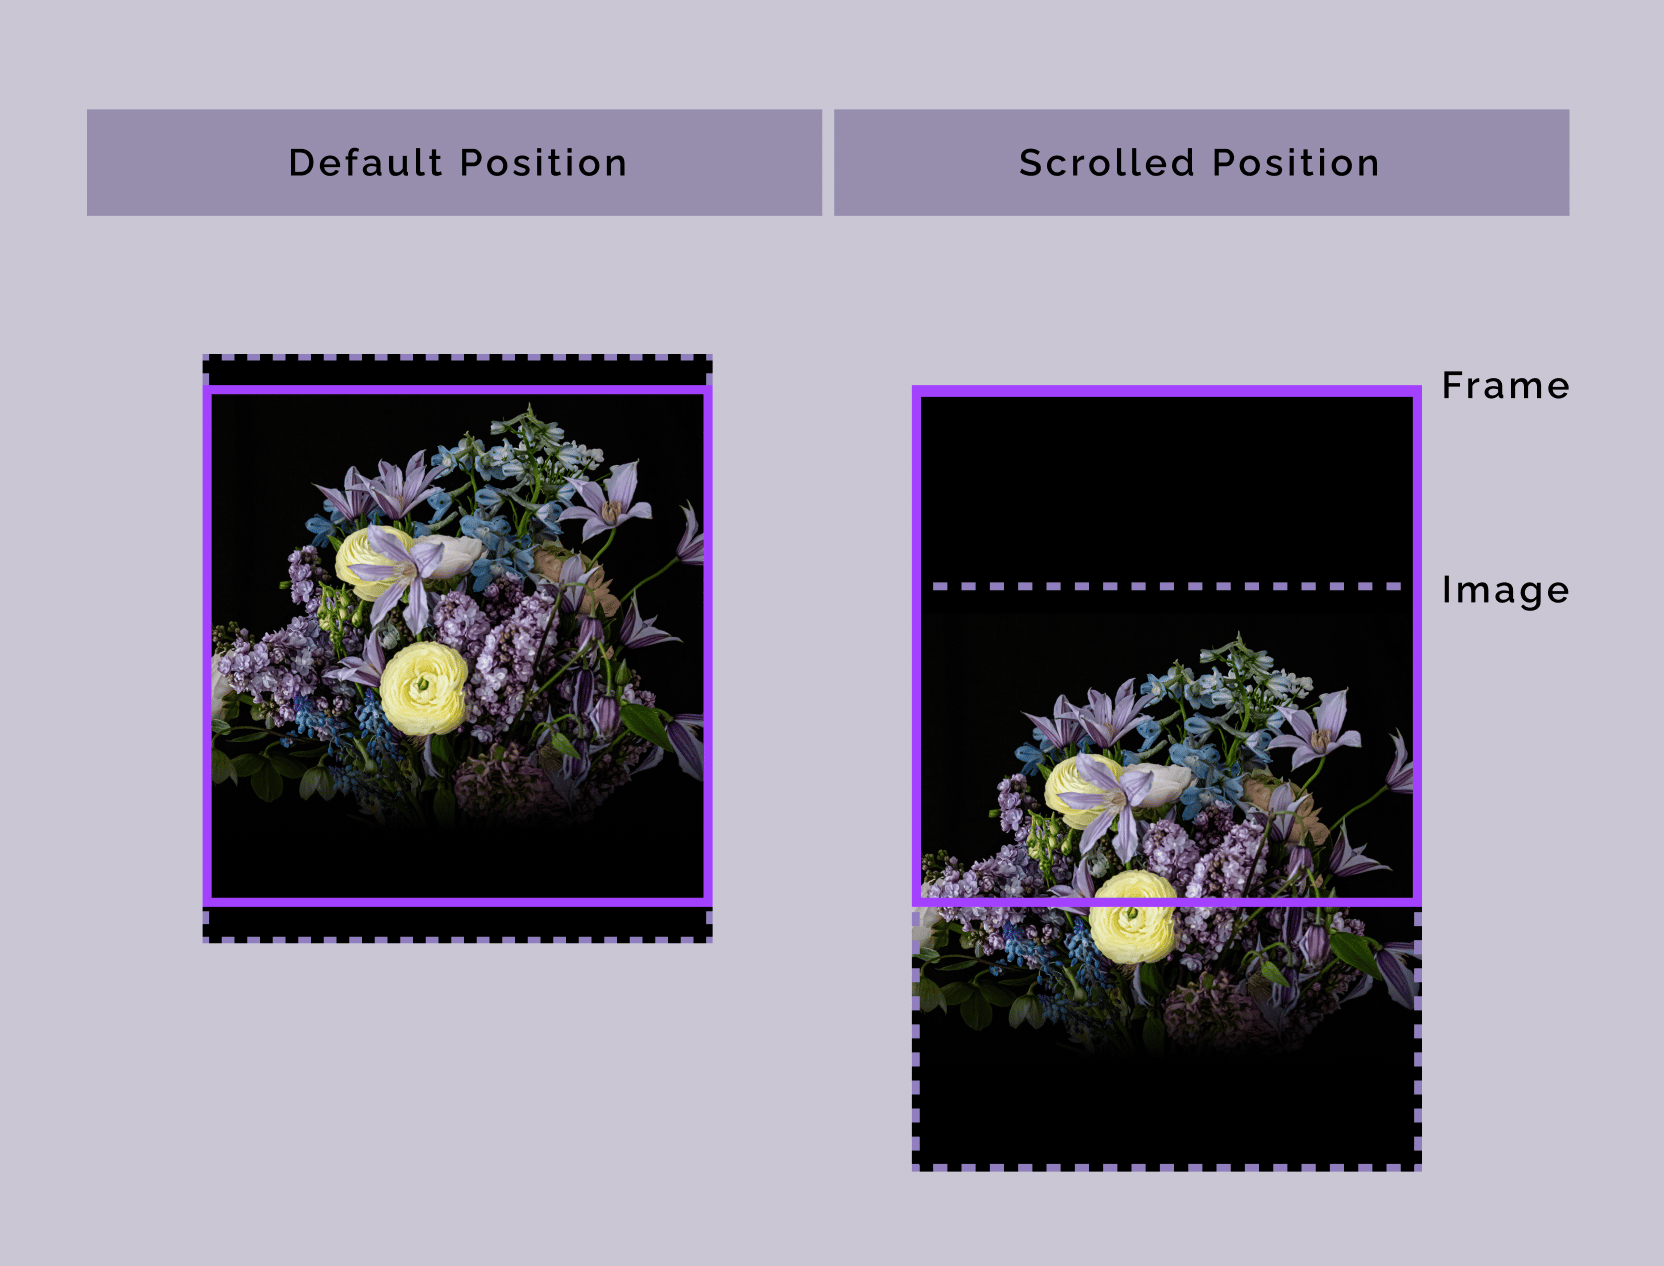
- Next, create a square frame the same width as your prototype screen. For this tutorial, I’m prototyping on an iPhone 14 Pro, and I created a 393 x 393-pixel square frame. I set the background color of my frame to black, to match my product photo.
- Convert the empty frame to a component and name it “Parallax-Header” and add a variant. Name the variant property “Img Position,” and set the variant options to “Default” and “Scrolled.” Now you have two states for your header image that we can animate between.
- Now all you need to do is add the product image inside your component frames. In the “Default” variant, center your image as you would like it to appear initially on the page. In the “Scrolled” variant, move your image down, so it is halfway out of the frame. (See image below.)
Later on when we animate from “Default” to “Scrolled,” the header image will appear to move down slightly, as content moves up while scrolling.
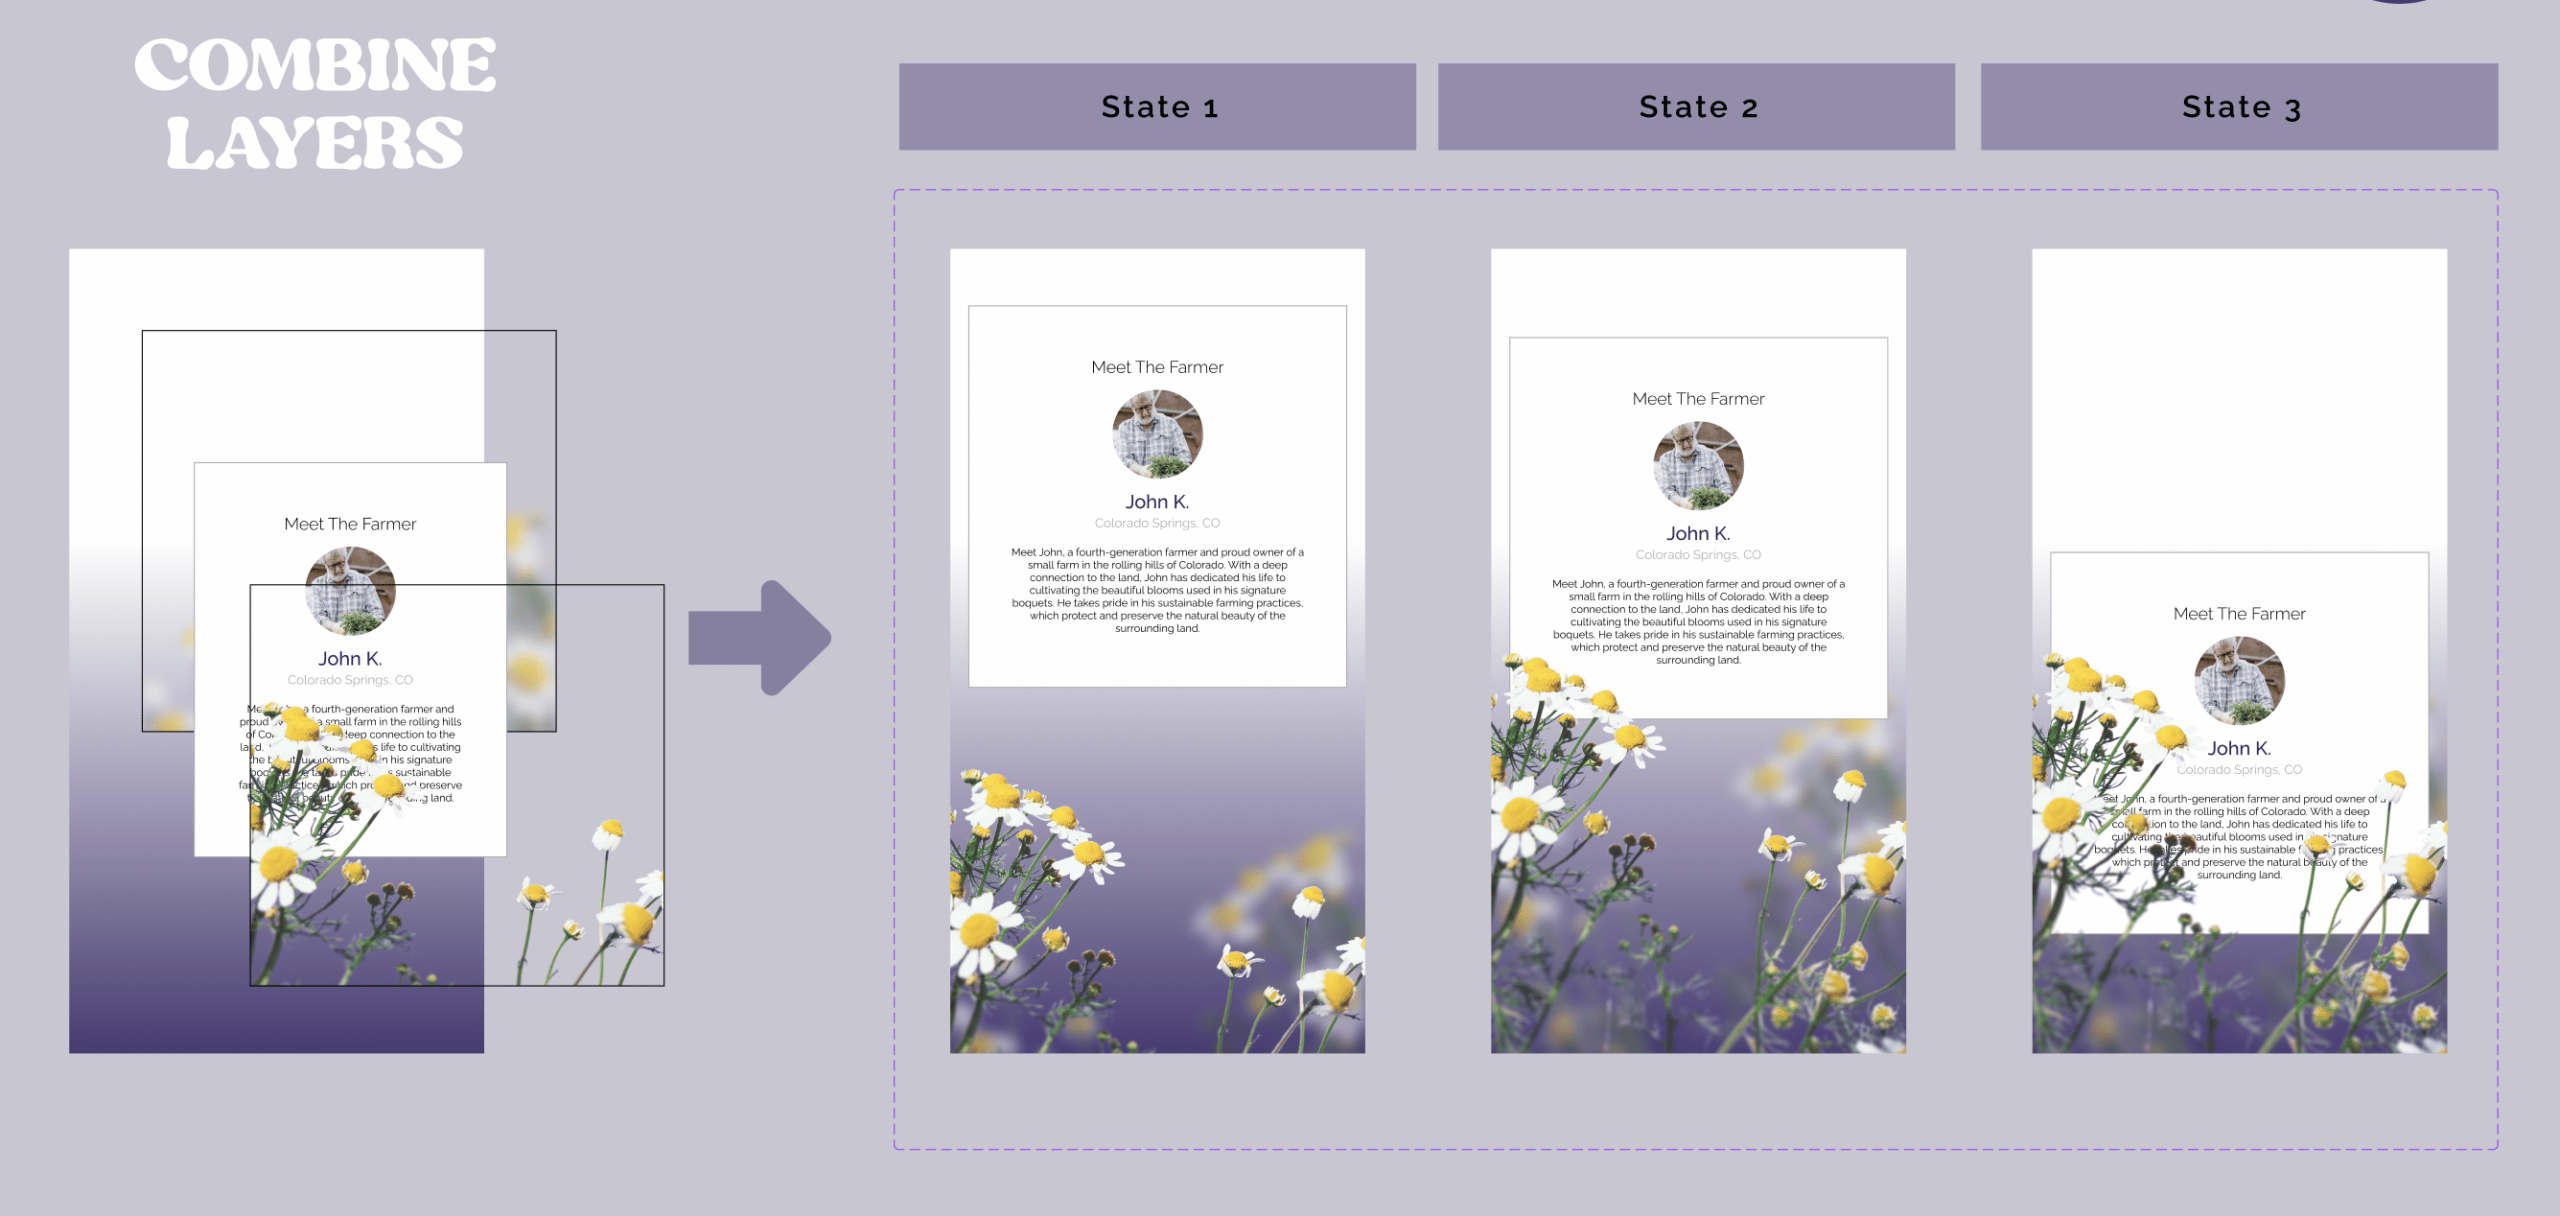
Step 2: Parallax Layers
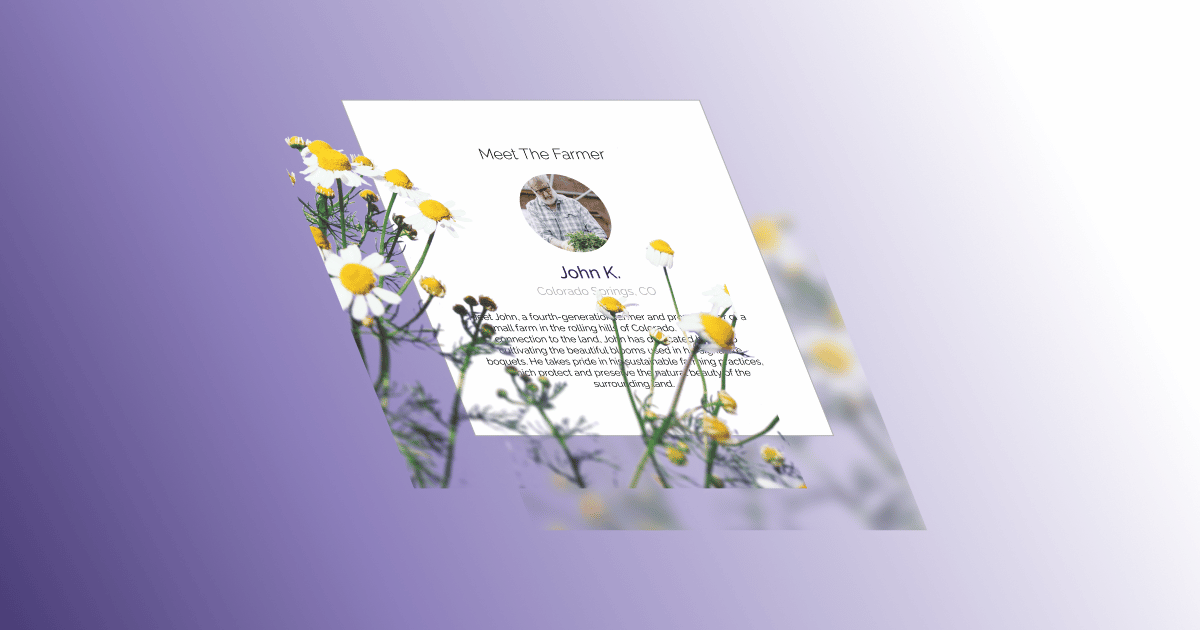
For the second parallax effect, we need two transparent PNGs. In the Figma file, I’m using two images of flowers with transparent backgrounds that I’ll layer above and below another page element.
- In your Figma file, start by importing your own transparent images or use the example already included in the Demo File.
- Again, create a square frame the same width as your prototype screen. Convert the empty frame to a component and name it “Parallax-Layers.” This time add three additional variants.
- Set two variant properties on your component: Img Position (Default or Scrolled) and Layer (Front or Back). You should end up with the following 4 variants:
- Front/Default: The image that will appear above our page element.
- Front/Scrolled
- Back Default: The image that will appear below our page element.
- Back/ Scrolled
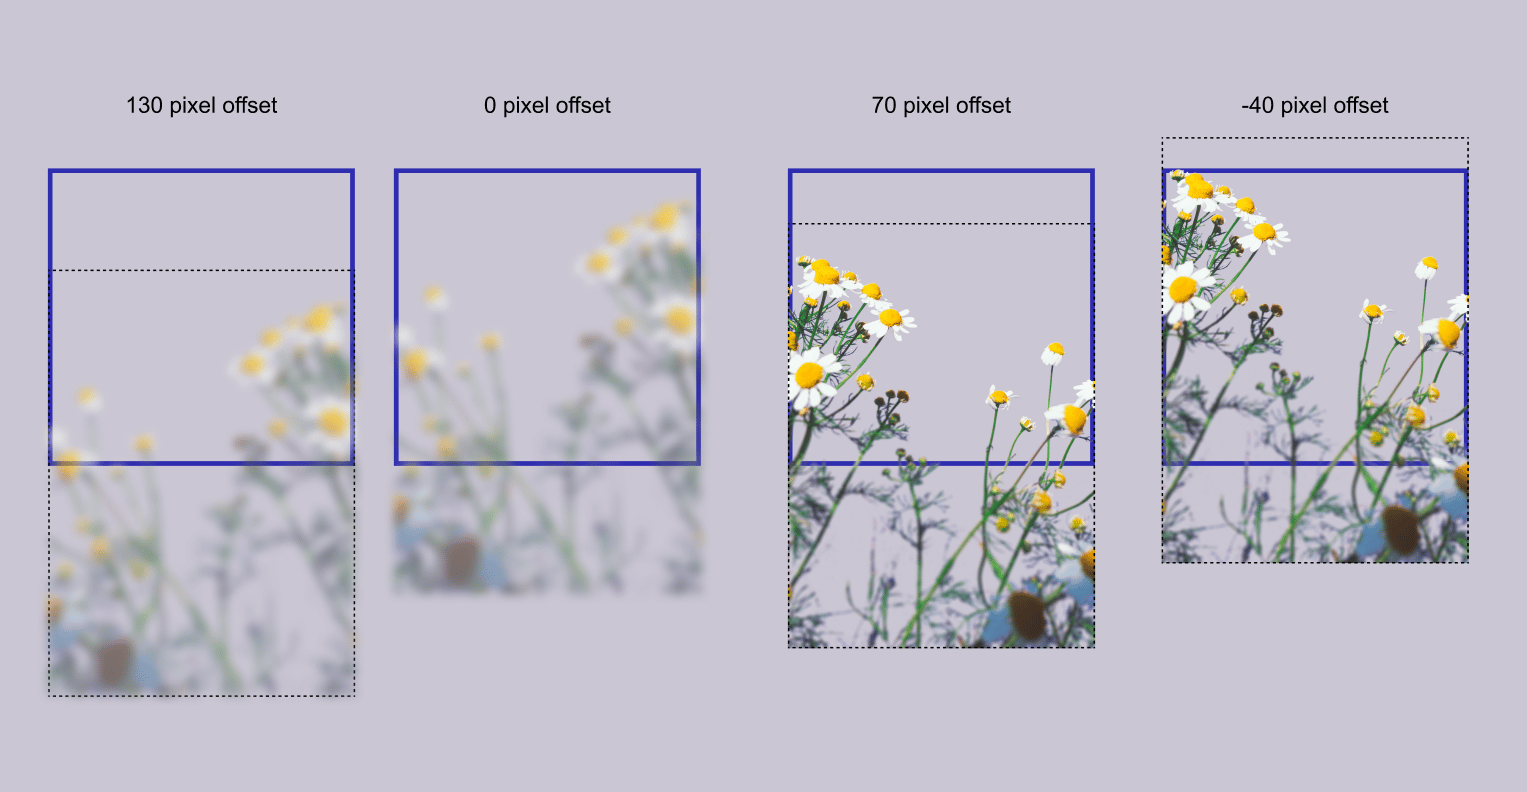
- Now, add your images to each variant as we did in the first component. We want to give the illusion of depth by animating the layers at different speeds. To do this, we set the difference between point A, and Point B so that it varies between the front and back sets of images. (See the example offsets noted in the Demo File.)
Step 3: Parallax Sandwich
To complete the parallax layered effect, we need to create one last component, a Parallax Sandwich!
- Create a frame the same width as your device and about twice the height of your image.
- Convert the empty frame to a component and name it “Parallax-Sandwich.” Throw a gradient background on it, and then create two additional variants. Label the property “Animation” and set the variants to “State 1,” “State 2,” and “State 3.”
- Now, add your image layers to each frame, along with the Farmer Profile component, sandwiching it in between.
We will transition between these three variants using Figmas smart animation. Add motion by changing the position of the images in the frame and “tweening” between two states.
Prototyping Steps
Now that all of our components are configured, it’s time to see them in action inside a prototype!
- To set up a prototype, we must add our components to a page layout. (I also turned the Page Layout into a component to make updating easier in the future, but you can skip this step if you want.)
- Then, just as inside our components, we set up frames for each state we want to animate. Add an instance of the page layout inside of each one, and position it.
- Frame 1: Page-Contents are aligned-top to the frame.
- Frame 2: Page-Contents have been moved up so Parallax-Header is just out of view. Parallax-Header Img-Position is set to Scrolled.
- Frame 3: The top of Parallax-Sandwich is Visible.
- Frame 4: The full Parallax-Sandwich component is in view and Animation is set to State 2.
- Frame 5: Parallax-Sandwich has been moved up, just out of view, and Animation is set to State 3.
- Frame 6: Page-Contents are aligned-bottom with the frame.
- Frame 7: An optional frame for looping back to the top.
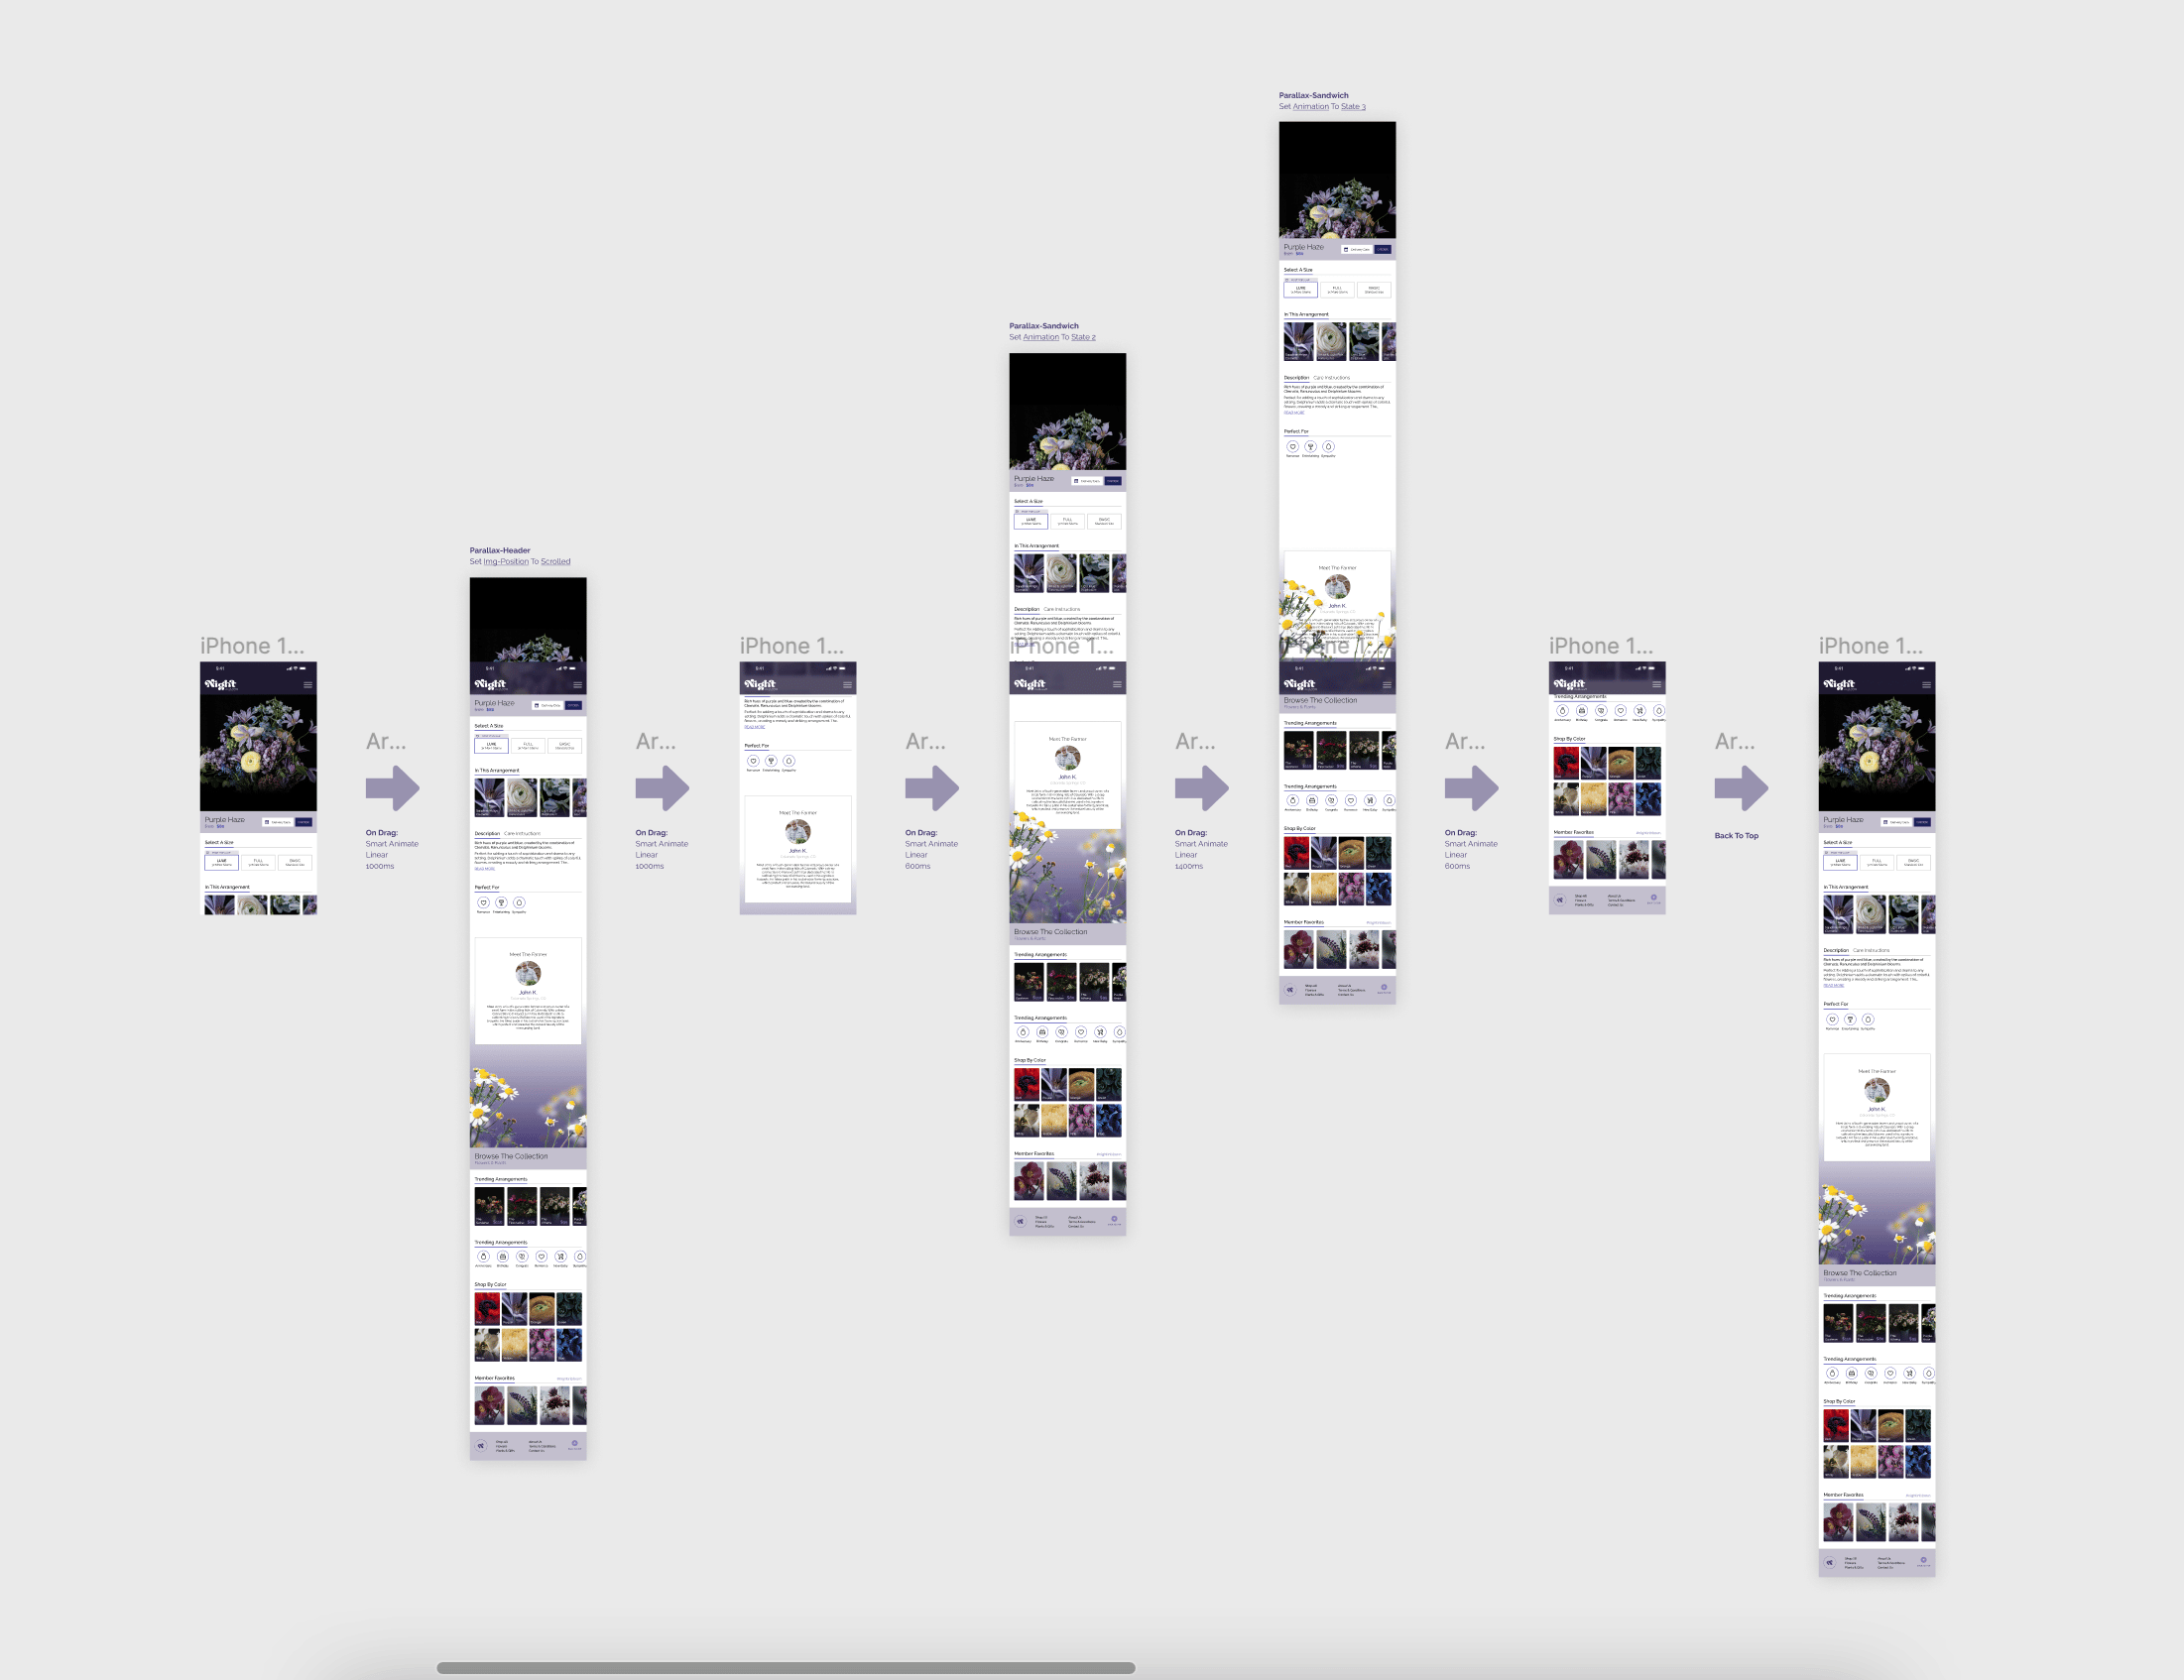
- Reposition the page layout on each screen. This part is a little hard to explain, so you may need to dissect the Demo File for this part. Essentially we should end up with a frame for the header of the app layout, the footer of the app layout, and each additional animation state we want to show. The idea here is that, rather than setting our page to scroll, we will manually set our page position in each frame and smart animate between them. This will give the illusion of scrolling while animating some subtle parallax effects.
- Now the magic… Change component variants on screens we are adding animation to. Link up the screens using Figma’s smart animate “on-drag” to simulate animations triggering upon scroll. And we’re done!
Previewing Your Prototype
If needed, you can modify your interaction settings and timing to make the transition of your screens a little smoother.
Stay tuned for part 3 of this series if you want to learn how to stick and unstick elements on scroll.