Recently, the team behind the Arc browser announced Boosts 2.0, a new and improved way to “Paint the Internet” and make websites your own. While the feature makes it easier to customize websites with Arc, I found that limiting users to color and font changes with no full flexibility still makes it rather limiting.
Arc also supports custom CSS and JavaScript to insert custom functionality and theming into a website. However, if you’re a beginner, this can be overwhelming. I’ll walk through how to use the Code feature of Arc to do a bit more using some simple CSS. We’ll go over changing the background and text color, and where you can go to figure out how to do more.
Assuming you already have the Arc browser installed, I’d recommend opening up this page alongside this article. That way you can follow along with exactly what I am doing. I’m using one of my previous posts as a playground for this tutorial.
Concept 1: Selecting something to edit
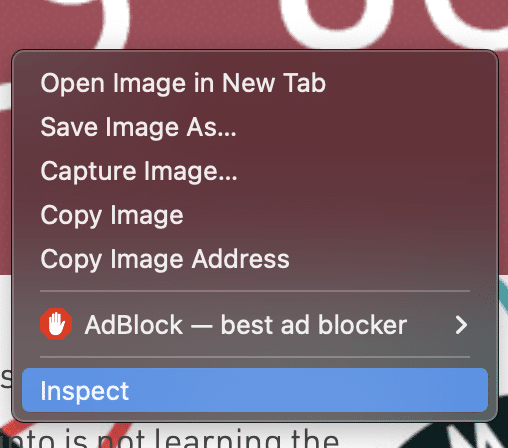
First, locate the element on the page we want to style. The quickest way is to right-click and select “Inspect” from the menu that pops up.

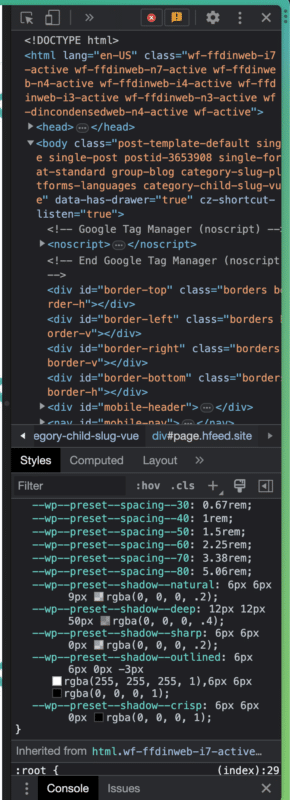
That should open a panel that looks like this:

This is where everything on a page gets generated. You can hover over any element to see where on the page it controls.
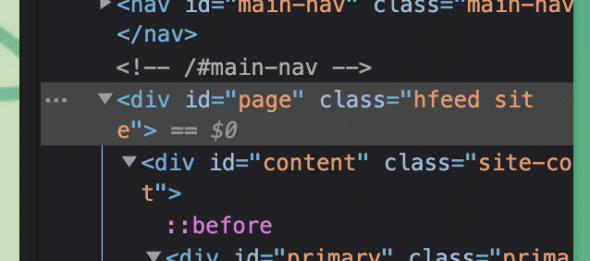
Once that’s visible, scroll down a bit and find the div element where the id equals “page.” It should look like this:

Great! we now have everything we need to start using CSS.
Concept 2: Simple colors
To start, let’s try some simple color changes inside of this div. Go ahead and open up the Boosts widget on the page. We’re going to want to navigate to the Code CSS button inside the widget. Once you’re there, you should have a blank editor, ready for us to write something.


Now it’s time to insert some colors. The code below will set our background color to teal and our text to pink. (This is just to show that it can be done. I am aware the colors I’ve chosen look atrocious.)
div[id="page"]{
  background: teal;
  color: hotpink;
}
After you’re done, your page should look something like this:

We can also set colors on multiple elements at the same time. Try the code below to set different colors on the page, article, and heading backgrounds.
div[id="page"]{
  background: teal;
  color: hotpink;
}

article {
  background: lightblue;
}

.entry-header {
  background: greenyellow !important;
}
Some quick tips:
- CSS styles you apply to things like headers, divs, or any other HTML element are written without a period before them, such as
article {} - CSS styles you apply to classes are written with a period, such as
.entry-header - If you’re applying CSS styles to something with a specific attribute, such as an id, use square brackets, such as
div[id="page"] - The
!importantdirective makes sure the property gets applied. You don’t always need it, but it’s good to have it as a tool here.
Concept 3: Gradients and Images
Creating gradients between colors and inserting images is just as simple. Inside the same initial div, let’s try the code below:
div[id="page"]{
  background-image: linear-gradient(45deg, red, pink, yellow, rgb(165, 255, 165));
}
Well isn’t that nice!
Now let’s say I want to insert an image instead. I’ve provided a link to an image of bread, but this will work with any image you can get a link to:
div[id="page"]{
  background-image: url("https://www.foodtribute.com/wp-content/uploads/2016/02/Different-types-of-bread.jpg");
  color: pink;
}
Recap & Further Resources
You’ve now learned how to harness basic CSS to expand what you can do with Arc Boosts 2.0. For more CSS rules, functions, and tips, you can take a look at this reference from W3Schools. You’ll learn more about what you can do with your newfound capability.
Happy painting!

