Article summary
When building a design system with Vue.js, one of the biggest problems I’ve run into is not learning the framework. Rather, the problem is clarity on how to do basic things. For example, recently I had to scour the internet for hours before I found an answer for testing a component that has nested subcomponents. However, I did manage to find that solution, and I will document it here.
The Component
To start, here is the component we will be testing today:
// TabView.vue
<template>
    <BaseTabView v-bind="$attrs"><slot /></BaseTabView>
</template>

<script setup lang="ts">
import BaseTabView, { type BaseTabViewProps } from "base/tabview";
export interface DemoTabViewProps extends BaseTabViewProps {}
defineProps<DemoTabViewProps>();
</script>

<script lang="ts">
import { defineComponent } from "vue";
export default defineComponent({
    name: "demo-tab-view",
});
</script>
Here is the subcomponent:
//TabPanel.vue

<template>
  <BaseTabPanel v-bind="$attrs"><slot /></BaseTabPanel>
</template>

<script setup lang="ts">
import BaseTabPanel, { type BaseTabPanelProps } from "base/tabpanel";

export interface DemoTabPanelProps extends BaseTabPanelProps {}

defineProps<DemoTabPanelProps>();
</script>

<script lang="ts">
import { defineComponent } from "vue";
export default defineComponent({
  name: "demo-tab-panel",
});
</script>
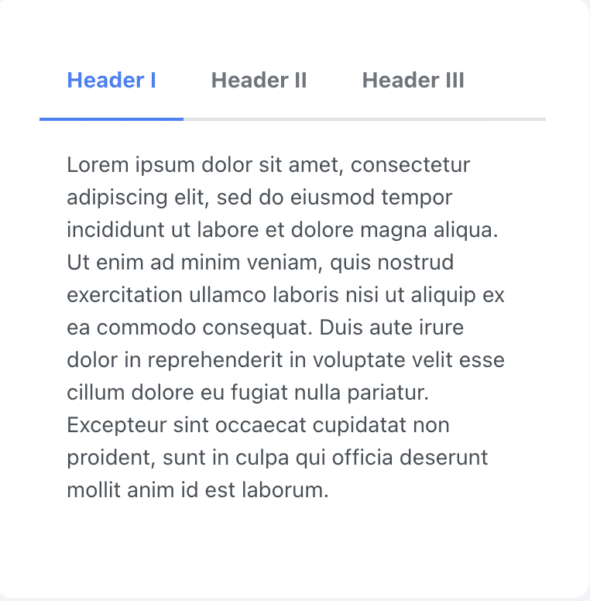
And here is an example of what the end component looks like:

Testing
Let’s start with our basic, no-slot test case:
// TabView.spec.ts
import { mount } from "@vue/test-utils";
import DemoTabView from "./";
import { DemoTabPanel } from "../TabPanel";

describe("TabView molecule", () => {
  it("rendered with no panels", () => {
    const wrapper = mount(DemoTabView);
    expect(// insert condition here).toBe(true);
  });
  //...
});
Now, to perform the test case with a slot, we need to set two configurations:
- We need to specify that this contains our DemoTabPanel component.
- We need to actually create the slot to go into it.
This is what that looks like:
// TabView.spec.ts cont’d
   //...
   it("rendered with one panel", () => {
      const wrapper = mount(DemoTabView, {
        global: {
          components: {
            DemoTabPanel,
          },
        },
        slots: {
          default: `<DemoTabPanel header="First">"First"</DemoTabPanel>`,
        },
      });
      expect(// insert condition here).toBe(true);
    });
    //...
And you’re done! We can even do more panels and test them all:
// TabView.spec.ts cont’d
    //...
    it("rendered with multiple panels", () => {
      const wrapper = mount(DemoTabView, {
        global: {
          components: {
            DemoTabPanel,
          },
        },
        slots: {
          default: `<DemoTabPanel header="First">"First"</DemoTabPanel>
            <DemoTabPanel header="Second">"Second"</DemoTabPanel>
            <DemoTabPanel header="Third">"Third"</DemoTabPanel>`,
        },
      });
      expect(//insert condition here).toBe(true);
    });
});
Test a Vue Component with Nested Components
As a reactive framework, Vue.js has a lot of really incredible benefits and uses. The single file format is clean and easy to read, and state changes are managed easily using their v-prefix directives. It also has compatibility with so many other existing development tools in existence today.
That being said, because it’s less popular than React or Angular, often documentation on compatibility is limited, especially because support for Vue is often newer. The issue I’ve documented is a great example — something like testing a component with subcomponents using Vue test-utils in Jest required a rather large amount of digging.

