
Authentication is a critical part of any website or application. It allows users to be uniquely identified and for accounts to be associated with each person. Authentication can be challenging to implement but it doesn’t need to be. Firebase provides many tools that we can use to easily set up authentication in your Expo application. In this guide, we will walk through how to set up authentication in your React Native Expo App with Firebase.
Prerequisites
- A React Native Expo Application. If you do not have your own application, you can create one by following this guide.
- A Firebase Account. If you do not have a Firebase account, you can create one here.
Setting up your Firebase Project
In your Firebase Account, navigate to your console. From your console, click on Add project. Navigate through the steps to finish creating your Firebase Application. You should see the main application page.

Now that we have created your app, we need to add Firebase to your Expo app. To do that, click the web icon as shown above. Expo allows us to develop for both Android and iOS, so creating a web app will suffice.
Fill out your web app name. This can be the same as your Firebase app name. You can leave Also setup firebase hosting unchecked and proceed to the next step.

Copy the chunk of code from the screen. This contains the info needed for your app to connect with your Firebase account. Now navigate to your React Native Expo App and in a terminal window run the following.
npx expo install firebase
Next, in the root of your project, create a new file called firebaseConfig.js. Paste in the code that we copied from above into the file. This will be used to initialize your Firebase app.
Expo uses Metro to bundle your javascript code, we need to add a metro.config.js to the root of your project. Run the following:
npx expo customize metro.config.js
Paste the following code into the file that was just created.
const { getDefaultConfig } = require('@expo/metro-config');

const defaultConfig = getDefaultConfig(__dirname);
defaultConfig.resolver.sourceExts.push('cjs');

module.exports = defaultConfig;
Now you are ready to set up Firebase authentication.
Enable Firebase Authentication
We will need to do a couple of things to set up authentication with Firebase.

Navigate back to your Firebase console. On the left-hand side navigation bar, click on Build > Authentication. Then click on Get started.

Under Sign-in providers > Native providers, click on Email/Password. Where it says Email/Password, toggle the switch to Enable and hit save.
Now with the Firebase initialized and authentication setup we can implement the ability for the user to sign up and log in to their account.
Create and Login Screens
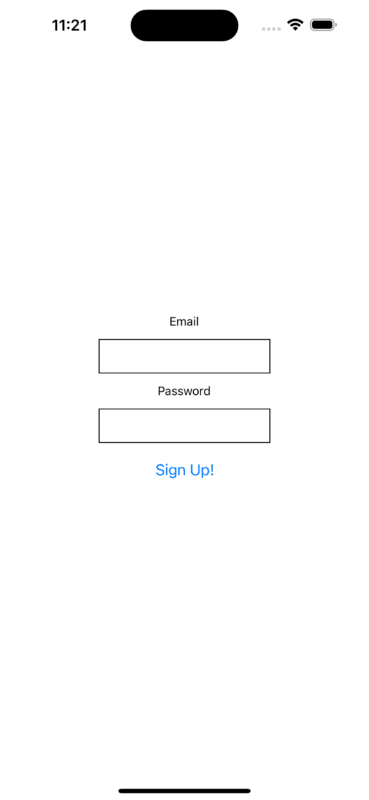
For the sake of this tutorial, I created a simple screen with two text inputs and a button. I will use the following code to demonstrate how the authentication will work. This is a barebones App.js.
import React from "react";
import { StyleSheet, Text, View, TextInput, Button } from "react-native";

export default function App() {
  const [email, onChangeEmail] = React.useState("");
  const [password, onChangePassword] = React.useState("");
  return (
    <View style={styles.container}>
      <Text>Email</Text>
      <TextInput
        style={styles.input}
        onChangeText={onChangeEmail}
        value={email}
      ></TextInput>
      <Text>Password</Text>
      <TextInput
        style={styles.input}
        onChangeText={onChangePassword}
        value={password}
        secureTextEntry={true}
      ></TextInput>
      <Button title="Sign Up!" onPress={() => {}} />
    </View>
  );
}

const styles = StyleSheet.create({
  container: {
    flex: 1,
    backgroundColor: "#fff",
    alignItems: "center",
    justifyContent: "center"
  },
  input: {
    height: 40,
    width: 200,
    margin: 12,
    borderWidth: 1,
    padding: 10
  }
});
With the input fields set up, we can now implement the authentication workflow. Firebase provides us with the functions necessary to authenticate the user.
Account Creation
The first thing we will look at is allowing a user to sign up for an account. To use Firebase authentication, we need to import a couple of things. The first thing is to import the Firebase config file that we created earlier. Following that, we need to import the Firebase auth instance and the Firebase create account function.
import "./firebaseConfig";
import { getAuth, createUserWithEmailAndPassword } from "firebase/auth";
Now with the necessary configs and functions imported, we can write the function to allow a user to sign up for an account. Let’s write the sign-up function.
  const auth = getAuth();
  const createUser = () => {
    createUserWithEmailAndPassword(auth, email, password)
      .then((userCredential) => {
        const user = userCredential.user;
        onChangeLoggedInUser(user.email);
      })
      .catch((error) => {
        const errorCode = error.code;
        const errorMessage = error.message;
      });
  };
Here we see a few things happening. We need to initialize the auth instance for Firebase, which is used to authenticate with your Firebase account. We can then call the createUserWithEmailAndPassword function which takes in three arguments: the Firebase auth instance and the email and password of the user creating an account. This function creates the user’s accounts and then returns the user’s credentials. It also implements a catch statement that will return an error if the account creation is unsuccessful.
We can now update the button component to call the createUser function.
<Button title="Sign Up!" onPress={() => createUser()} /></button></code>
With everything set up now, the user account can now be created when the user enters their email and password and hits the sign-up button. For this tutorial, I added some text to indicate when a sign-up is successful.
With the user’s account created, we can now navigate back over to our Firebase console and verify that the user account was created.

Here we can see the user who just created an account. In this dashboard, you can see details about the user. You can also manually manage the user’s account in this dashboard (reset password, disable or delete accounts). Now that the user exists within Firebase, we can move on to allowing the user to sign in to their account.
Account Login
Now that the user can create an account. Let’s implement the function allowing the user to log in to their account. This process should be pretty similar to the signup, except we will use a different Firebase function. Let’s import the signInWithEmailAndPassword function.
import { getAuth, createUserWithEmailAndPassword, signInWithEmailAndPassword } from "firebase/auth";
Now let’s implement the login function. This function will look very similar to the sign-up function.
  const login = () => {
    signInWithEmailAndPassword(auth, email, password)
      .then(async (userCredential) => {
        // Signed in
        const user = userCredential.user;
        onChangeLoggedInUser(user.email);
      })
      .catch((error) => {
        const errorCode = error.code;
        const errorMessage = error.message;
      });
  };
This function takes in the same auth instance, email, and password. Let’s update the button to accept the login.
<Button title="Login!" onPress={() => login()} /></button></code>
With that working, the user can now log in to their account. Once again if there are any errors in the process of logging in, the catch statement should produce the resulting error. This can then be used for validation purposes for your application.
Add Authentication with Firebase
With Firebase authentication setup and the functions implemented, we can now use the create account and login workflow in your Expo app. For the sake of this tutorial, we have only set up the barebones functionality for creating and logging into a user account. The implementation of how to handle the process after creation or login is up to the use case of your application.
That’s it! I hope this guide helps you get started with Firebase authentication. Have any questions? Run into any bugs? Leave a comment down below. Happy coding!
grazie. il primo tutorial che funziona