In my previous post, I discussed the benefits of building your portfolio in Figma and why I advocate for leaning into its capabilities. Now, while Figma isn’t an entirely perfect solution, the pros far outweigh the cons regarding time, cost, and overall efficiency. In this post, I’ll focus on how best to set up your file when building your portfolio in Figma.
1. Select a frame via the Figma presets.
Figma comes preloaded with various screen sizes that you can use as a starting point for your portfolio. You can choose frames that range anywhere from various mobile screens and tablets to desktops and even social media viewports. If you intend to have your portfolio viewed on a desktop, I recommend building from the MacBook Pro 16-inch frame. I found this to be the “happy medium” of screen sizes. It can scale nicely down to a 14-inch screen as well as scale up to an extra-wide monitor.

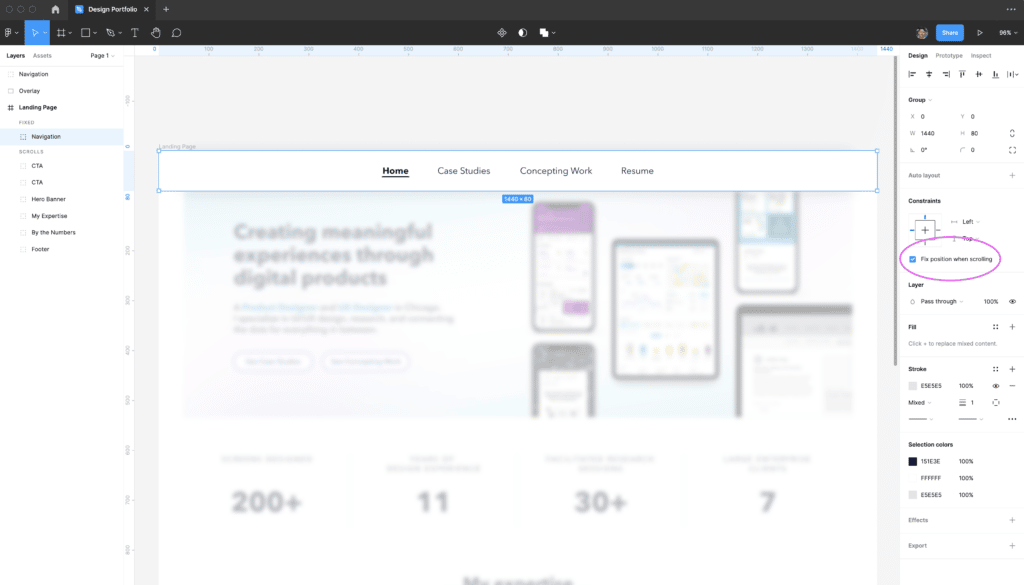
2. Set your navigation to fixed position.
This might sound like an obvious step, but it’s one easily overlooked. Having your primary navigation set to “fix position when scrolling” anchors your navigation to the top of the page. Anchoring your navigation not only creates a live website effect but also allows your users to quickly navigate to other areas of your portfolio.
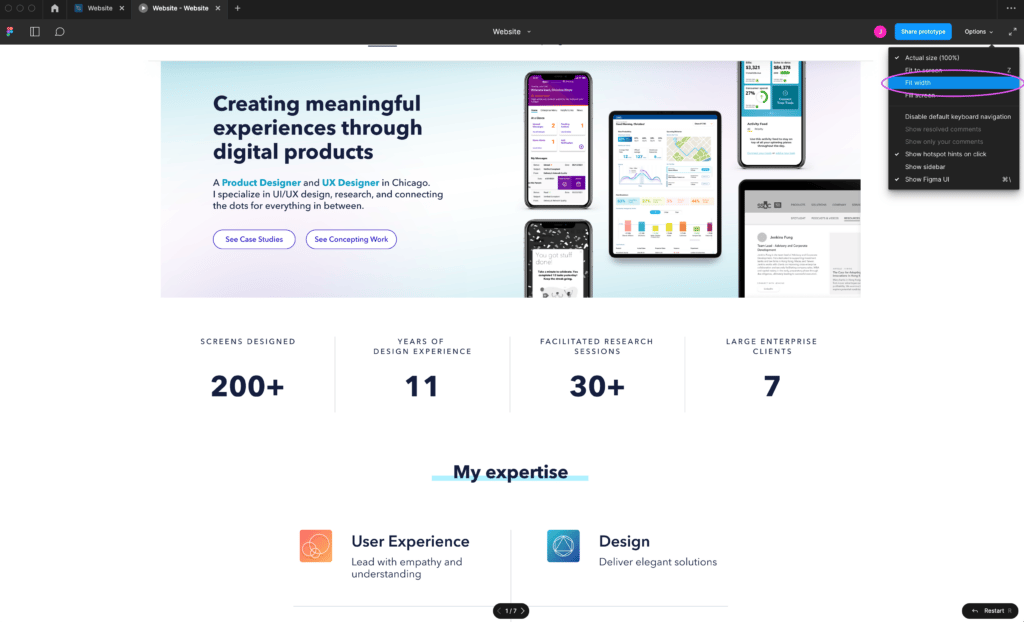
3. Set your prototype to ‘fit width.’
Once your prototype interactions are connected and you’ve pressured tested your prototype, open the options dropdown and select “fit width.” The “Fit width” option will format your prototype to whatever screen size your viewer is opening your link on. This will ensure that your portfolio will be viewed in the most ideal format for your everyday desktop browser.
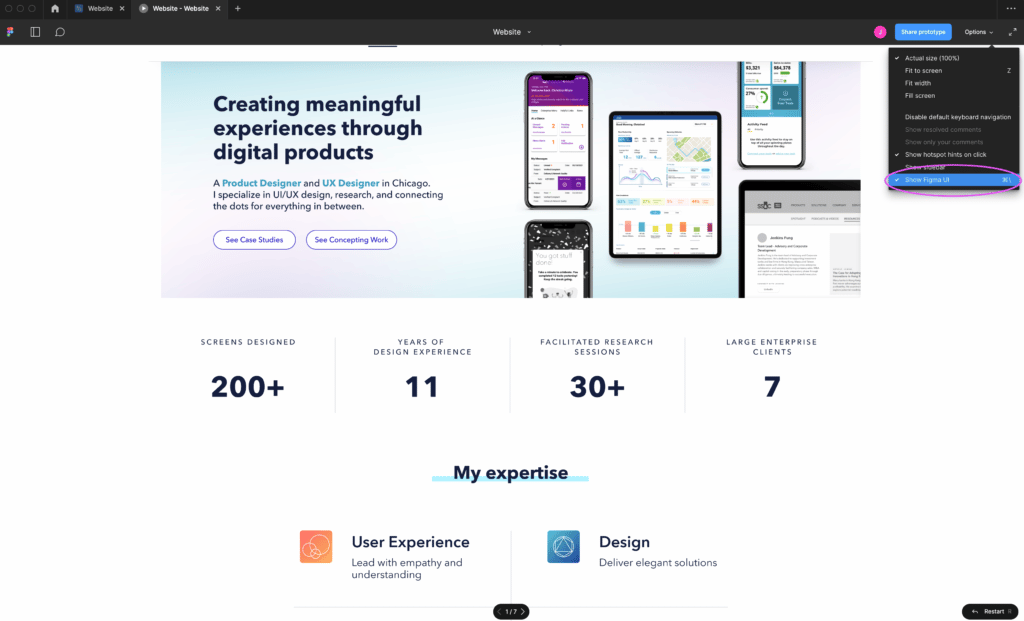
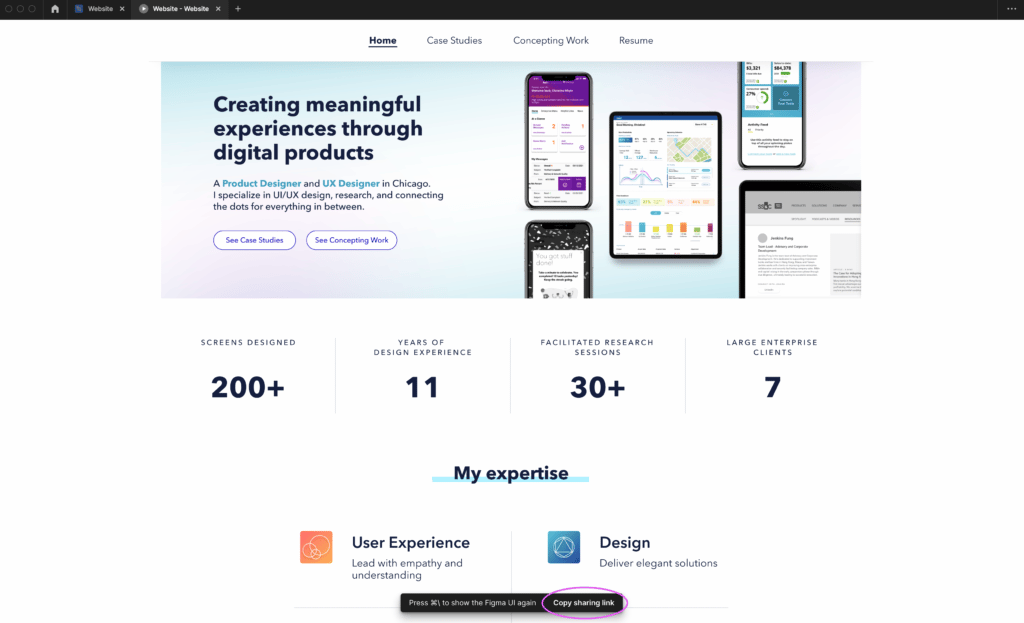
4. Ensure that ‘Show Figma UI’ is unselected.
This is a very important step in setting up your portfolio prototype. With “show Figma UI” unselected, the top banner of the Figma application will not show when a third party is viewing your link. That allows your top-level navigation to remain ever-present and not be hidden by the primary Figma menu. Additionally, this will support the illusion that your prototype is a live site.
5. Copy sharing link.
As soon as you deselect “show Figma UI,” a prompt will show at the bottom of your prototype. Select “copy sharing link” to copy the link of your prototype. This is the hyperlink you will use if you’re including said link in an email or message. This prompt will eventually disappear over an extended amount of time. Should that happen, use the keyboard shortcut “command+\” to enable the Figma navigation and deselect “show Figma UI” again for the prompt to reappear.
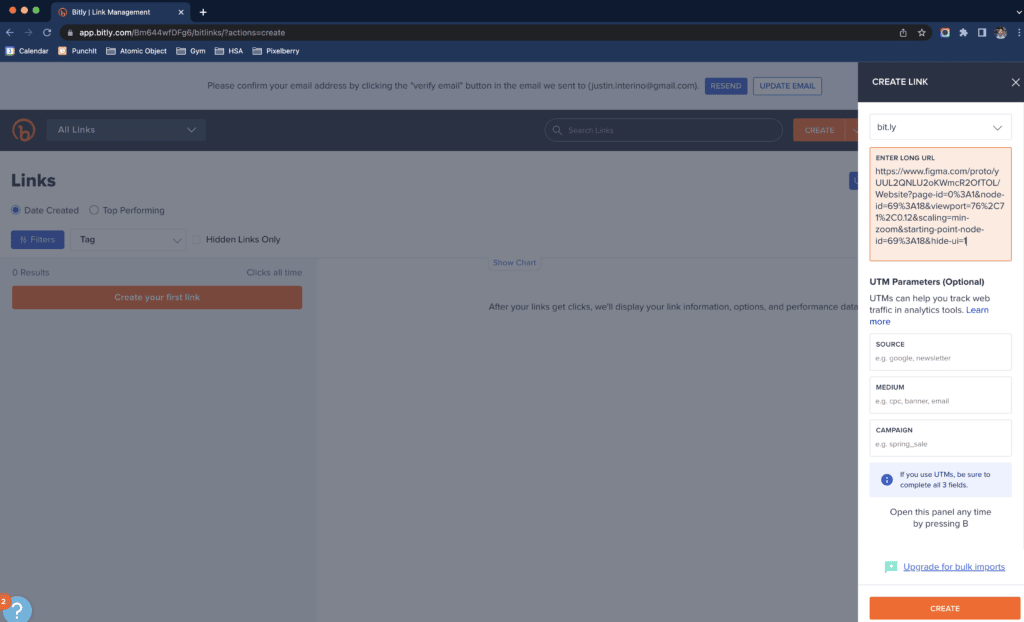
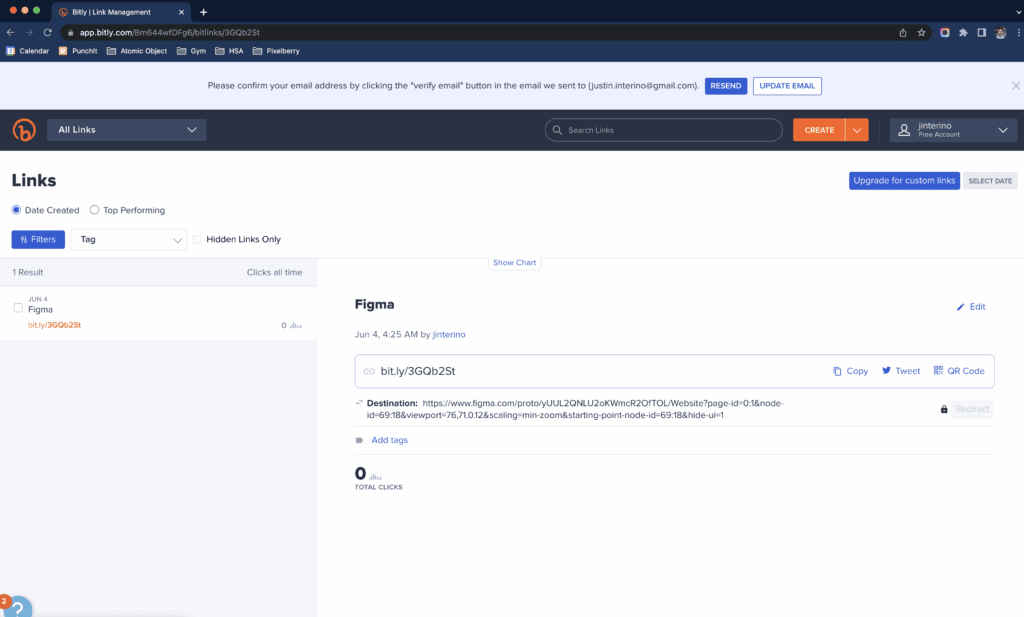
6. Optional: Shorten your prototype link.
This is an optional step, but it provides quite a bit of value and long-term flexibility. You can use your prototype link and copy it into a URL compressor to shorten your Figma URL. There are several options available, but I found that Bitly was a free and extremely easy site to use. You do need to sign up for a free account before using its services, but once you’re signed in, your Bitly link will remain inside your account. This means that anytime you need to send your portfolio out, you can quickly log into your account and copy your shortened link whenever you need it. Having quick access to the URL of your portfolio will pay off in the long run.
Get started building your portfolio in Figma.
These steps are just one set of options to help set your Figma portfolio up for success. There are many ways your design file can be set up and formatted specifically to your needs. Ultimately, I hope these steps can be a starting point for those early in their journey of building their personal brand and unique voice.