Article summary
Recently, I took some time to integrate VS Code and Godot for a game jam and explored adding a VS Code Profile. If you are a tool and organization freak and are interested in getting Godot and VS Code talking, read on.
Integration Settings
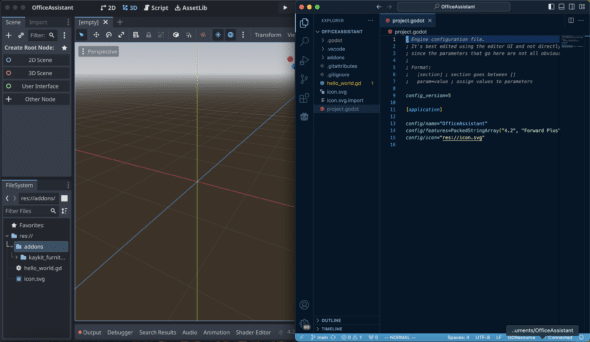
Integrating Godot and VS Code is great for several reasons including code navigation, debugging, maintaining a consistent environment, and version control. The integration requires updating settings in both VS Code and Godot.
Getting Started
My setup began with making a directory for the project and creating a project in Godot. First, using the command line, I entered the following commands to make a directory and initialize a Git repository:
mkdir <DirectoryNameHere>
git init
Then, in Godot, I created a new project by providing a name and added this path to the Create New Project dialog. Once I pressed Create & Edit, this brought me to the Godot interface, and generated some files in the repository.
Connecting VS Code to the Godot Executable
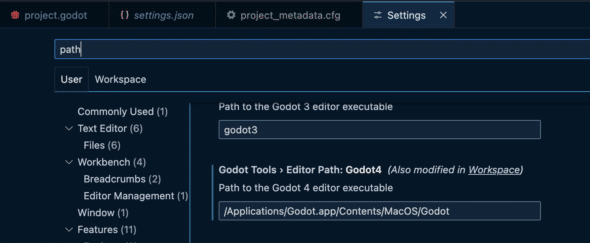
To tell VS Code where to look for Godot, I needed to specify the path for the executable. Inside .godot/editor/project_metadata.cfg I updated the executable_path property to my Godot path. I repeated this process in .vscode/settings.json , and VS Code user and workplace settings (pictured below).
Godot Settings
To launch VS Code when I wanted to make a script in Godot, I needed to verify VS Code was referencing Godot’s language server through the correct port and had to tell Godot where to look for the external editor.
Verify the language server port number.
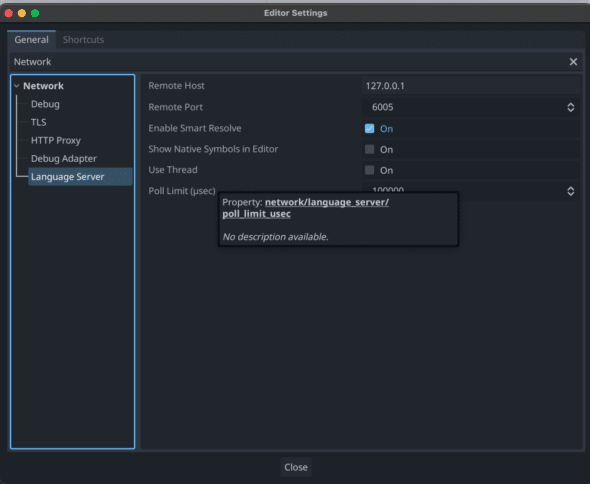
Once in the Godot UI, I went to the menu bar at the top and clicked Editor, Editor Settings, and typed Network in the search bar. Under the Network tab, I chose Language Server. Here, I referenced the Remote Port setting to know what port to update in VS Code settings.
Back in VS Code, I used Shift+CMD+P to open settings and looked up Server Port, and this brought me to the Godot Tools Server Port. Originally, mine had 6008, so I updated that to 6005.
Set VSCode as the Godot text editor.
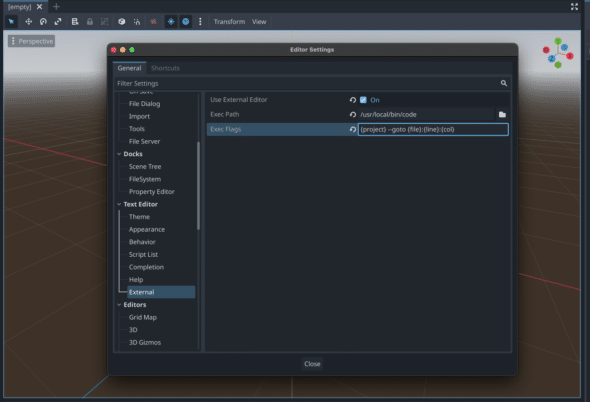
The final piece is to tell Godot which external text editor to use. This involved going back to Godot’s Editor settings, searching text editor, and clicking on External.
I did three things here:
- I clicked
Onin the Use External Editor field.
- In the Exec Path field, I entered the path to VS Code (I have a Mac, so mine is
/usr/local/bin/code).
- In the Exec Flags field, I entered
{project} --goto {file}:{line}:{col}.
Once I had the external editor set, adding a new script prompted me for a script name and launched VS Code with a new script ready to go. Though there are more integrations you can do to facilitate debugging, these steps completed the integration I was most interested in.
VS Code Profile
Why a VS Code – Godot profile?
I spend a large chunk of my time developing in VS Code. When I’m developing for fun, I’m also working in VS Code (amongst other workspaces). So, when I went to set up a repository for a game in Godot, I wanted it to feel like a full context switch from one project to this one. I wanted a workspace with different extensions, themes, and settings—akin to having different color folders for school subjects. Enter VS Code Profiles.
VS Code Profiles are sets of customizations: extensions, settings, keyboard shortcuts, etc. What’s great about a VS Code Profile is if I make another game using Godot, I can apply my Godot profile to that game as well without worrying about additional setup. Alternatively, I could make a profile that’s entirely Python-flavored and not worry about any extension conflicts.
For my purposes, the customizations I wanted all centered around the tools I need and want for my work in Godot.
Make a VS Code profile.
Here are the two different ways to make a VS Code Profile:
- Toggle the gear icon in the bottom, lefthand corner, click Profiles, and Create Profile.
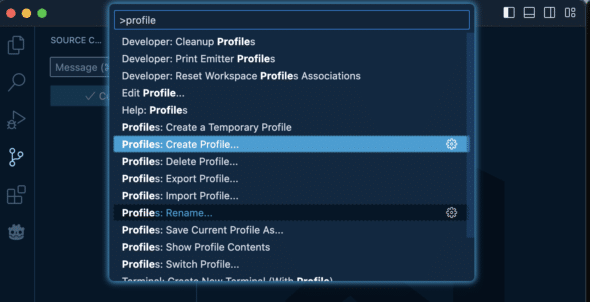
Shift+CMD+P, start typing Profile, and you should see Create Profile in the command palette.
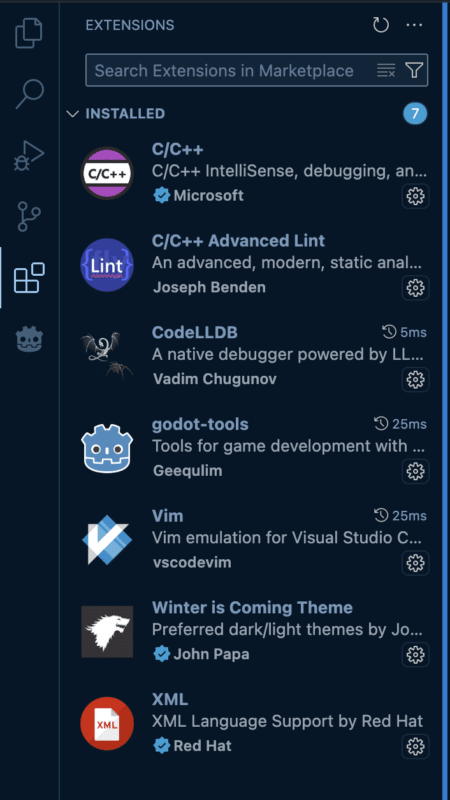
I used the second option and named the new Profile Godot. In this profile, I started with the most basic of extensions for a Godot profile: godot-tools, C/C++ IntelliSense, and others I don’t want to code without.
Open VS Code with the Godot profile.
To complete the experience, I found a command to add to a custom bash script to open up all my tools for the day. In particular, I applied the Godot profile with this command:
code --profile Godot --folder-uri /Users/meghan/Documents/NewProjectNote: This presumes you’ve already set up VS Code in your path. Here’s how to do that on Mac or Windows.
Godot and VS Code
Over time, my need for a more organized setup has increased. I consider fiddling with integrations like the one between Godot and VS Code, and setting up VS Code Profiles to be another step in that evolution. Both have afforded me new ways to speed up my computering and organize my thoughts while I develop. For more information on these and other settings, take a look at the following links.
Links n’ Such
A vast majority of the steps I spewed above have been originally documented in these places:


