Article summary
I am just getting into the habit of using the new UIStackView on iOS. I find it much easier to use UIStackView to build the majority of the UI, tweaking it when necessary with Auto Layout. Auto Layout is really powerful and flexible, but for simple layouts, it can be tedious.
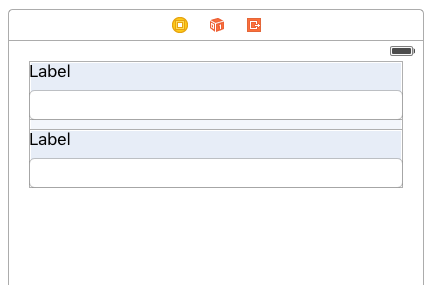
Recently, one of my co-workers had a layout he wanted to represent with stack views, and the solution wasn’t obvious to us at first. He had a column of UILabels and UITextFields and wanted them to stretch across the screen. There are many ways you can build the layout, but we chose UIStackView because it seemed like the simplest solution and required no code.

Building the UI
I started out by placing the UILabel and UITextFields onto the UIViewController and then wrapping them in stack views. You could also go the other direction and place stack views on the UIViewController first, then place the controls inside of them.

To wrap existing controls in a stack view, highlight the controls you want to include and press the “Stack” button in the lower right corner of the storyboard view.


I only selected the first label/textfield pair because I wanted the spacing between my label and textfield to be different from the spacing between the pairs. Putting each pair in separate stack views allows me to control the spacing.
Next, select the other pair of controls and place them in a stack view. At this point, you should have both pairs in stack views. Make sure both stack views have a vertical axis.


The last control to put on the scene is wrapping both stack views in another vertical stack view. Your final layout should look like this, with the document outline showing the UI hierarchy:


Configure and Constrain the Stack Views
Now that we have the UI in place, we can add Auto Layout where it is needed and configure our stack views to stretch the content. By default, the stack view will only be as big as the intrinsic content size of the controls inside of it, so we need to tell the outer stack view to do something different.
The first step is to add Auto Layout constraints on the outer stack view. This will anchor it within the leading, trailing, and upper edges of the parent view. To do that, select the outer stack view and add the constraints shown below. You do not need to anchor the outer stack view to the bottom layout guide.


You can see that the outer stack view is constrained to the leading and trailing edges, but the content inside is not stretching to fill the space. Specifically, the UITextFields are not very wide. To fix this problem, we need to set the alignment property on all stack views to “Fill” (make sure you change all three of them).

Once you have this alignment property set, you should see the content in your stack view stretch and fill the space that is inside. You can also play around with the spacing property on both sets of stack views to get the look you want in your UI.
I know this example was pretty easy, but the situation can easily confuse a beginner to UIStackView. Hopefully, you’ll find it useful.
For more on using Xcode, read my series on unwind segues:
- Unwind Segues in iOS Storyboards
- How to Perform an Unwind Segue Programmatically
- Custom Animation for an Unwind Segue
- Specifying the Destination of an Unwind Segue Programmatically
Or my series on switching view in iOS:
Could you show us how you would put 4 fields on the same row evenly?
That is a good question Dan. I will cover that example in my next post.
can you send me the link of next post of this
I need to know Stack views Behaviour in same row And how to implement that
https://spin.atomicobject.com/2016/05/09/space-content-uistackview/
Hi Dan, Same problem for me as well
How does fill proportionally works.. every time I tried this distribution but fails .. so any tutorial about that may be helps. something like this https://www.dropbox.com/s/tin5zydgyx6jogc/Screenshot%20at%20Jan%2012%2015-18-01.png?dl=0