Recently, I had the opportunity to aid in moving our Atomic Object website to Webflow. Consequently, I had the chance to use Webflow for the first time. My main order of business was to fine-tune the iconic Atomic team periodic table. Mainly, the Webflow animation we were trying to achieve was a little messed up.
The Bug in Question
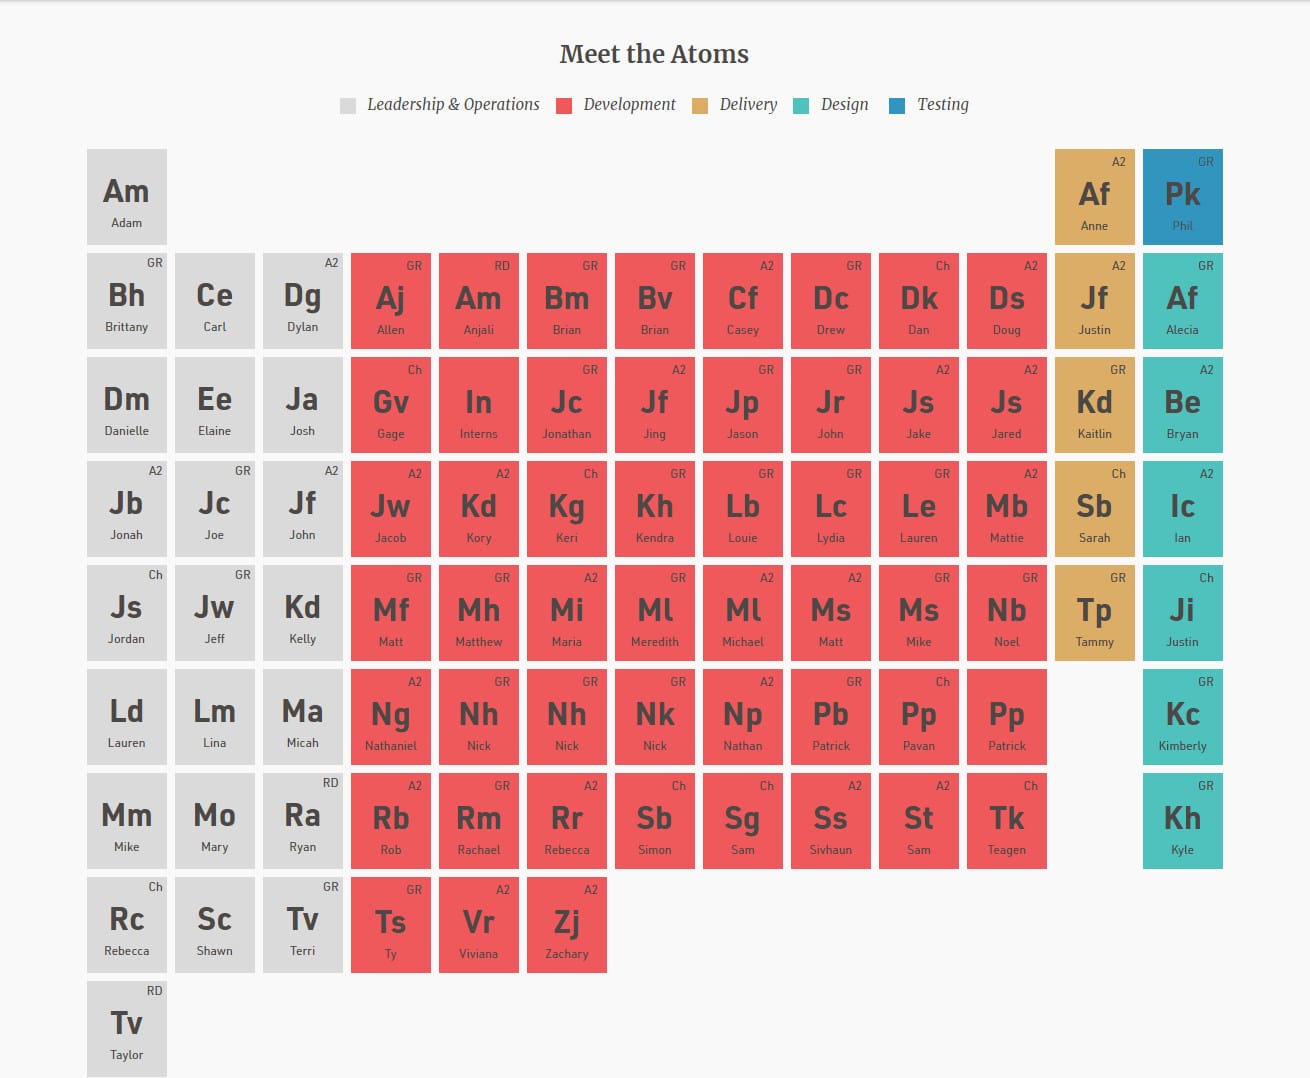
Based on the previous website, we wanted a bio link to pop up whenever the user hovers over any “element” or specific Atomic Object employee in the periodic table. This then would allow the user to click on said link and be redirected accordingly. However, hovering over the table left quite a few of these bio links visible.
Note: for this article, I will refer to these two elements separately often. I will use Element for the elements of the periodic table, and Pop-Up for the link that should appear on hover.
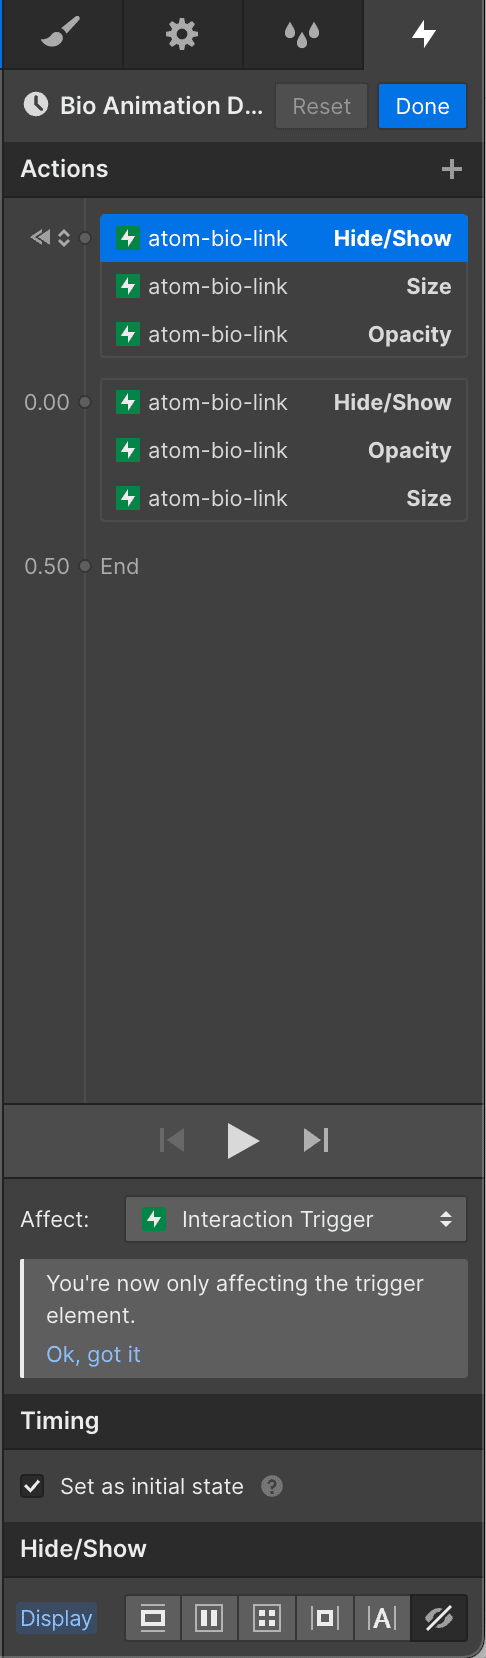
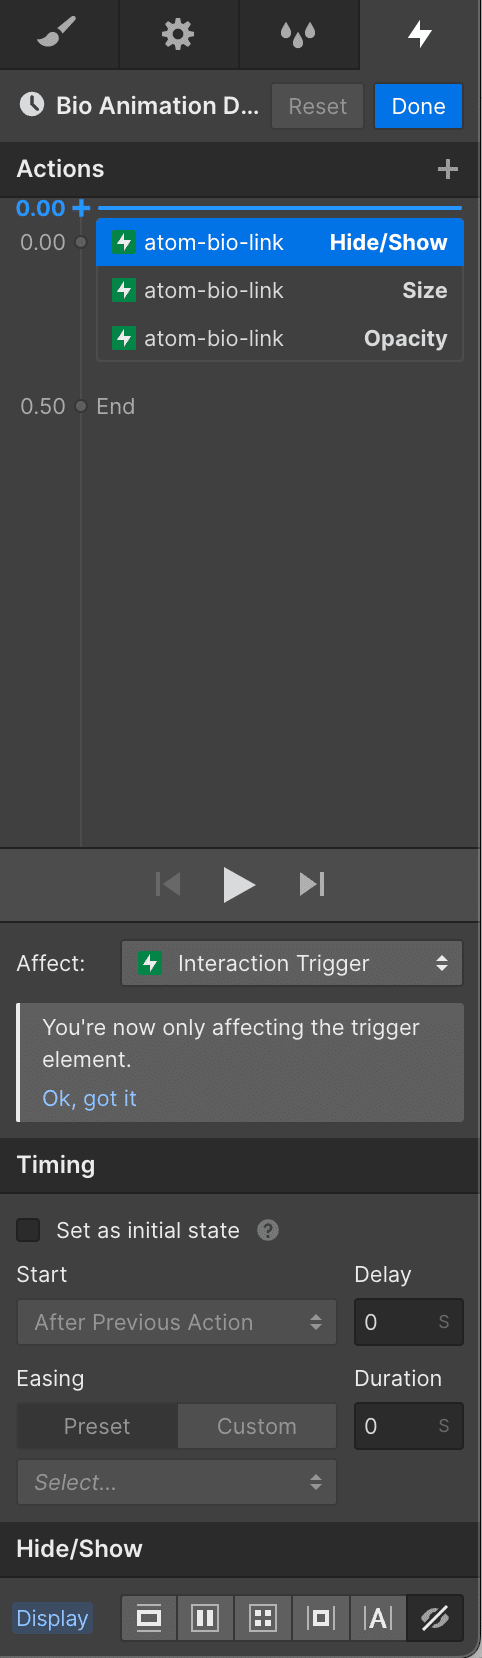
Each animation appeared reasonable based on first impressions. On each Element of the periodic table, an animation was set to start on mouse hover. This animation set an initial state on that pop-up element that had the element hidden (the Hide/Show property). The opacity was set to 0%, and it had an initial size of 0% as well. The animation then transitioned to a visible “block” element with an opacity of 100% and a size of 150%.
On the Pop-Up object, we had an equal and opposite reaction. An initial state was set on the element to have the end state of the previous animation, and then faded back to 0 in the same way it began. Down to the timings, this simply appeared to mirror our entrance animation.
The First Problem
Just by looking at the information on the transition screen, it’s a little unclear what marking a transition as an “initial state” actually means. It could imply two things: that each animation needs an initial state to begin from, or that the initial state is the start state for a particular item on the page load.
As it turns out, the latter is true, but our current attempt assumed the former. The initial state for a “hover out” animation is just the state of the object when you hover off of it. We can go ahead and delete all our initial state variables on the hover out animation then.
However, after doing this, it still appeared as though the animation was acting the same. That meant we still had work left to do.
The Second Problem
As mentioned, this animation has three parts: a visibility transition, an opacity transition, and a size transformation. In reality, to achieve what we want, we probably don’t need that many transforms. The animation is also happening in two different places: in both the Element and on our Pop-Up. In reality, this approach introduces too many variables into the main animation trigger: the mouse hover.
Let’s think about an example. Say the mouse enters an Element and quickly exits, leaving us with the bio Pop-Up still visible instead of disappearing. But what has actually happened behind the scenes?
In reality, our mouse has entered the space of our periodic Element, triggering the “enter” animation. But if we exit before that animation completes, three things are now true:
- The opacity of the Pop-Up is not at 100%
- The size of the Pop-Up does not fully take up the space
- The Pop-Up itself is not completely considered “visible”
All three of these intermediate states pose both visual errors as well as interference with mouse events. For example, if the Pop-Up has not yet expanded enough to reach your cursor, it will never register that the mouse is there at all, much less that it has left. It’s the same if the display is not fully set to visible. A visibility setting of “none” means that it takes up no space and therefore you cannot hovered over it with your mouse.
The Full Solution
So, let’s redesign our approach to this problem. Let’s first consolidate this animation by making sure that the only thing that has any animation triggers on it is our Pop-Up. This allows everything to exist in one place, both the exit and the enter, and allows us to better control what happens.
Since everything is happening to itself now, we can also ensure the animations affect the Pop-Up only selected by setting it to animate the “Interaction Trigger.” To do that, though, we have to create an animation from scratch with our previous options. Either way, the main goal is that the object in question needs to have full control of its own animation.

Next, let’s remove the Hide/Show animations completely. To hover in and out of the element, it’s best to allow it to always exist, so that the mouse always has something to hover over. We can use other properties like opacity to ensure that the element is not shown to the user until we explicitly want it to be shown.
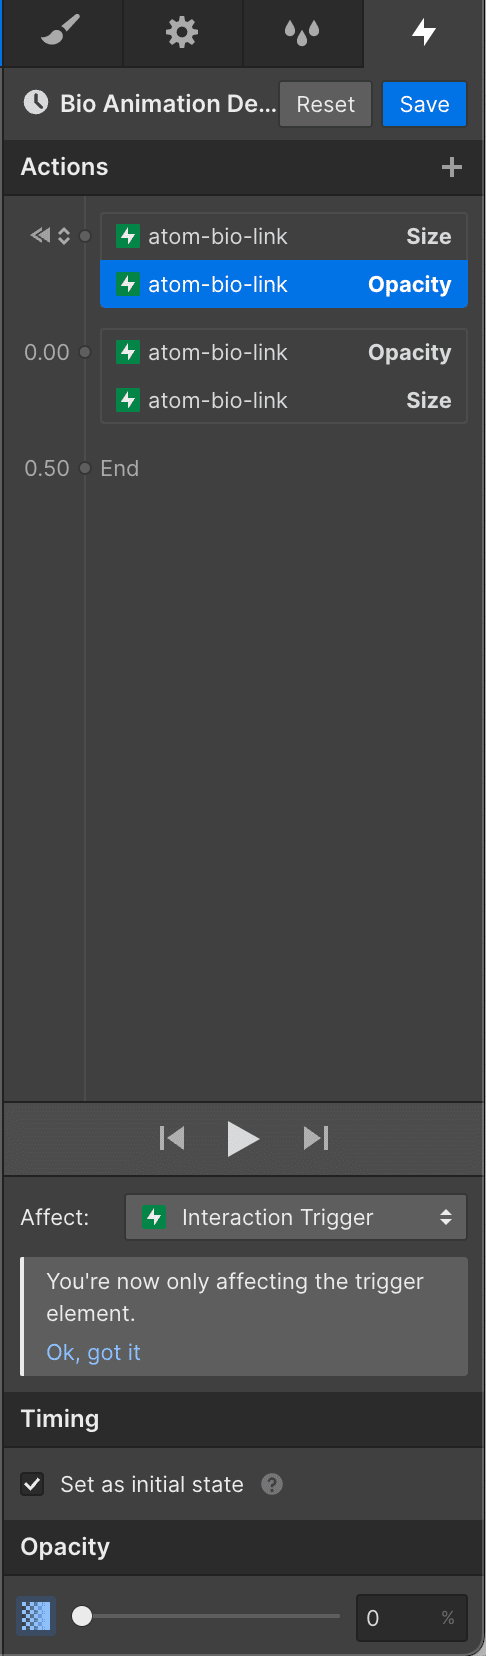
The last consideration is the size. Realistically, if we want the mouse animation to always work over the whole element area, two things need to be true. We need to ensure that the Pop-Up has the exact same base size as its sibling, the Element. Then we need to ensure that it, at minimum, always has that size. Instead of having the size expand from 0% to 100%, the animation should go from 100% to 120%. I’m also opting to do a scale transformation as opposed to a size animation.
With a few timing adjustments, the final animation now looks like this, with no weird lingering elements on the screen.
Webflow Animation Takeaways:
- Initial states aren’t animation specific, but rather element-specific, and you shouldn’t have multiple of them on the same element.
- Mouse hover animations need space to hover over or they won’t work, and you should design your hover animation with that space in mind.