Last week I updated my laptop to Mavericks and Xcode 5. I had been waiting to do it pending resolution of a bug in pre-release versions of Xcode that was causing massive layout problems in my app. The fix finally came in the Xcode 5.0.1 release, so I installed it and provisioned a new iPad Air for development. But before I could build and install my app for this device, I had to add it to my team provisioning profile, which is “Managed by Xcode”. That process is a little different in this version, so I thought others might benefit from a simple guide.
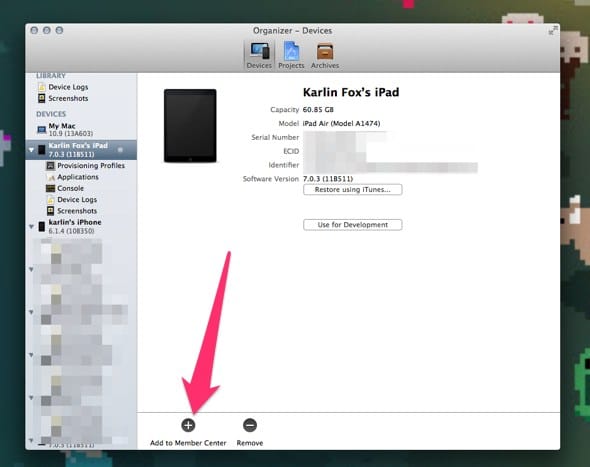
First I plugged in my new iPad and opened Xcode Organizer. The first step is to select the new device in Organizer and then select the Use For Development button:

Once you’ve selected an organization, you can select Add to Member Center:
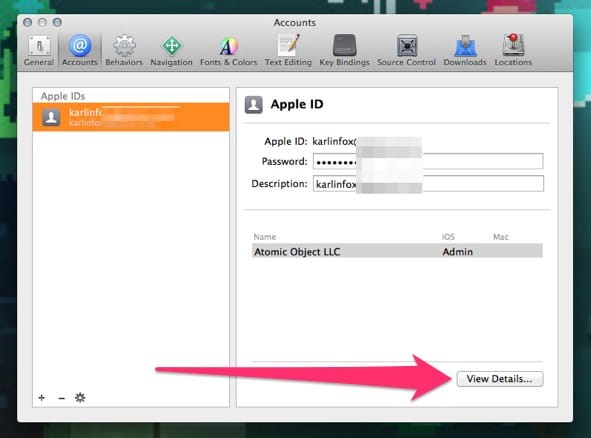
Here’s the part that’s tricky in Xcode 5, especially if you’re used to using the “Refresh” button provided in Xcode 4. In order to add this device to an Xcode-managed team provisioning profile, you’ll need to go to Preferences→Accounts in Xcode, and select your Apple ID from your team profile, then select View Details:
Then click on the tiny little refresh button in the lower-left corner:
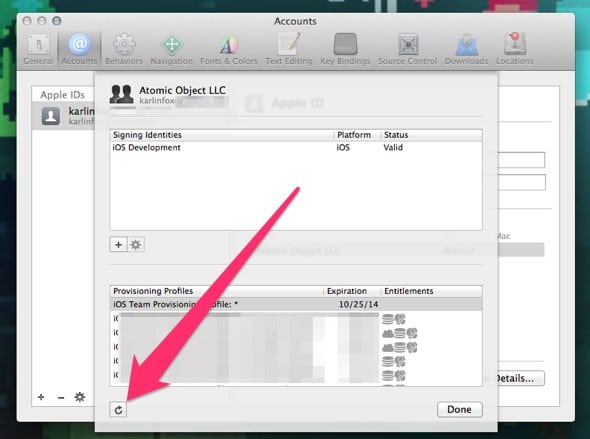
Finally, you can load up the iOS Developer Center in a browser and download the new provisioning profile with this new device added.
I don’t understand Apple’s reason to flip-flop, adding and then removing the Refresh button in the Organizer, but hopefully I’ve saved you a little bit of time pointing out the new process.
I just wanted to say thank you for making this post. I was totally stuck on this and would not have found it if not for your blog.