Article summary
In my last post, I talked about how easy it is to drop in a self-contained UIPageViewController. By popular request, this post covers how to change the position of the UIPageControl dots.

Unfortunately, we are unable to alter the position of the UIPageControl embedded inside UIPageViewController directly. Fortunately, we are able to create our own UIPageControl and maintain full control over it.
Setting Up
- First, create a new class called
TutorialViewControllerin code. - Drag a new
UIViewControllerobject onto theMain.storyboardcanvas and set the custom class toTutorialViewControllerin the identity inspector. - Drag a new container view object onto the newly created view controller and remove the default
UIViewControllerthat it created. - Add constraints to pin the container view to all four edges.
- Then right-click (or hold
Ctrlif you do not have right-click enabled in System Preferences) the container view and drag it on top of ourTutorialPageViewController. - Choose “Embed” from the list.
- Drag a new
UIPageControlobject onto the newly createdTutorialViewController. - Add constraints to pin it wherever you’d like.
- Then add
IBOutlets for the page control and container view. - Finally, make sure the new
TutorialViewControlleris the initial view controller.
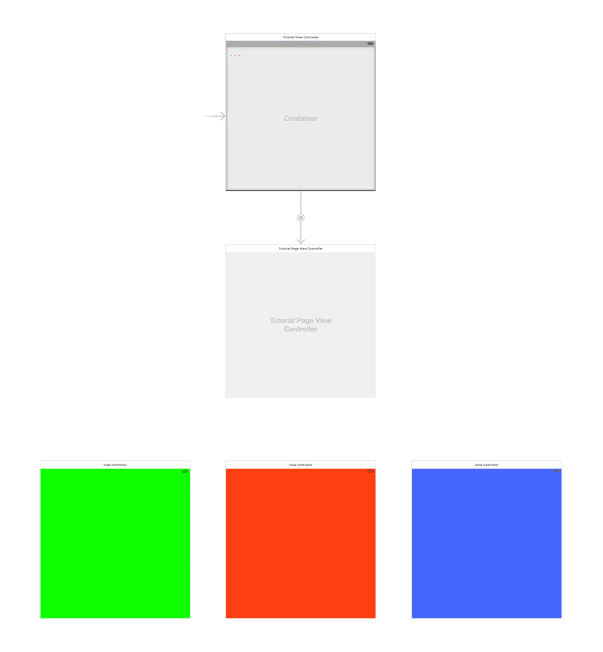
After completing all of these steps, Main.storyboard should look similar to the following:
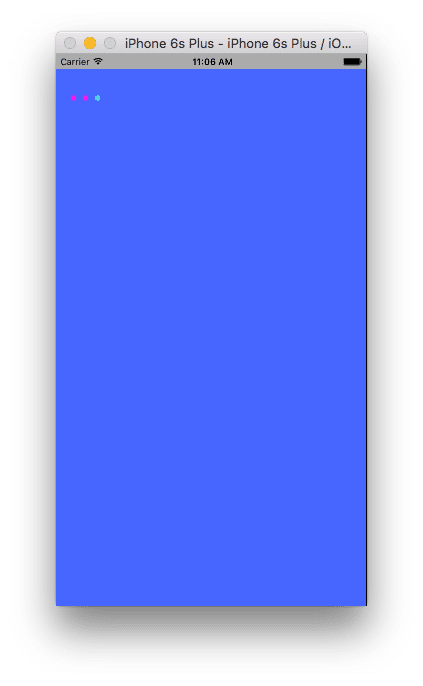
If we build and run now, the page view controller will show up, and you will be able to swipe through pages. However, you will quickly realize that the dots are not updating (and our old dots are still there).
Addressing the Page Dots
In order to remove the old dots, remove the following two UIPageViewControllerDataSource methods:
presentationCountForPageViewControllerpresentationIndexForPageViewControllerIn order to send data from TutorialPageViewController to TutorialViewController, let’s use a delegate. We have to name the delegate something other than delegate since UIPageViewController already defines delegate. Inside TutorialPageViewController.swift:
class TutorialPageViewController: UIPageViewController {

    weak var tutorialDelegate: TutorialPageViewControllerDelegate?

    ...

    override func viewDidLoad() {
        super.viewDidLoad()

        dataSource = self
        delegate = self

        ...

        tutorialDelegate?.tutorialPageViewController(self,
            didUpdatePageCount: orderedViewControllers.count)
    }

    ...

}

...

extension TutorialPageViewController: UIPageViewControllerDelegate {

    func pageViewController(pageViewController: UIPageViewController,
        didFinishAnimating finished: Bool,
        previousViewControllers: [UIViewController],
        transitionCompleted completed: Bool) {
        if let firstViewController = viewControllers?.first,
            let index = orderedViewControllers.indexOf(firstViewController) {
                tutorialDelegate?.tutorialPageViewController(self,
                    didUpdatePageIndex: index)
        }
    }

}

protocol TutorialPageViewControllerDelegate: class {

    /**
     Called when the number of pages is updated.

     - parameter tutorialPageViewController: the TutorialPageViewController instance
     - parameter count: the total number of pages.
     */
    func tutorialPageViewController(tutorialPageViewController: TutorialPageViewController,
        didUpdatePageCount count: Int)

    /**
     Called when the current index is updated.

     - parameter tutorialPageViewController: the TutorialPageViewController instance
     - parameter index: the index of the currently visible page.
     */
    func tutorialPageViewController(tutorialPageViewController: TutorialPageViewController,
        didUpdatePageIndex index: Int)

}
Inside TutorialViewController.swift, let’s conform to TutorialPageViewControllerDelegate:
class TutorialViewController: UIViewController {

    @IBOutlet weak var pageControl: UIPageControl!
    @IBOutlet weak var containerView: UIView!

    override func prepareForSegue(segue: UIStoryboardSegue, sender: AnyObject?) {
        if let tutorialPageViewController = segue.destinationViewController as? TutorialPageViewController {
            tutorialPageViewController.tutorialDelegate = self
        }
    }

}

extension TutorialViewController: TutorialPageViewControllerDelegate {

    func tutorialPageViewController(tutorialPageViewController: TutorialPageViewController,
        didUpdatePageCount count: Int) {
        pageControl.numberOfPages = count
    }

    func tutorialPageViewController(tutorialPageViewController: TutorialPageViewController,
        didUpdatePageIndex index: Int) {
        pageControl.currentPage = index
    }

}
Now that everything is hooked up, go ahead and build and run. Everything should be working as expected! You can download the full source code from this GitHub repo.
interesting stuff—thanks a lot for the update!
thanks for the post! very interesting stuff. i was looking at the iOS home screen and i noticed how the dots appear right above the four main apps slots–did they likely achieve this effect in the way you did here? or if you put a bottom bar on a view controller would it automatically move the dots up? anyways thanks again!
Hey Dan,
Thanks for checking my post out. The “automatic” dots are constrained to the bottom of the
UIPageViewController. So, if theUIPageViewControlleris set up to be 100 pts from the bottom of the screen, the dots would also be 100 pts from the bottom of the screen.Hope this helps!
-Jeff
yeah thanks! i had another question that might be beyond the scope of what you’ve been writing about–how can you animate elements between the different pages of a page control? a lot of higher end apps have this lately, where (for example) as you move one page left off screen, an element that was already on that screen moves to the right and then occupies a position on the new page that’s sliding in. a great example of this would be in the linkedin app pre sign in. i imagine that you animate/position the element based on the position of page (e.g. how far to one side it is) but idk how to keep it static or how to detect when the page is moving. thanks for any help!
Hey Dan,
That is definitely a more complex situation. Unfortunately, with a
UIPageViewController, you do not have access to the embeddedUIScrollViewor anyUIScrollViewDelegatemethods. I’ve done this in a previous app, but it required a different architecture. Instead, I used aUIScrollViewdirectly and messed with the positioning of elements based on the scroll position. My views used autolayout and I tinkered with the constraint constants whenscrollViewDidScrollfired.There are a lot of open-source parallax libraries out there available through CocoaPods. Perhaps one of them does exactly what you’re looking for.
Hope this helps!
Jeff
yeah it does, thanks a bunch!
This is really great tutorial! One question though – is it possible to set the same background ‘programatically’ to each screen of the tutorial? I want to add a gradient color instead of white background, I tried to modify this method with adding my code:
private func newPagedViewController(name: String) -> UIViewController {
let background = CAGradientLayer().greenBlue()
background.frame = self.view.bounds
self.view.layer.insertSublayer(background, atIndex: 0)
return UIStoryboard(name: “Main”, bundle: nil) .
instantiateViewControllerWithIdentifier(“\(name)”)
}
but the background is still white… Is there any way of changit it?
Hi Michal,
Are you trying to add a different gradient to each page? Or a single gradient that sits behind all of the pages (attached to the page view controller)?
-Jeff
Thanks! Very useful!
Hey there,
I’m glad you found my post useful! Thanks for the feedback.
Jeff
Great tutorial — the only step that had me confused was #5. I think you should add that you need to hold down the Ctrl key while dragging the container view to the Page View Controller. Thanks!
Hey Bradley,
I guess it depends on your mouse settings. I have the following setting for my mouse: Secondary Click enabled > Click on right side.
Good call though, I should not assume everyone has right click enabled. Thanks for the comment!
Jeff
hi jeff
how can i change dots to custom image?
hey jeff, I have downloaded your sample project on github, but after I practiced all why the next button is not working?
i try to make button next and previous. help me please