
Article summary
After several instances of developers ooh-ing and ahh-ing while they watch me quickly navigate and edit in Sketch, I’ve decided it’s time for a developer’s guide to Sketch. This guide will start with the basics and then jump into some very handy tips and tricks, equipping you with the knowledge you’ll need to quickly and painlessly dissect your designer’s files.
Key Terms
Before we jump into the exciting stuff, let’s make sure we all understand the basic taxonomy of a Sketch file.
Pages
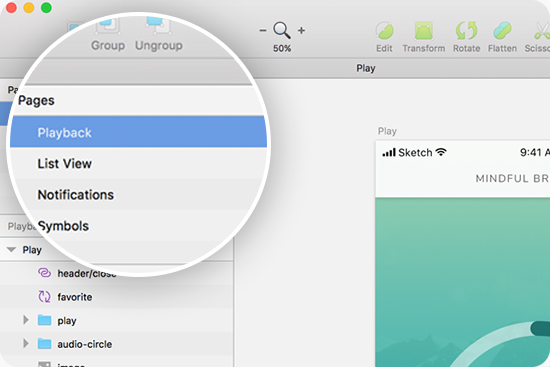
Sketch documents can be broken up into multiple sections called Pages. In the hierarchy of Sketch sections, Pages are at the top. You can access Pages in the left sidebar. It’s common for designers to break up iterations or feature sets into numerous Pages. If you can’t find what you’re looking for in the document, be sure to look here.
Note: By default, one Page will always be called “Symbols.” We’ll talk more about this shortly.
Artboards
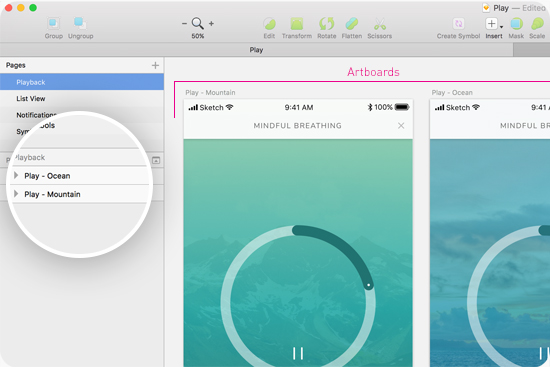
Artboards are the second highest in the hierarchy of a Sketch document. Each Page can contain multiple Artboards. Typically, each screen is created on a new Artboard. You can select an Artboard by clicking on it directly, or by selecting the Artboard name within the sidebar.
Layers
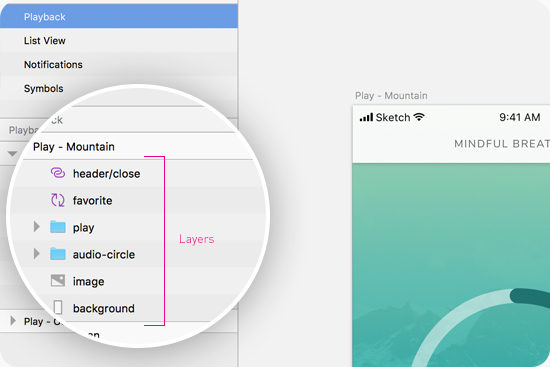
Each Artboard will contain multiple Layers. Every element you see in the document exists as a Layer. Layers can be grouped, combined, and turned into Symbols (we’ll talk about this next). You can access Layers in the left sidebar, or by clicking directly on one within the page.
Symbols
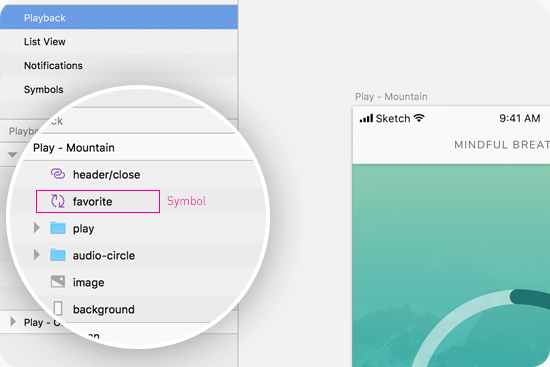
Symbols are reusable design elements. Any Layer or group of Layers can be turned into a Symbol. The great thing about Symbols is that if the root Symbol is updated, all instances of it will be updated, as well. Using Symbols helps ensure that elements in a design are consistent. Double-clicking a Symbol instance will take you to the Symbols Page, where you are able to edit the root Symbol.
You’ll know if a Layer is a Symbol because it will have an icon that resembles “sync” before its layer name in the left sidebar.
Symbols can get quite complex and can even be nested within each other. If you want to dive deeper into Symbols, this series will be helpful.
Libraries
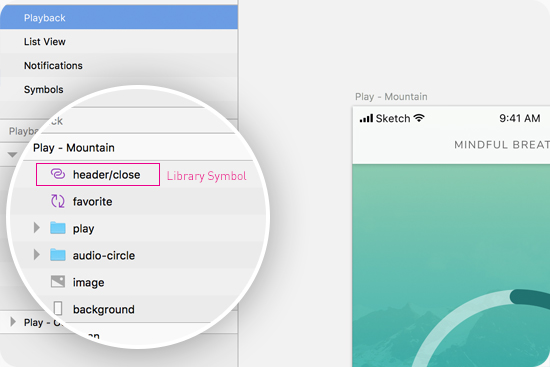
If you thought Symbols were exciting, you might want to sit down before you read about Libraries! A Library contains a set of Symbols, which can be applied to multiple Sketch documents. Editing the root Symbol within a Library will update every Symbol instance in every Sketch document it is linked to. This is a newer feature that makes updating styles in an ecosystem of Sketch documents nearly seamless. A Symbol that is linked to a Library can be identified by the “link” icon before its layer name in the left sidebar.
Sketch will notify you if you are in a Library file that is linked to other files. Do not make changes to the Library file unless you’ve discussed it with your designer first. Your change could affect many files!
Styles
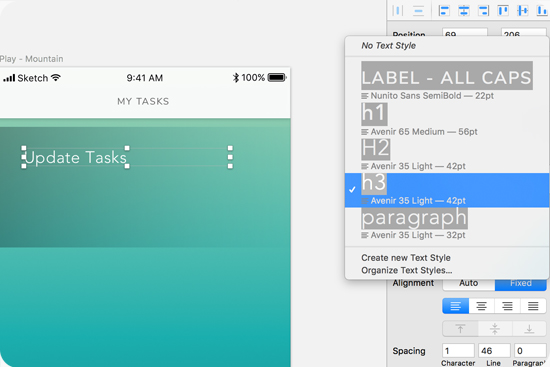
Styles can be used to create a reusable list of text styles (h1, h2, h3, p, etc.). You can also use them to create styles for Layers, including their fill, border, drop shadow, etc. They can be accessed in the right sidebar when a Layer is selected.
Styles make it easy to change the color of your h1 or lessen the opacity of drop shadows used on all elements with the click of a button. If you cannot find defined text styles in a document, look here.
Tips and Tricks
Now that you’re caught up with the basic Sketch lingo, we can jump into some handy tips and tricks.
Determine dimensions of an object
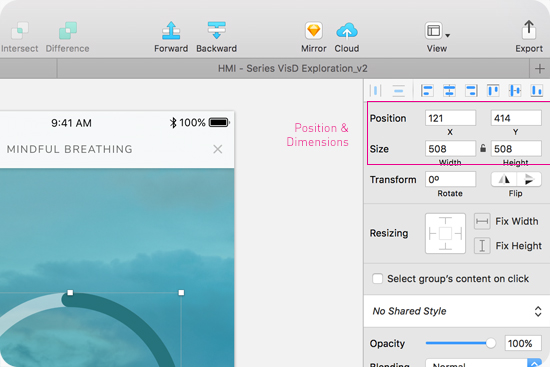
Sketch makes seeing the dimensions and placement of an object very easy. To do so, select the Layer. Look at the top of the right sidebar. You’ll see its size and position.
Detect distance between objects
I often see developers drawing rectangles in Sketch documents to measure the space between elements. While that can work just fine, there is a quicker, more accurate, and easier way!
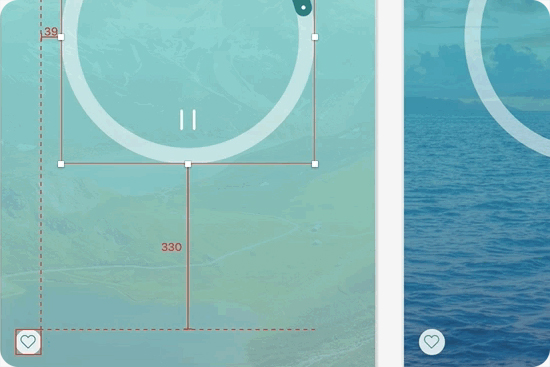
Select a Layer. Hold down the Option key. Hover over the layer whose distance you are measuring. You will see red text appear, indicating the distance.
Locate a Layer: sidebar to Artboard

Sometimes, Sketch files get messy, and you need a better way to locate what you’re looking for. If you’re sifting through the Layer list in the left sidebar and you’ve found the Layer you want, press Command + 2. This will center your view on the Layer.
Note: The Layer list has a search feature. When in doubt, use it!
Locate a Layer: stacked Layers
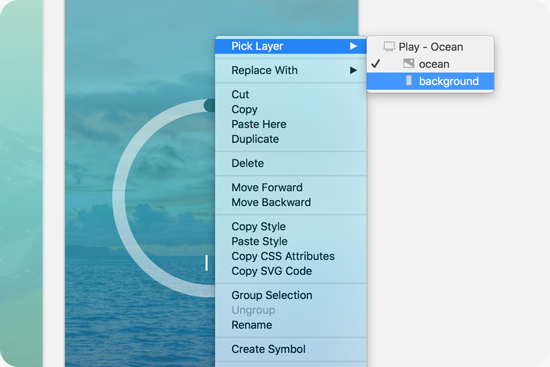
Have you ever tried clicking a Layer, only to select the wrong one? Sometimes Layers are too close to each other, or stacked in a way that makes selecting the right one very difficult. In this instance, right-click the area. A menu will appear. Choose “Pick Layer” and then select the Layer you want.
Unlock a layer
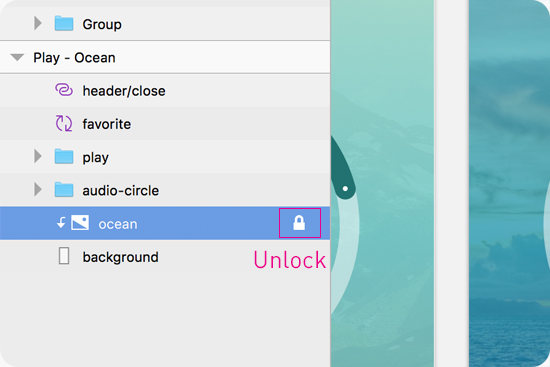
Sometimes, designers will lock Layers that are easy to accidentally grab. This can complicate things when someone who isn’t extremely familiar with the files tries to use it. To unlock a Layer, click the lock icon located to the right of its name in the sidebar. If you can’t find the Layer in the sidebar, you can use the right-click option (previous tip) to locate it in the list.
Copy CSS
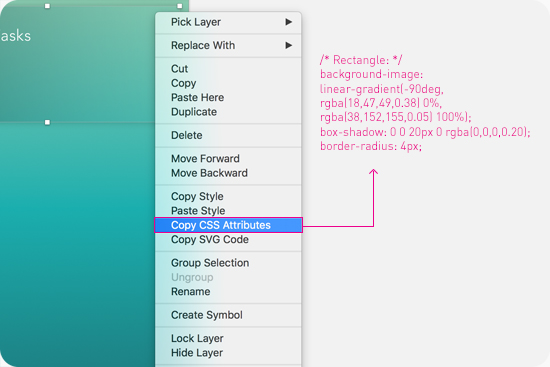
Did you know you can copy CSS attributes directly from Sketch? This won’t work on super-complex groups or Layers, but for basic shapes and text styling, it can be a real time saver. It will copy things like font family, color, gradients, borders, shadows, etc. To copy, right-click an object, and then select “Copy CSS Attributes.” Paste it in your editor.
But That’s Not My Job…
Don’t worry! I’m not suggesting that you trade in your favorite text editor for Sketch. These tips should simply help you better navigate your designer’s Sketch files, enabling you to more efficiently implement the task at hand. While there are other tools that could reduce a developer’s need to poke around in Sketch, chances are, at some point in time, you will need to get your hands dirty in Sketch. Now you have this guide to help you.