
If you are building a Unity application that will require user sign-on, Google’s Firebase is a great option, with Authentication, Database, Storage, Hosting, Functions, and more. Plus it’s fairly easy to get set up! In this tutorial, I’ll explain how to create a Firebase account, register your app, and get your Unity project prepared for Firebase integration.
Note: this tutorial assumes you already have some familiarity with Unity. If you are new to Unity, I highly recommend the official getting started tutorials. If you are new to deploying Unity to mobile platforms, follow this building for mobile tutorial, which has all the information you need to get started.
This is the first post in a series about connecting Firebase to Unity and utilizing Firebase Authentication and Database services. See the bottom of this post for the full list.
What is Firebase?
Google’s Firebase is a BaaS (Backend-as-a-Service) that allows you to create web and mobile apps without server-side programming, making development easier and faster. This single platform provides authentication, storage, hosting, functions, machine learning, analytics, and testing infrastructure. These services are all bundled together into a Firebase project.
A project is a container that supports the sharing of resources between cross-platform apps. A single project can support up to 30 apps, and you can use multiple projects to support multiple environments, such as development, staging, and production.
Creating a Firebase Project
Navigate to Firebase and select the Get Started button. Sign in with the Google account that you want to be associated with your Firebase account. When that’s finished, you will be taken to the Firebase console. This is your home base, where you can view all the Firebase projects you have created.
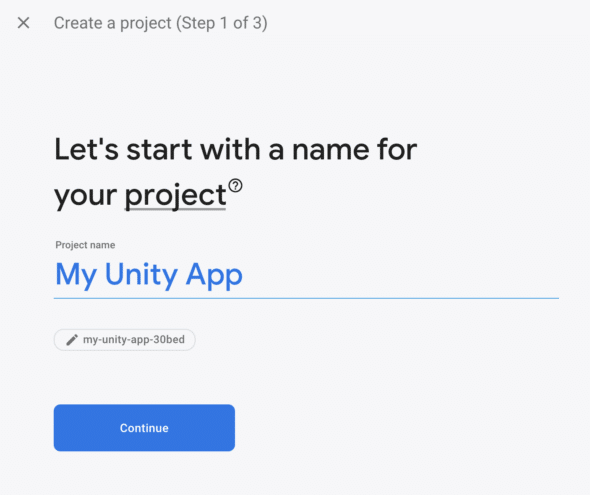
Select Create a Project and give your project a name such as: “My Unity App.” You will notice that right below the project name is a unique identifier such as my-unity-app-30bed. That identifier is what will be used for your database URL, hosting subdomains, and more. The identifier cannot be changed once it is created, so be sure you are happy with it.
Next, you will be asked about adding Google Analytics to your Firebase project. Google Analytics can be useful if you are looking for in-depth reporting on your app. It can provide useful crash reports and user insights. This is not necessary for what we are doing in this tutorial, so feel free to choose whichever option is best for your project.
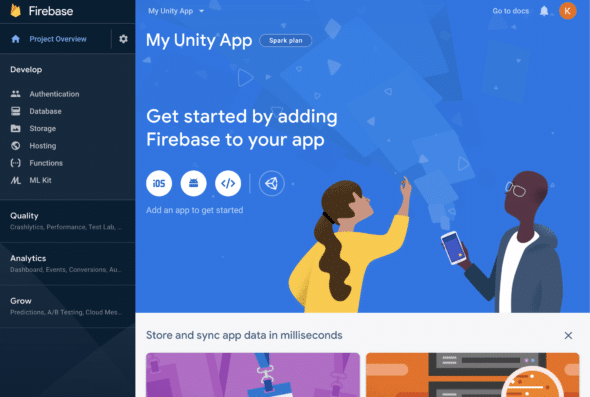
Once you complete the initial set up, Firebase will create your project and provision resources. Your console should now look somewhat similar to the screenshot below. By default, you will have the Spark pricing plan. This plan is free and will have everything we need to set up authentication and users in a database. To read more about what the Spark plan offers, view the full plan details.
Registering Your Unity App with Firebase
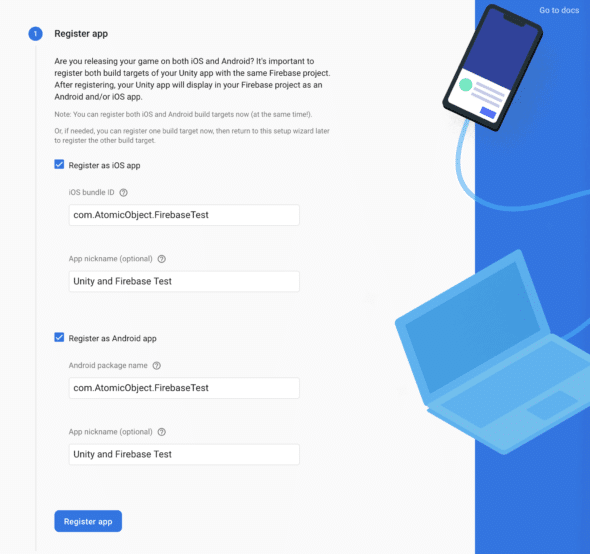
In the console, select the Unity icon to get started with adding Firebase to your project. You can register both iOS and Android apps, but to do so, you’ll have to provide an iOS bundle ID/Android package name. To find that information, open up your existing Unity project. Click on File > Build Settings.
Android
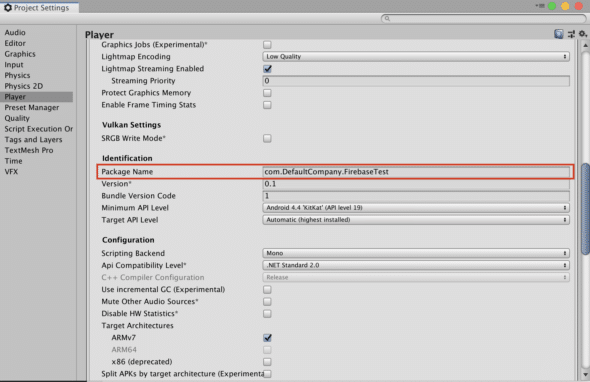
For Android builds, select Android on the Build Settings menu and then click on Player Settings on the lower left-hand side. Here, you will see an accordion menu of Android Settings. Look for Other Settings and then Package Name. This identifier is needed to associate your app with Firebase. Change the name to something unique. It should follow the pattern: com.CompanyName.AppName.
iOS
For iOS builds, select iOS on the Build Settings menu and then click on Player Settings on the lower left-hand side. Under the accordion menu of iOS Settings, look for Other Settings and then Bundle Identifier. This identifier is needed to associate your app with Firebase. Change the name to something unique. It should follow the pattern: com.CompanyName.AppName. This does not have to match your Android package name.

Now you can copy and paste your unique Android and/or iOS identifiers in the Firebase App registration form. Note that these values must always be the same! If you ever change the identifier on Unity, be sure to change it with the setup wizard on the Firebase console.
With the first part of the form completed, go ahead and register the app.
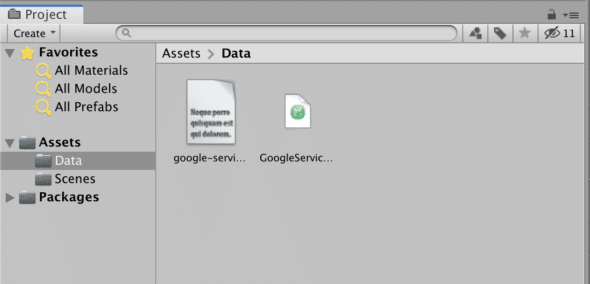
Next, you will need to download the google-services.json for Android and the GoogleService-Info.plist for iOS. These files need to sit somewhere in your Assets directory in Unity. Their sole purpose is to tell your app how to connect to Firebase.
Next, a link to download the Firebase Unity SDK will be provided. This zipped file contains packages for both .Net 3 and .Net 4. If you are using Unity version 2017 or higher, you will need the .Net 4 packages. Open your Unity project and navigate to Assets > Import Package > Custom Package. From the unzipped SDK folder, navigate to your specified .NET version and select FirebaseAuth.unitypackage, FirebaseDatabase.unitypackage, and if you chose to use Google Analytics, import the FirebaseAnalytics.unitypackage also.
Click “next” on the Firebase setup page and then continue to the console. On your console, you should now see that your app is registered! In my case, I have two registered apps: one for iOS and one for Android.

What’s Next?
Next time, I’ll show you how to set up Firebase Authentication so users of your Unity app can sign in with an e-mail and password or create a new account.
This is the first part of a series on setting up Firebase with Unity:
- Project Setup & Getting Started
- User Accounts with Firebase Authentication
- Storing User Save Data with Firebase Database (coming soon)
Hello Kasey
Thank you for your nice tutorial.
How do you manage multiple configs with multiple projects?
We currently have 2 projects, Dev & Production for the same game (iOS & Android). This means having 2 json and 2 plist files.
I recommend looking here: https://firebase.google.com/docs/projects/multiprojects
There are some code snippets on how to use multiple projects in Unity.
Hope that helps!
Thank you for clear and step by step tutorial! Will wait for next parts too :)
Where is part two?
Hello! I am working on Part 2 right now. Once it is published, I will update the links in this blog post.
Yey, nice! Eager :)))
looking forward for part 3, thank you btw.
Hi! Thanks for this article. Most everybody is writing tutorials on how to authenticate using email. What about authenticating with mobile number? This is the difficult one as in Unity 2020 the firebase package seems to be broken.
Here is the link to the broken Unity 2020 and firebase
https://firebase.googleblog.com/2020/08/firebase-compatibility-with-unity-20201.html
“Firebase with unity working on Unity Editor but not on mobile device”
Yes you read it right. My app working fine (updating and fetching data) on unity but when I export it over a device it doesn’t work. Although export is 100% Successful :)
alert(0)