The Oculus Quest 2 exploded in popularity this year. While virtual reality has applications in the workplace, I am most interested in building and playing games. Want to get started building your own? Here are the steps I followed to build my first app for the Oculus Quest 2.
Step 1: Setting Up Unity Workspace.
I chose to use Unity for my experiments. It has good support for VR development, and I am more comfortable with it than Unreal Engine.
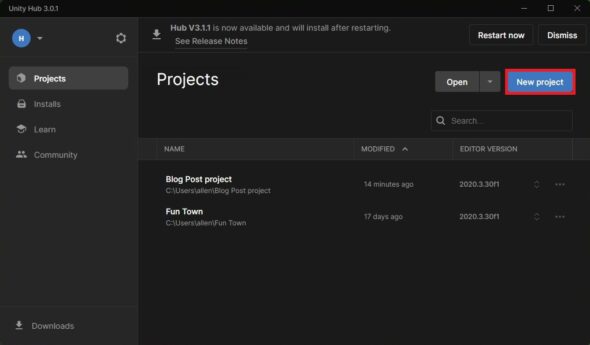
To start, download Unity. The personal edition should suffice for the vast majority of projects. Install the program in a location of your choice. Then start Unity up and create a new project.
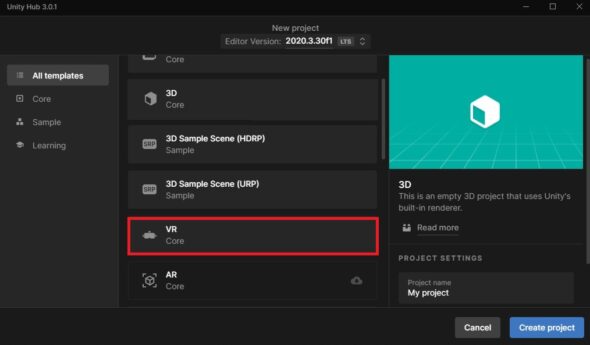
Start the project using the unity VR sample. This project comes with components that handle tracking the controllers and headset. However, some settings need tweaking so it knows what kind of headset to use. Go to Edit/Project Settings and then find “XR Plug-in Management.” Once there, select the Android tab and make sure Oculus is checked. The settings should look like the following: 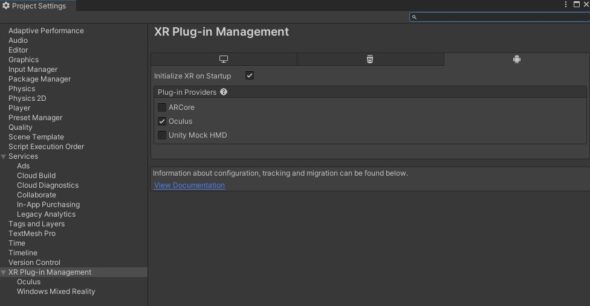
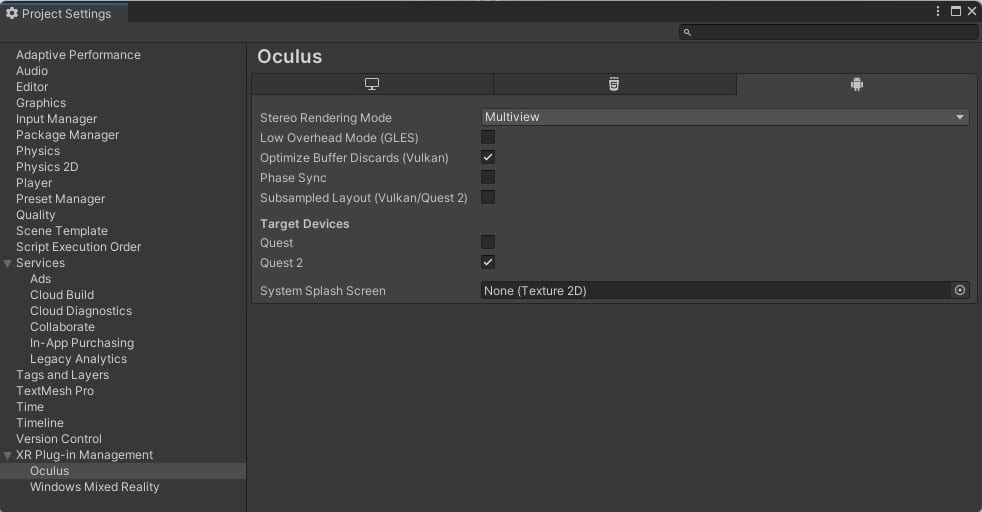
Next, on the left side under the XR Plug-in Management option, click on “Oculus.” Make sure Quest 2 is checked as the target device like so:

Now the project is all set. It is time to set up the device for development.
Step 2: Setting Up the Device
For development, the Quest 2 headset will need to be paired to the PC development with a USB cable and to the Oculus phone app over Bluetooth. Both are available here. Follow the instructions from Oculus to pair the device to the PC and a mobile device.
After the device pairs, turn on development mode. To do so, open the Oculus mobile app and go to the Devices tab. You should see the headset paired to the phone. Under Headset Settings, there should be a “Developer Mode” heading visible. Tap that and then enable the toggle. The app will display a prompt to create a developer account. Follow the instructions from Oculus to fully enable developer mode.
Step 3: Loading the App onto the Device
Now, it’s time for the final preparation for the most exciting part, adding the app to the device.
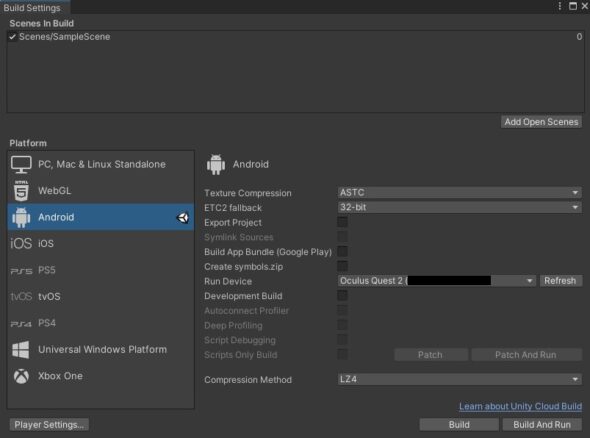
Return to the Unity project and then navigate to File/Build and Run. This will open a window that shows the different target platforms Unity can build for. Select Android since the Oculus is an Android device.
Of the settings listed to the left, the ones that should be modified for this first build are Texture Compression and Run Device. Set the compression to ASTC. Then from the Run Device dropdown menu, select the Oculus Quest headset. If the device does not appear listed click refresh. Lastly, add the current scene to the build by clicking the “Add Open Scenes” button in the top right. The settings should look roughly like the screenshot below.
Now press Build and Run. Unity will prompt you to save the build. I would encourage saving the build in a new “builds” directory to have some version control. Once the build completes, the game will be automatically saved to the headset and launched. Put on the headset and observe the virtual world!
To exit press the “Oculus” button on the right controller, and then click exit on the menu. To relaunch the app, go to Apps and then, in the filter dropdown to the top right, select “Unknown Sources.” Then click on the app that matches the name of the project.
Wrap Up: Building an App for the Oculus Quest 2
From this baseline, it is all up to your imagination. Crafting an environment involves texturing and shading. Scripts and plugins generate interactions with the virtual world. You can create your very own metaverse or your personal yoga studio on a mountaintop.