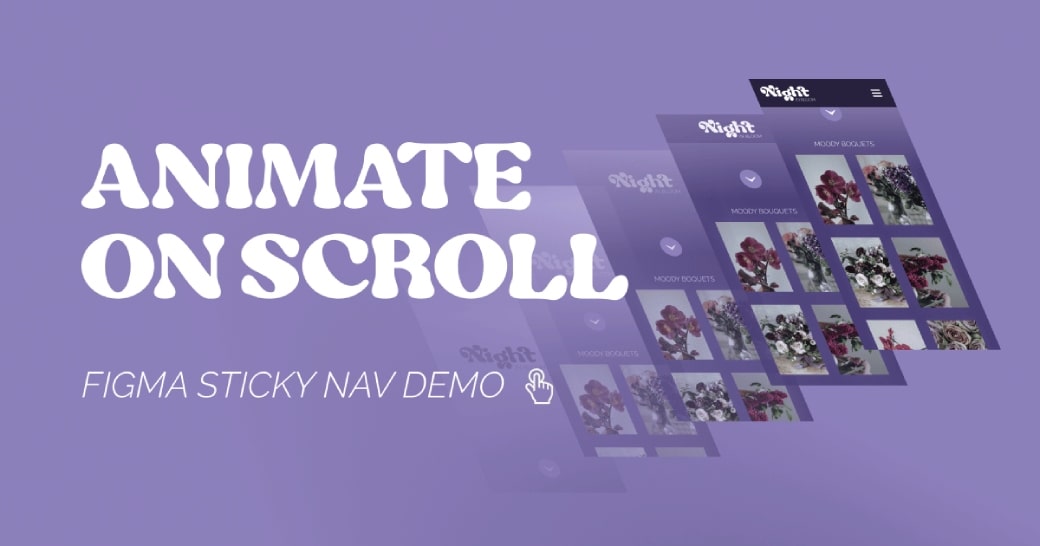
Learn to create a scroll effect with an animated sticky header in this simple Figma design tutorial. Download the demo file from Figma Community and follow along.
Animations, transitions, and microinteractions play an important role in user experience design. They can be used to deliver visual feedback, encourage specific behaviors, or capture a user’s attention. Generally, they help to create more tactile and delightful experiences.
The list of animation tools available to developers is constantly growing. The possibilities for creating interactive experiences are virtually limitless. We have CSS transitions and keyframes, SVG animations, Javascript libraries, and even webGL for more experimental visual effects. The list goes on. When it comes to design tools, however, there is still a lot to be desired.
Simple hover effects or state changes are a snap to design, but some effects are still a challenge to create in tools like Sketch or Figma. Specialized apps like Framer or Lottie offer flexibility but can be more time-consuming than they are worth.
Static prototypes can usually get the job done, however, design animations are sometimes essential in communicating how an interface should respond to user input.
Maybe you’re a designer who knows enough code to be dangerous and can hack together a prototype. But, there has probably been a time when the limitations of your design tool meant you had difficulty conveying your vision to stakeholders or developers. You can’t always rely on the imagination to fill in the blanks.
Figma continues to add new features to make animations and micro-interactions easier to design. Last month they added a ton of new updates including some slick spring animations. There are still many limitations. One missing feature I hope to see added soon is the ability to animate on scroll.
What are scroll animations?
A scroll effect can be used to do several things in a website or application, including:
- Changing properties like color or visibility on scroll. For example, creating a header or navigation with a transparent background that changes to a sold color when a user scrolls down the page.
- Creating “sticky” elements that switch to a fixed position when they reach a specific scroll depth. Like sticking a secondary nav or sidebar just below a primary nav when it reaches the top of a page.
- Changing the size of elements as they enter the viewport to add emphasis.
- Sliding elements into view when scrolling to a page section.
- Creating parallax or layered animation effects.
If you too hope to see this feature in Figma soon, please upvote it here. In the meantime, use this tutorial series as your guide to learn a few hacks and workarounds for creating scroll effects in Figma. Follow along below to get unstuck!
Let’s Create An Animated Sticky Header
In this tutorial, I’ll show you how to animate a logo into a sticky navbar on scroll in Figma. I’ll use animations to transition between multiple artboards, easing from one state into the next.
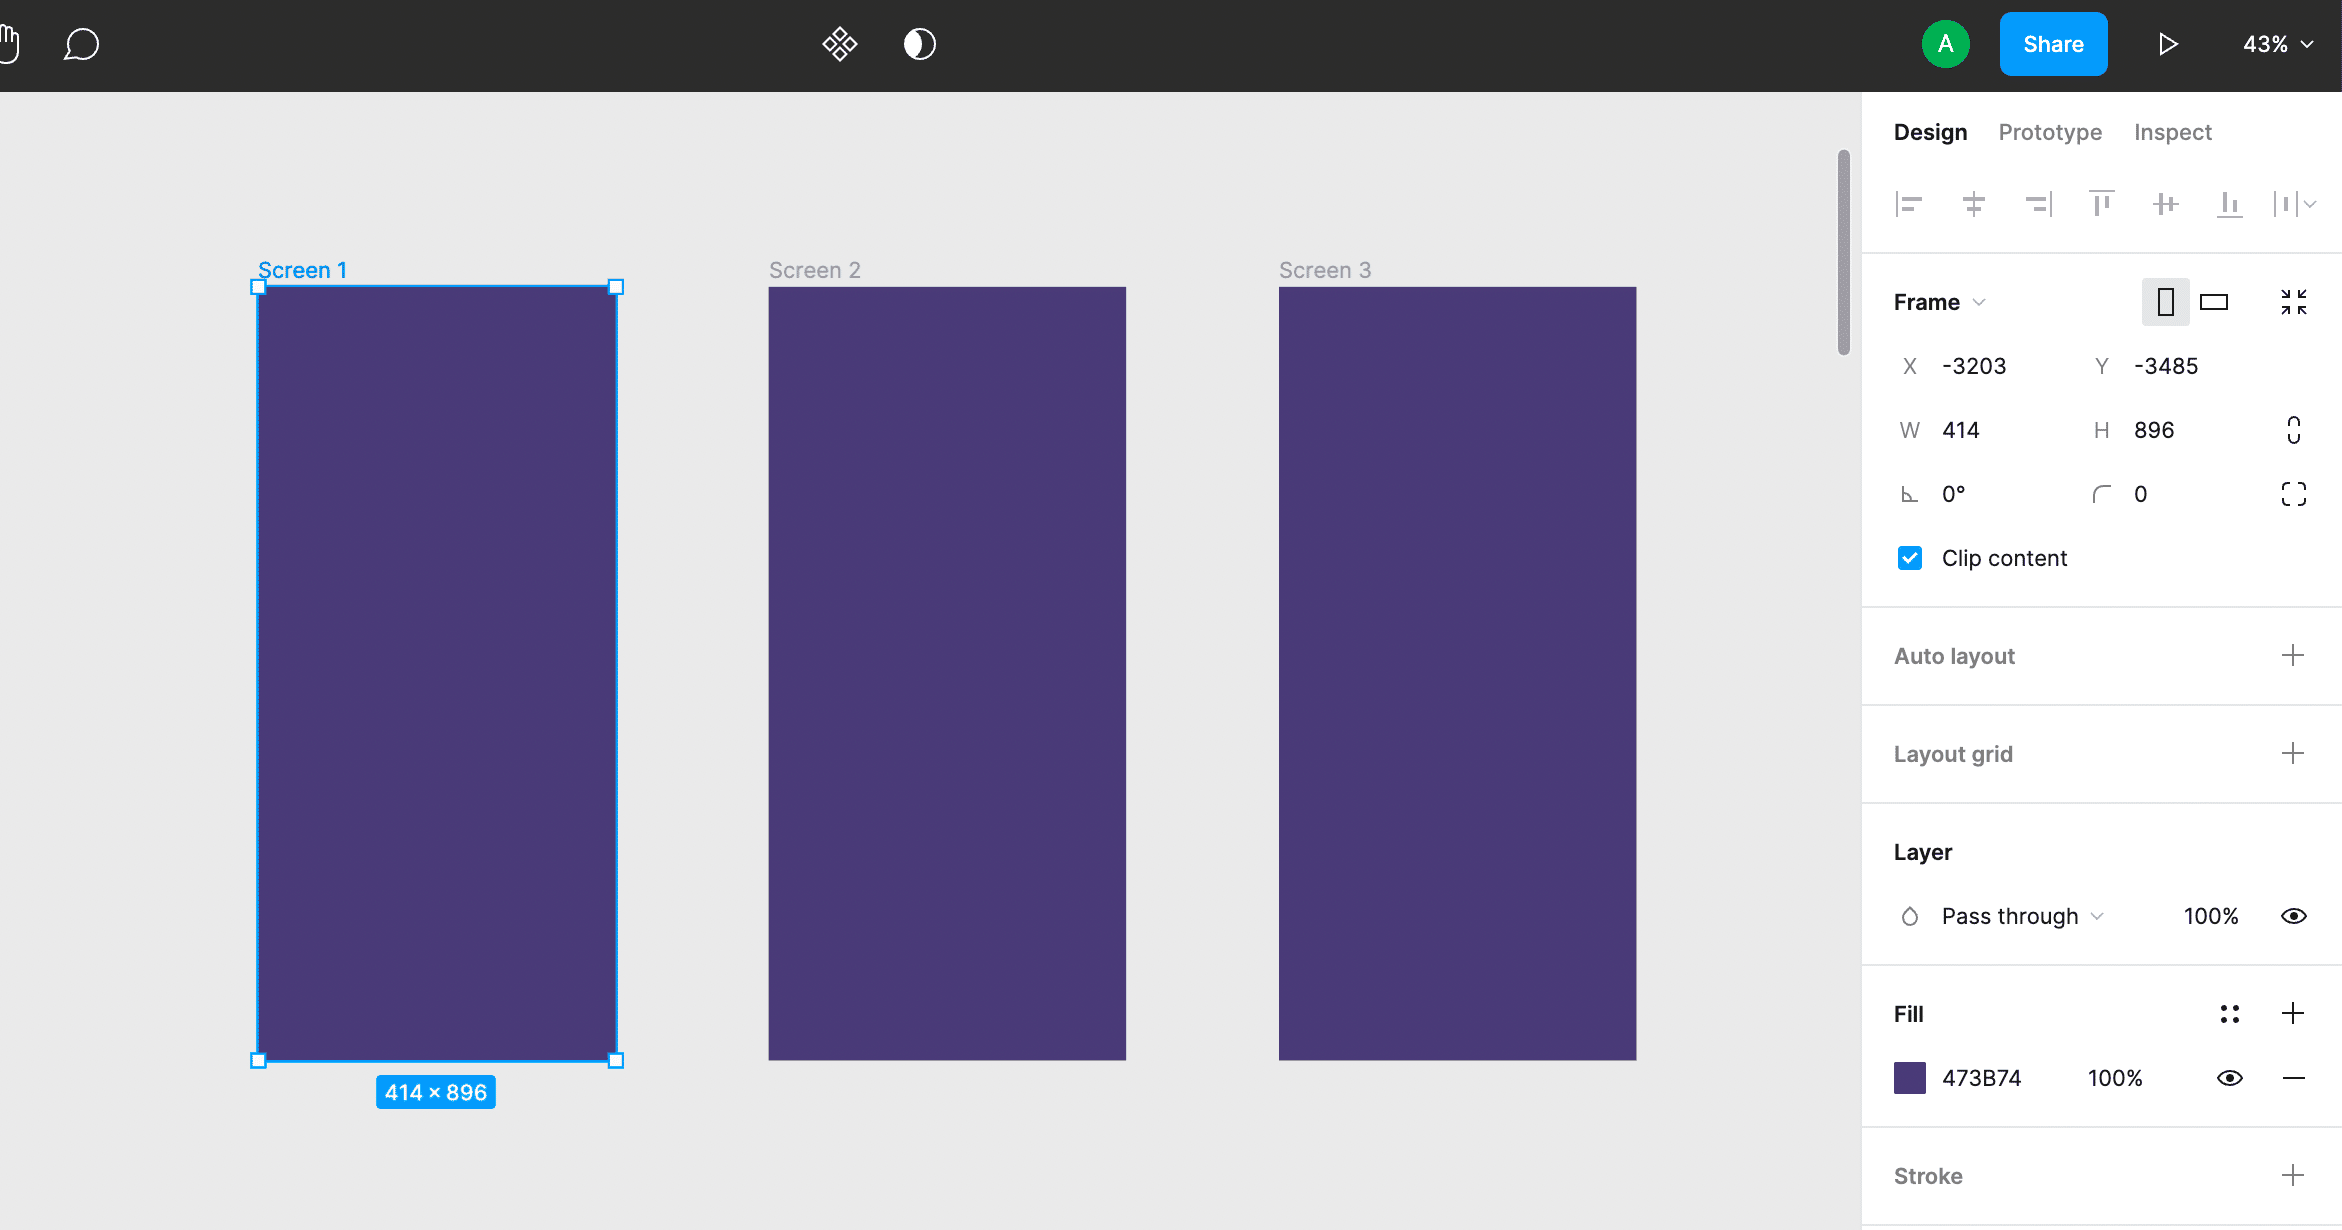
Step 1: Set up your space.
In your Figma file, start by creating three artboards. For this tutorial, I’m prototyping on iPhone 11 Pro Max, but you can use any dimensions. These artboards will essentially be used to storyboard our animation.
Step 2: Create your navbars.
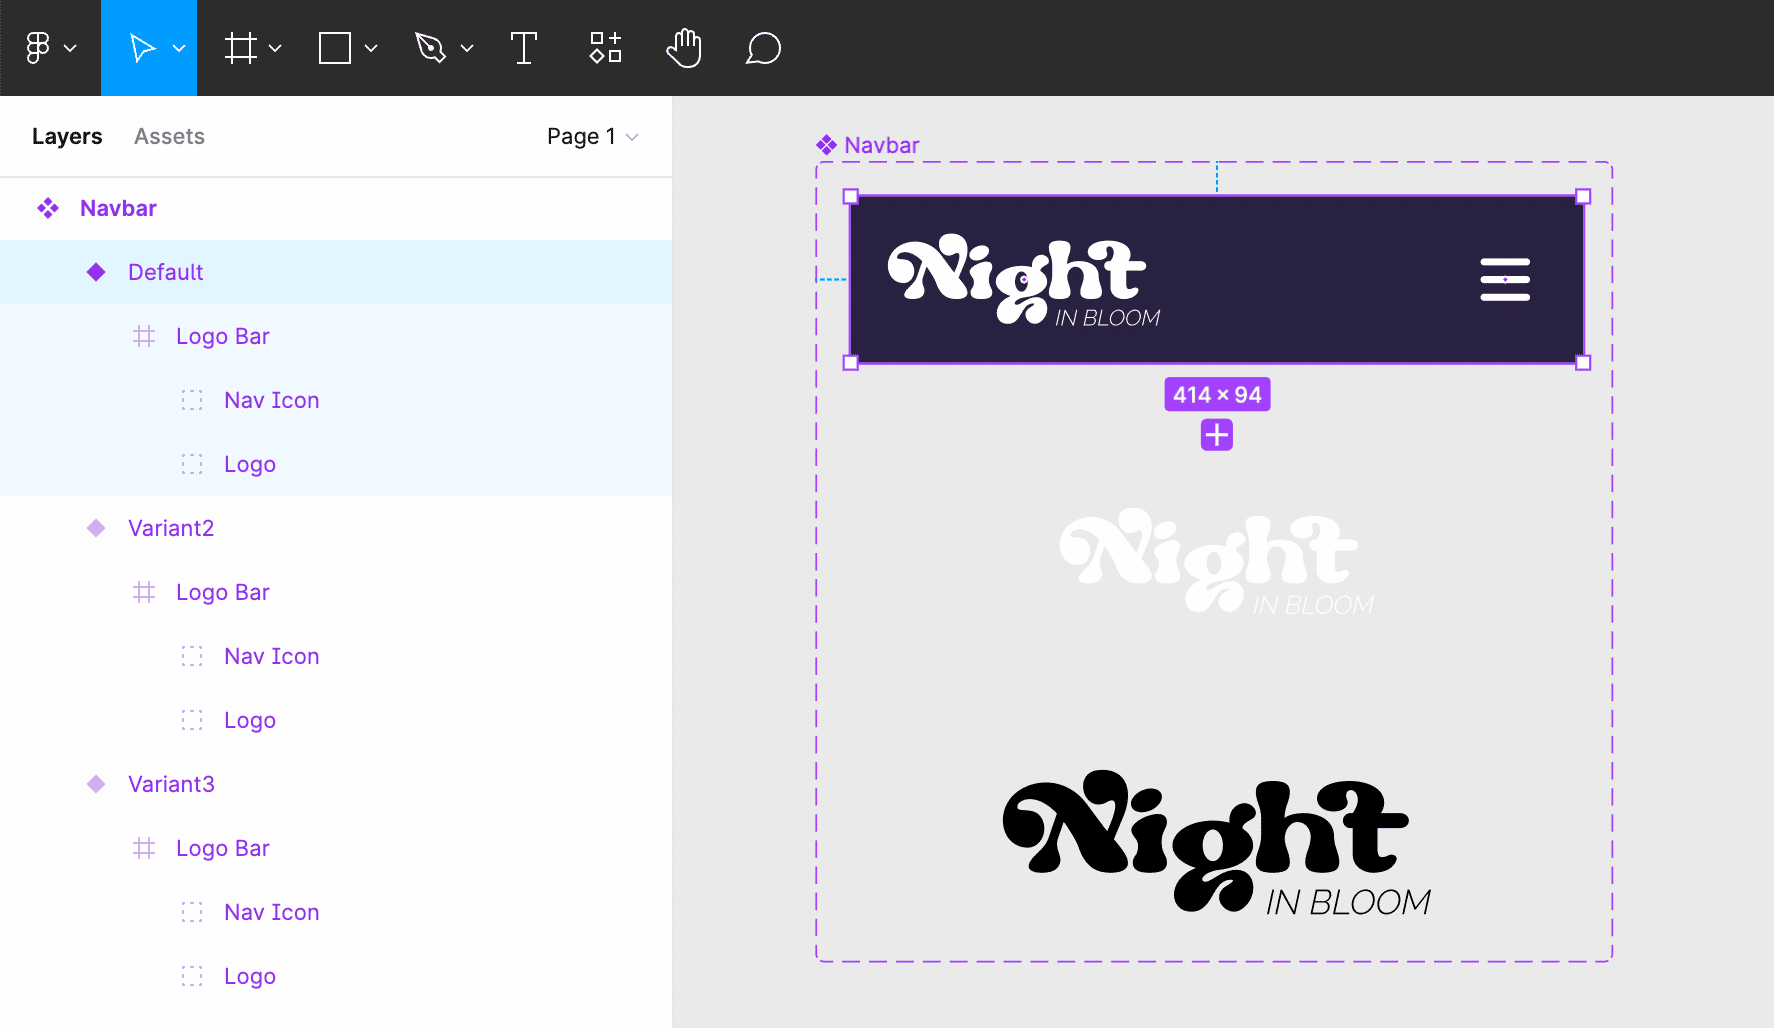
Create a frame that is the same width as your artboard. Set the height to 100px (or whatever you would like your final navigation height to be.) We will use this frame to create three variations of the navbar.
Design your navbar. In the frame, add a white logo or some text and a nav icon. Then set a dark background color. Name your frame and layers to make them easier to distinguish later on. Create two copies of your navbar frame. (You could also make component variants rather than copying if you prefer.) Ultimately we want to end up with three versions of the navigation:
- Version 1 – Set the background fill to 0%, and change the logo to a darker color.
- Version 2 – Set the background fill to 0%, but keep the logo white.
- Version 3 – Your original nav, in its final state.
Step Three: Create your page content.
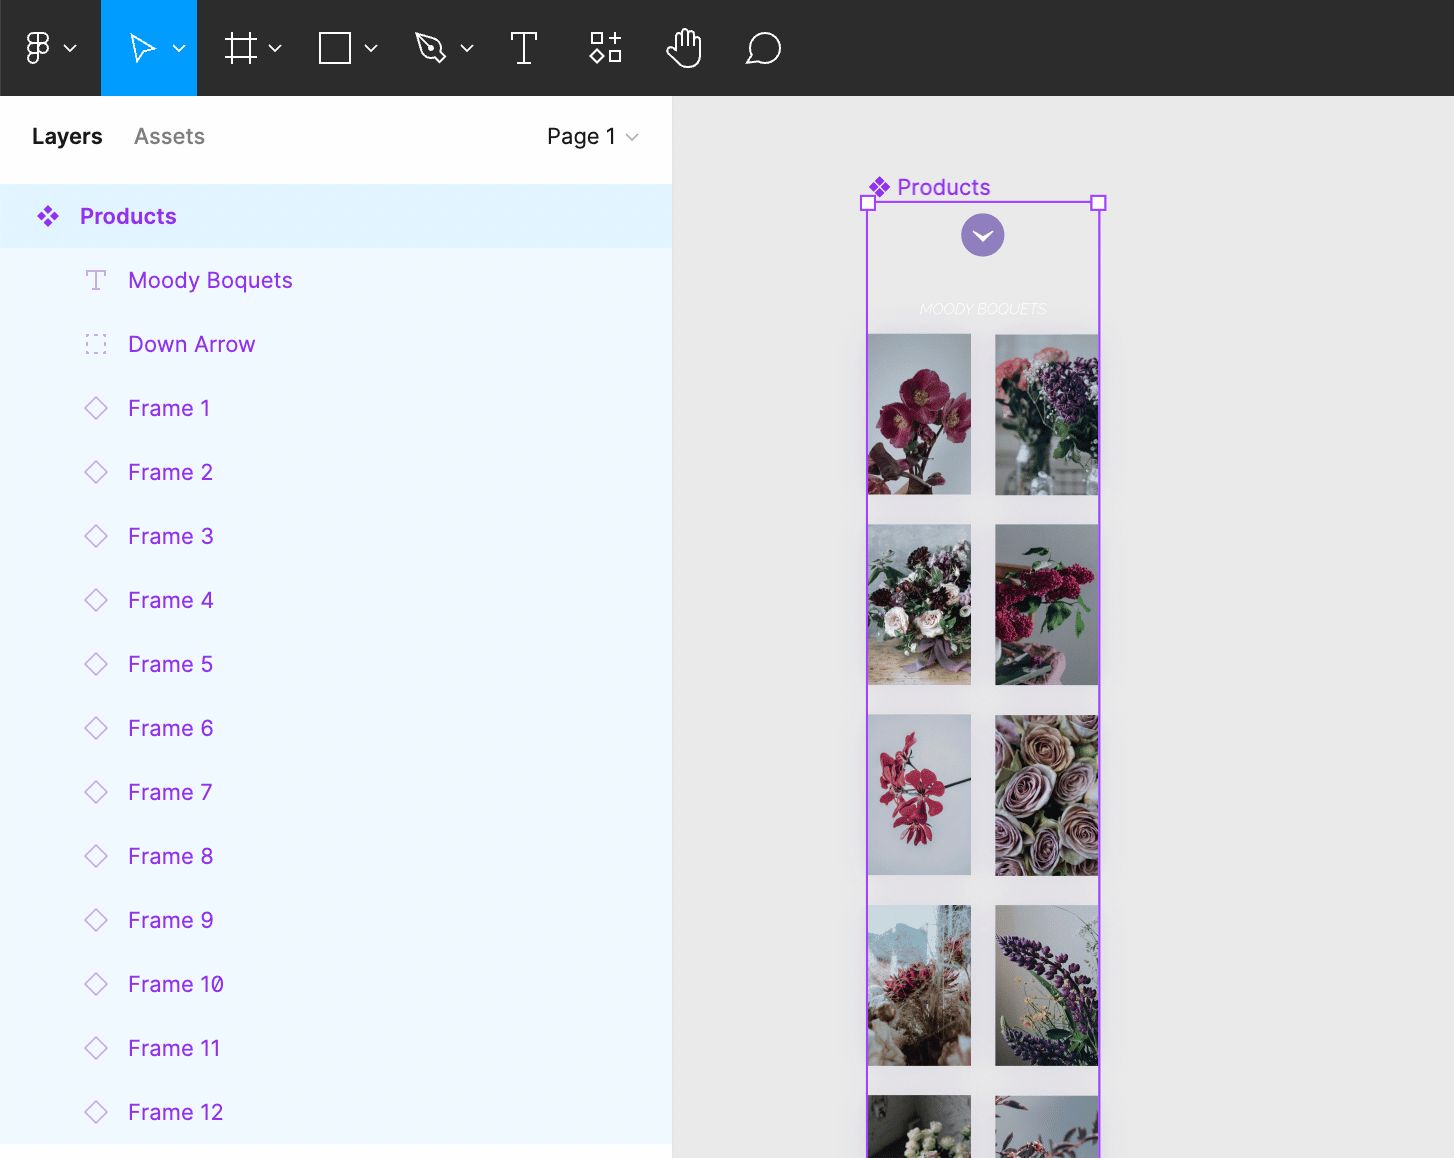
Next, we will need to create a frame that contains some content for our screen. In my example, I’m setting up a 2 x 12 grid of products for a fictitious flower boutique. You can add anything you like, but keep your frame width slightly narrower than your screen artboards, and around two times the height of your screen dimensions. In my example, I made my product list around 330px x 1720px to fit well on the iPhone 11 Pro and allow for scrolling.
Step 4: Time to pull it all together!
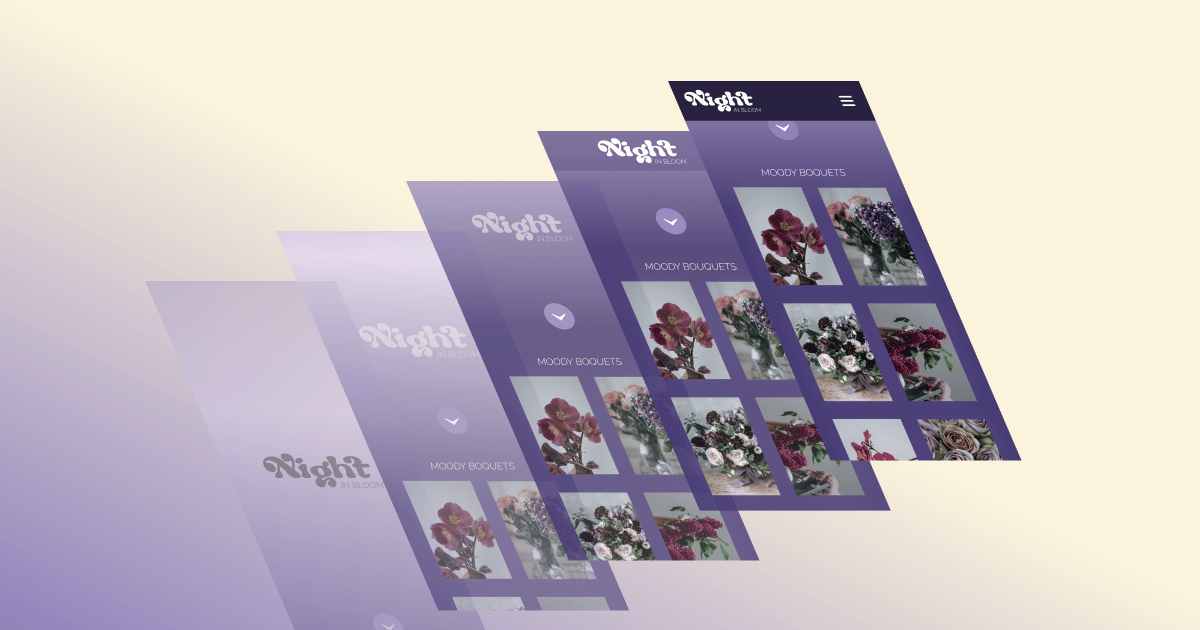
Now that we have all of our page elements created, it’s time to add them to our artboards. Set them up like this:
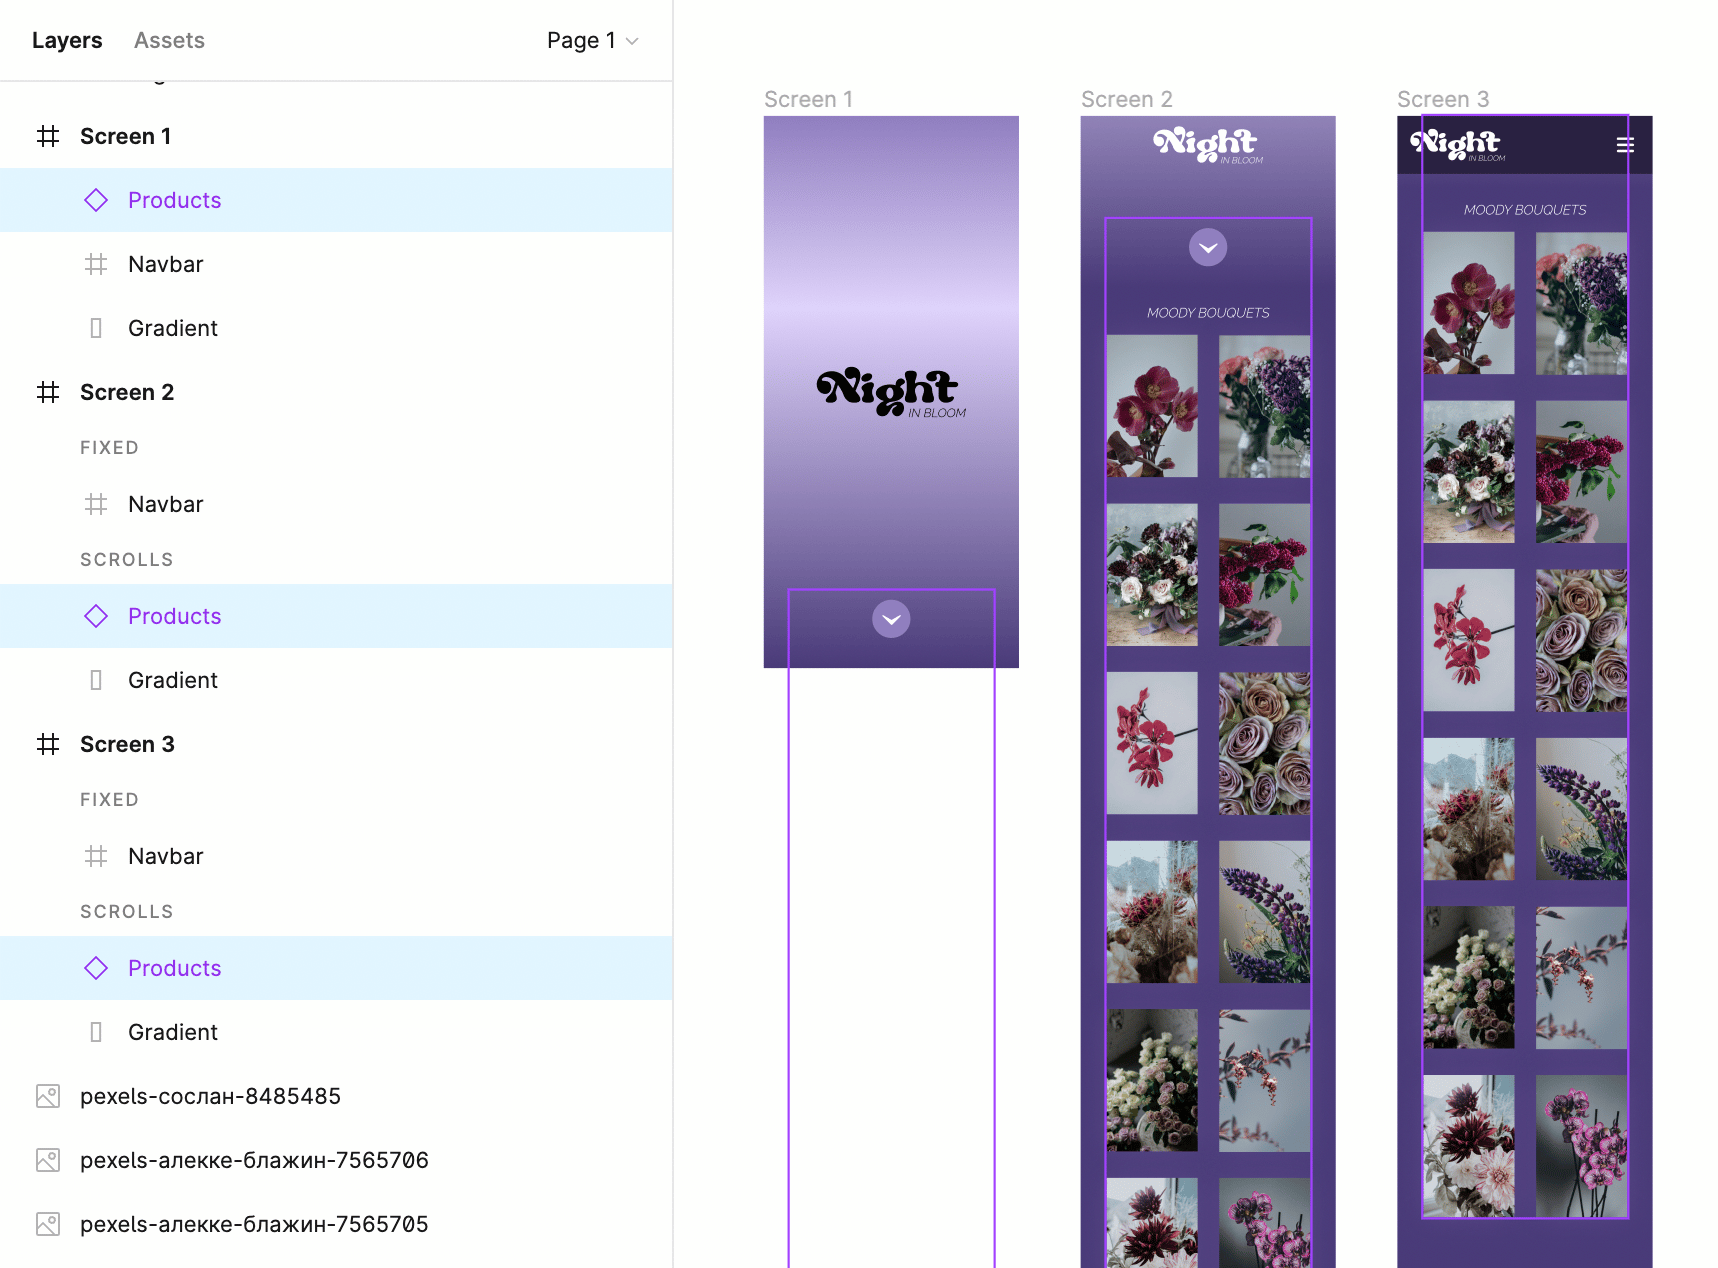
- First Artboard: Add your Version one nav centered on the page. Add your page contents and position them at the bottom center, off the screen. If you like, you can have the top of the container peeking into the frame. In my example, I have a button showing. Make sure the navigation layer is above the layer with your page contents.
- Second Artboard: Add your Version 2 nav at the top center of the screen. Pull your page contents into view. Again, make sure the navigation layer is above the layer with your page contents.
- Third Artboard: Add your original navigation to this screen and set the position to fixed. Move your page contents up slightly so they start to slide under the navigation.
If you want to add additional layers, you can position them similar to your page contents. I also created a rectangle with a gradient fill to add some depth. Make sure all of your layers are in the same order on each screen before moving on to the next step!
Step 5: Make it scroll!
Now it’s time for the fun part — adding scrolling animations to make it all work!
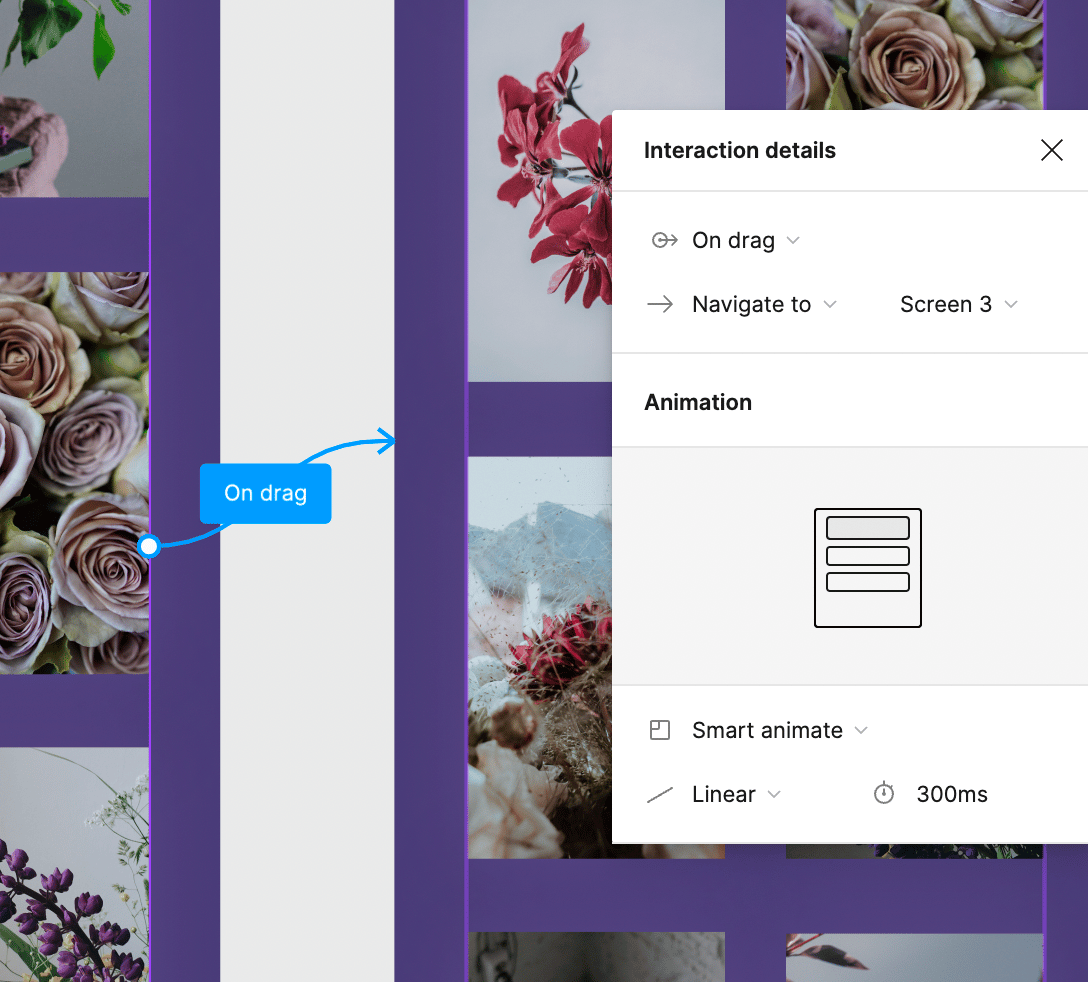
- Link your first artboard to your second artboard, setting your transition to smart animate on drag.
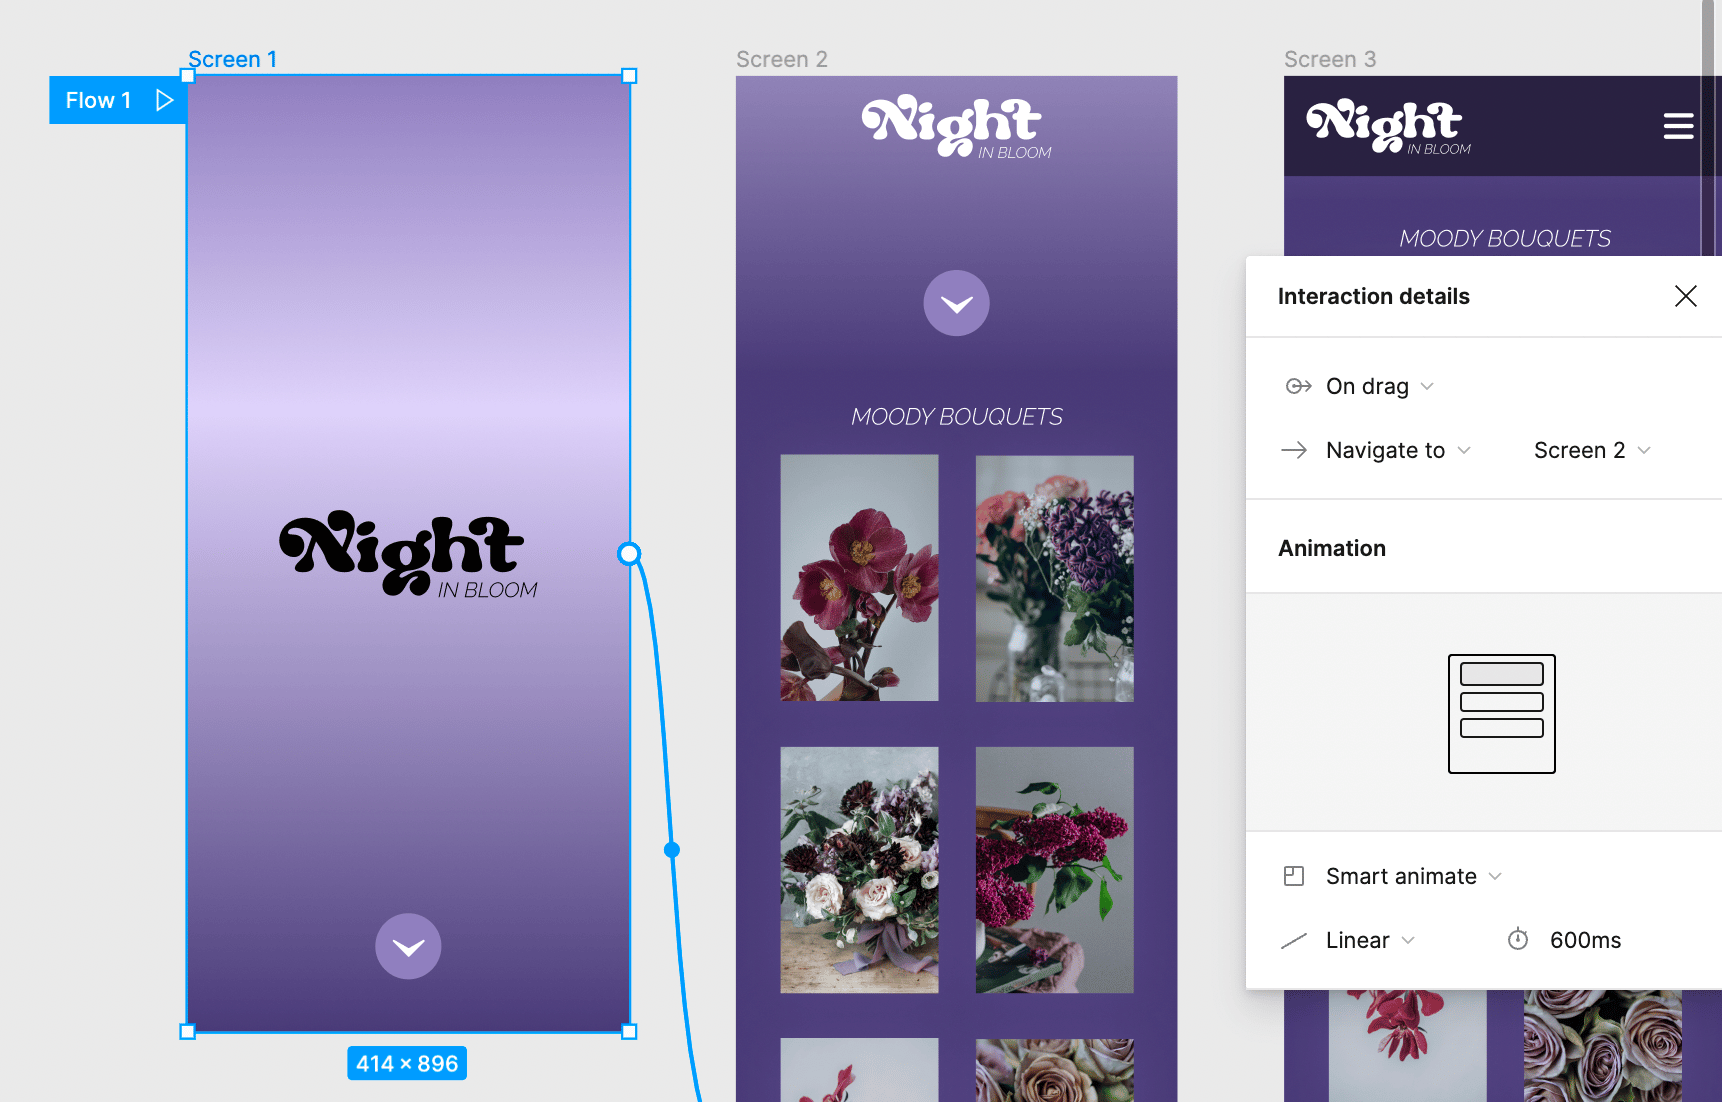
- In your second artboard, link your page contents (not artboard) to your third artboard and use the same settings to smart animate on drag.
- Bonus points: If you want to make your animation reversible simply link an element at the top of your second and third artboards to transition back to the previous screen on click.
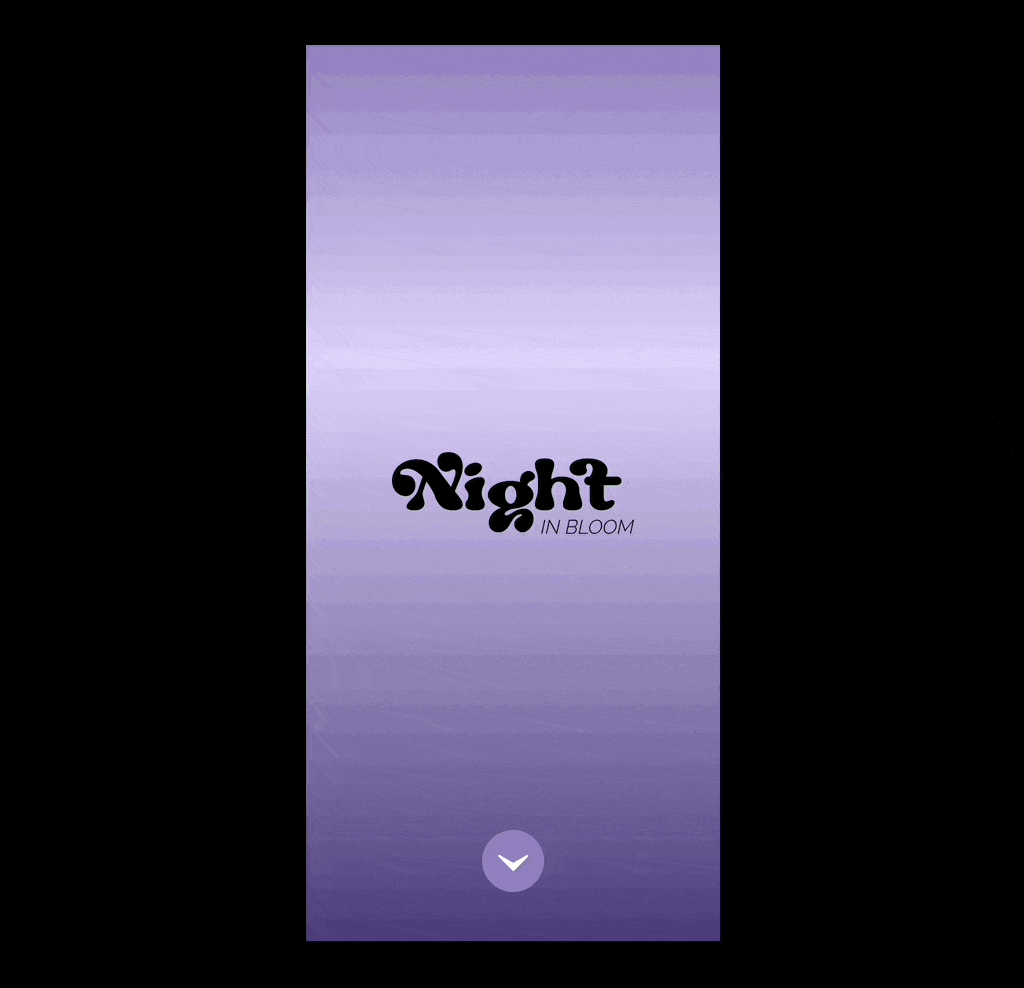
Now, preview your prototype and you should see something like this:
If needed, you can modify your interaction settings and timing to make the transition of your screens a little smoother. I ended up setting the smart animations to linear at 600ms.
Creating an Animated Scroll Effect in Figma
I hope this tutorial has been useful as an easy-to-implement technique for adding scroll interactions to your Figma designs. This solution is far from perfect. It does require you to make duplicates of a single screen for a simple animation. But, until more robust features are available to designers, it gets the job done. Now you can apply this any time you want to create a sticky element on scroll!
If you liked this tutorial, keep an eye out for more in this series on slick scroll animations in Figma!
I just implemented the animation on scroll for my sticky header and it looks amazing! The tutorial was super helpful, thanks for sharing the detailed steps. One thing that wasn’t clear for me was how to adjust the animation speed, any tips on that would be great!