
Article summary
By the end of this guide, you will have a project akin to “Hello World” but for Meta Quest headsets. Much of this walkthrough is an abridged version of the
Meta Unity Hello World Guide, but focused on developing with a Mac instead of a Windows machine.
Specs
This guide was written in July 2025, with the following machine specifications. Outcomes may vary depending on your machine
- CPU: M3 Max
- Memory: 48 Gb
- OS: Sequoia 15.4.1
- ~24 Gb of space
- Meta Quest 2
Project Setup Steps
Using Unity
Set up a Unity Account or “Unity ID”. A personal license is fine for the purposes of this guide, which focuses on learning only.
Install Unity 6.1 (6000.1.12f1) from here
Required SDKs
Before creating a project install the following modules.
- Android Build Support
- OpenJDK
- Android SDK and NDK tools
- Meta XR Core SDK
The Android Build Support module can be installed from clicking the “Manage” button from the Unity 6.1 install on the “Installs” page of Unity Hub, selecting add modules, then checking both “OpenJDK” and “Android SDK and NDK” “Android Build Support” under “Platforms”.
The Meta XR Core SDK can be installed via the Unity Asset Store. Click “Add to My Assets”, then click “Open in Unity”. The same can be done with the Meta XR Interaction SDK.
The Android Build Support SDK is required because all of the Meta Quest’s OS is a modified Android build. The Meta XR Core and immersive SDKs are required for supporting building projects for the Quest.
Creating the Demo Project
Go to projects and select “Universal 3D” template. Use the Unity organization that was created for you. Click the project name field and change from “Create new project” to “Create new local project”; Then save to a local directory, click “Create project”, and you will be sent back to the Unity Projects view.
Setting up the Scene in Unity
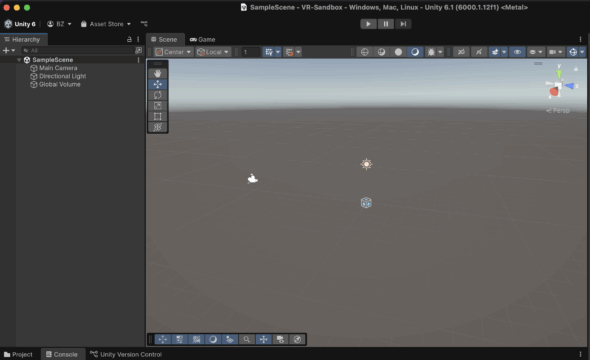
You’re ready to open the project! The project Hierarchy should only have a camera, directional light, and a global volume.
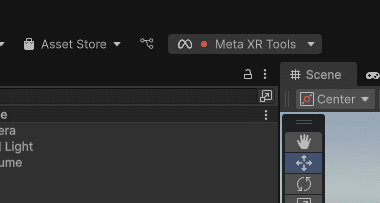
Before jumping into building you must install the Meta XR Core SDK you added to your Unity account earlier. Navigate to the “Asset Store” dropdown on the top left and select “My Assets”. You should then see the Meta XR Core SDK in the Package Manager modal that appears. Install it, restart Unity, and see the “Meta XR Tools” tab in your project view
Notice that I have a red dot in mine. This indicates that two required fixes are needed, according to the Project Setup Tool.
- I need to install the “XR Plug-in Management” plugin in project settings. Click XR Plug-in Management from the sidebar of project settings and install.
- I need to use the OpenXR Plugin (com.unity.xr.openxr) Package. This is installed from the Unity Package Manager (Hidden in Asset Store → Click “My Assets” → Unity Registry → Search for com.unity.xr.openxr)
After fixing these two issues, several other issues may pop up in the Project Setup Tool. They can be resolved by selecting “Fix”. After this, the Meta XR Tools indicator should now be orange

Add an XR Camera Rig
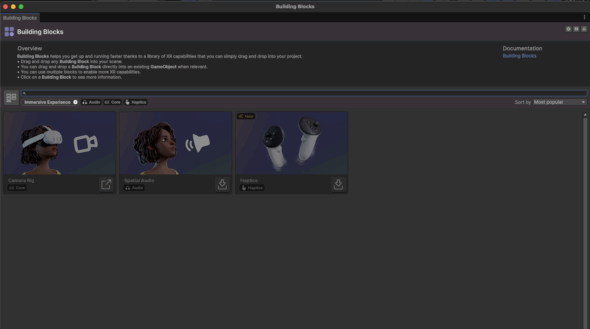
Finally, we are done adding plugins, and we can start building. Luckily the Meta XR Tools plugin has a “Building blocks” section that is perfect for Hello World projects. Click the Meta XR Tools dropdown, and then select building blocks and a series of preset components or “blocks”.
Select “Immersive Experience” and drag the Camera Rig into your scene. Delete the default Unity Main Camera. See the Meta documentation on camera rigs if you want to configure any further.
Add Grabbable Object
Before testing, we should add something interesting like grabbing objects.
Install the following packages from the Asset Store/Package Manager:
- com.meta.xr.sdk.interaction.ovr
- Note you need to install by name from the package manager, hit the plus in the package manager, then paste
com.meta.xr.sdk.interaction.ovrand hit enter - com.unity.netcode.gameobjects@^1.7.1
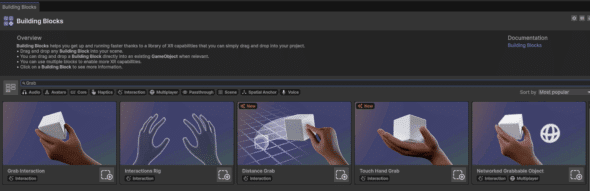
Once these packages are installed the “Grab Interaction” (and a variety of other grabbing tools), should be available in your building blocks. Add the basic “Grab Interaction” to your scene.
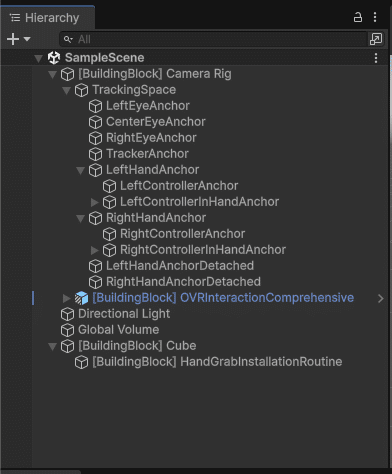
Before we move to testing let’s check in. Here is what my scene hierarchy looks like:
Testing Project on Headset
Meta “Link” is only supported on Windows. The official guide for Meta points to using the simulator for testing on a Mac. For fast iteration, the simulator is not a bad solution, but it’s more satisfying to see it work on your headset.
Mac requires deploying the APK to the headset.
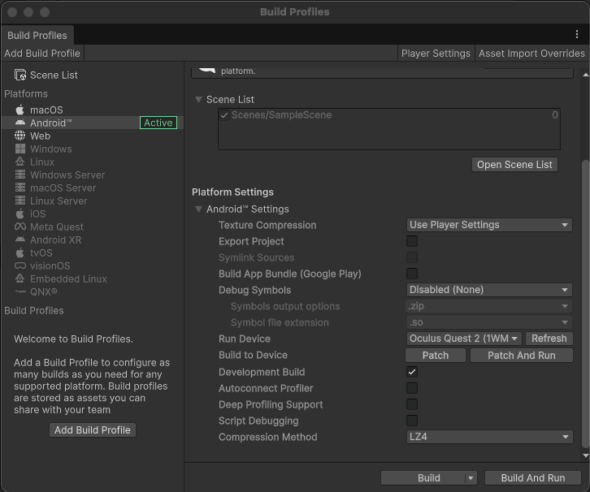
1. File → Build Profiles → Select “Android” under Platforms (not Android XR)
2. Click Switch Platform
3. Check Development Build
4. Set “Run Device” to your Quest headset
1. Set your Quest to Developer mode following these instructions from Meta
2. Connect your Quest to your Mac via USB-C
3. Refresh the list after connecting via USB-C
5. Select Build and Run
Note the first run will take longer, and the following builds will be faster. Once it is complete, put on the headset and see your scene!
Final Word
This was the most verbose Hello World I have done. It took approximately an hour to install. Be patient with the knowledge that setting up Unity for VR is a one-time deal, and future projects will reuse the installed packages. That reusability is perfect since the Building Blocks section is incredibly easy to use. Good luck and happy building!