Article summary
No matter what application you are developing, chances are it will require at least one modal view. In case you’re not familiar with them, modals are a special kind of body language apps can use to communicate that something important is happening. Modals are often used to alert that something unexpected has happened, request a confirmation, or provide an opportunity for users to provide additional information to the application workflow.
Regardless of the purpose of the modal, if you want to provide a consistent and understandable experience for all users, it is important to follow the recommended Human Interface Guidelines specified by the operating system. This can be a difficult to accomplish for a couple of reasons.
First, design is not easy. Luckily, iOS gives us some handy tools that reduce our design workload and help us develop apps that look consistent with the built-in apps. Secondly, the information available on the internet is extremely broad; much of it dating back many years and referencing classes and techniques that are no longer preferred.
My hope is that this post will help you understand what tools are available and where to start with iOS modal view implementation. I do not intend go into the design aspect of modals and the discussions regarding when/where modals should be used within your application. Refer to the Human Interface Guidelines linked to above for that information.
Custom UIViewController
When it comes to implementing modals in iOS, there are several approaches that will give you similar results. The first approach is the most flexible and involves making a custom view to contain the entire contents of the modal. This custom view is very similar every other view that you make, but it includes some additional code for dismissing the modal and committing the required changes based on your application’s specific needs.
To add the standard Save and Cancel buttons to the navigation bar, start by creating a subclass of UIViewController. Override the the viewDidLoad delegate method and add the buttons like this:
override func viewDidLoad() {
    super.viewDidLoad()
    self.view.backgroundColor = UICommon.commonModalBackground()
    // Create save button
    let saveButton = UIBarButtonItem(barButtonSystemItem: .Save, target: self, action: "handleSave")
    saveButton.tintColor = UICommon.commonTextColor()
    // Create cancel button
    let cancelButton = UIBarButtonItem(barButtonSystemItem: .Cancel, target: self, action: "handleCancel")
    cancelButton.tintColor = UICommon.commonTextColor()
    // Add the buttons to the navigation bar
    let topViewController = self.navigationController!.topViewController
    topViewController!.navigationItem.rightBarButtonItem = saveButton;
    topViewController!.navigationItem.leftBarButtonItem = cancelButton;
}
This code assumes the existence of two functions: handleSave() and handleCancel(), which will be called when the corresponding buttons are tapped.
In each of these methods, after you perform any required actions such as persisting changes, you must ask the navigation controller to dismiss your custom view. This is done as follows:
func handleCancel() {
    print("Aborting changes to device")
    // Ask the view controller that presented us to dismiss us...
    self.dismissViewControllerAnimated(true, completion: nil)
}
To present your modal, create a NavigationController and initialize it with your custom view controller as the rootViewController. The NavigationController is what provides the navigation bar at the top and gives you a place to add your custom controls. If your modal design does not require a navigation bar, you can skip creating a NavigationController and instead call presentViewController directly on your custom view.
    let modalViewController = MyCustomModalViewController()
    let navigationController = UINavigationController(rootViewController: modalViewController)
    self.presentViewController(navigationController, animated: true, completion: nil)
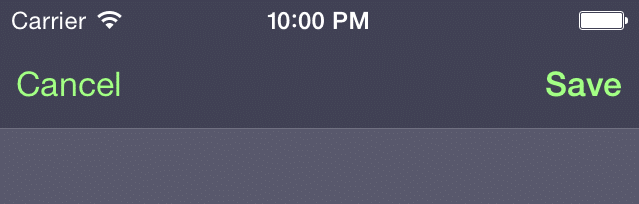
The code above will create a modal that looks something like the image below with standard iOS Save and Close buttons.
By default, the modal will transition over top of the view that presented it by sliding up from the bottom of the screen. It is possible to select a different transition animation, such as a page-turn or dissolve-in style, by setting the modalTransitionStyle property on the view controller to any of UIModalTransitionStyle values. You can also set the modalPresentationStyle property to affect the size of the presented view and the dimming of background views. See UIModalPresentationStyle for more details.
Alerts
In some cases, you might not need a custom view to implement your modal. If all you need to do is alert the user that a problem has occurred, you might be able to use a UIAlertController. This handy class can be used to present a small modal over top of your app while automatically preventing the user from interacting with your app until the modal is dismissed. For example, the UIAlertController looks like this in iOS 9:
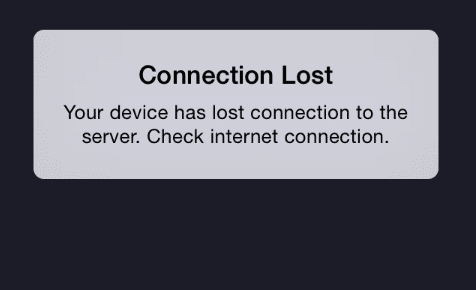
Very little code is required to show an alert like this. You simply need to create an instance of UIAlertController and present it as follows:
    let alertController = UIAlertController( title: "Connection Lost",
            message: "Your device has lost connection to the server. Check that you have a valid internet connection.",
            preferredStyle: .Alert)
    self.presentViewController(alertController, animated: true, completion: nil)
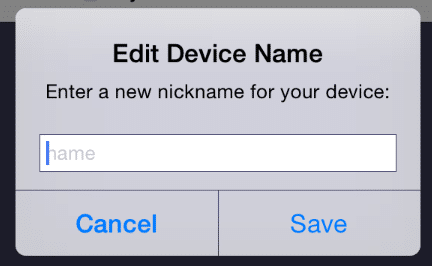
If you need to allow users to enter some text into the alert and cancel or commit an action, you can do so by adding UIAlertActions and text fields to the alert controller.
    let alertController = UIAlertController( title: "Edit Device Name",
        message: "Enter a new nickname for your device:",
        preferredStyle: .Alert)
    alertController.addTextFieldWithConfigurationHandler({
        (textField: UITextField) in
        textField.placeholder = "name"
    })
    let cancelAction = UIAlertAction(title:"Cancel", style: .Cancel, handler: {
        action in
        print("Cancel pressed")
    })
    let saveAction = UIAlertAction(title:"Save", style: .Default, handler: {
        action in
        let value = alertController.textFields!.first!.text
        print("Save pressed. Value: \(value)")

    })
    alertController.addAction(cancelAction)
    alertController.addAction(saveAction)
ActionSheet Alert Style
You might have noticed that the alert above was initialized with preferredStyle: .Alert. The other option for the alert style is .ActionSheet. An action sheet style is intended to be used to provide alternative ways of completing a task or to get confirmation from the user before completing a potentially dangerous task. The ActionSheet style looks like this:

Keep in mind that when you choose .ActionSheet for the style, the alert can no longer include text fields to allow user text entry. Attempting to add a text field will result in a runtime exception.
This post merely scratches the surface of all you can do with modally presented views in iOS. If you want to get really fancy, check out the UIPresentationController class which supports full customization of the presentation and dismissal of modal views.
If you’re just getting into iOS app development, I highly recommend starting with the UIAlertController class and going from there. Good luck!