Article summary
With the addition of the Touch Bar comes the ability to customize it for your own applications. From simply adding buttons to incorporating sliders or color pickers, programming the Touch Bar is a new, creative way to add shortcuts and other functionality into your Mac app.
I spent some time getting familiar with NSTouchBar by playing around with storyboards. Using storyboards, I was able to see what types of functionality I could add to my Touch Bar and test out the new features available to me.
In this post, I’ll show you how to get started with NSTouchBar using storyboards.
What You’ll Need
Xcode 8.1 or later
macOS 10.12.2 or later
Using the Touch Bar Simulator
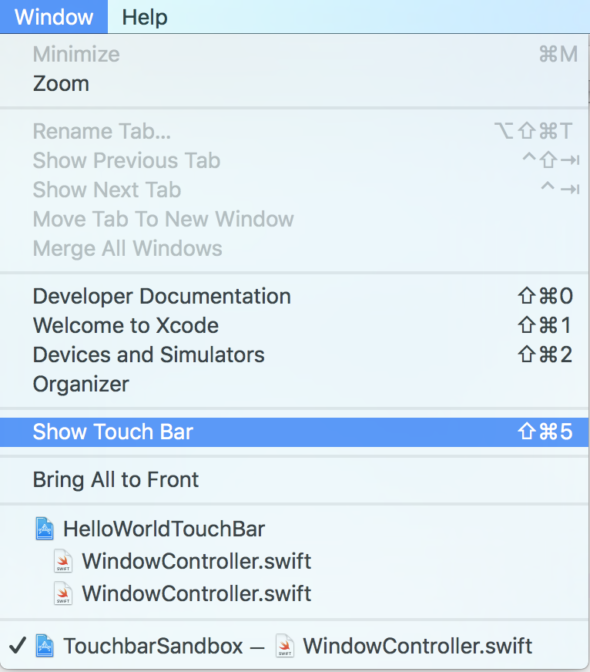
Having a MacBook with a Touch Bar is not necessary for adding Touch Bars to your applications, as Xcode 8.1 includes a Touch Bar simulator. To access this, select Window -> Show Touch Bar or Shift+Command+5.
Adding to the Touch Bar
Once you’ve got your Touch Bar simulator up and running, it’s time to work on what you want to add to it. I chose to use storyboards so I could see all of my options for objects I could add to the Touch Bar.
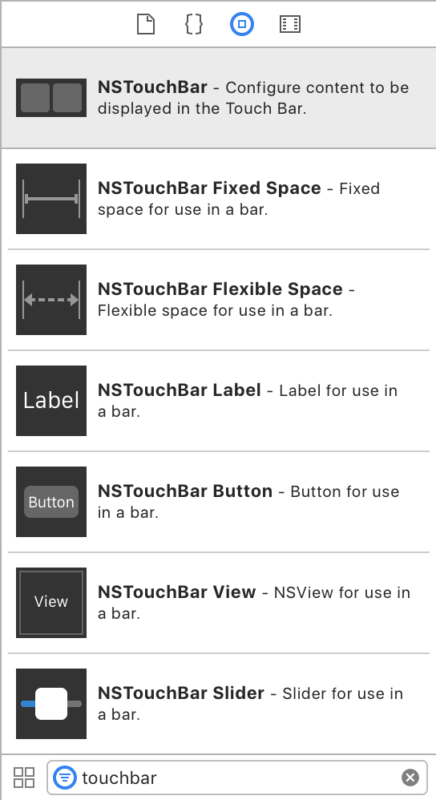
Starting in Main.storyboard, search for “Touch Bar” in the Object Library pane. This will bring up all the objects you can add, as well as the Touch Bar itself: NSTouchBar.
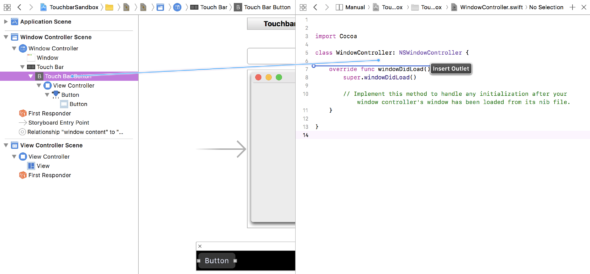
Select the NSTouchBar object, and drag it onto the Window Controller. This should snap it into place between the Window Controller and the View Controller.
Now, in order to add any functionality to the Touch Bar, we’ll need to add a corresponding class to the project for the Window Controller. Add a Cocoa class for the controller to the project, making sure to select NSWindowController as the subclass.
We need to tell Xcode that this class is going to be used by the Window Controller in our storyboard. You can do this by selecting the Identity Inspector in the Utilities pane of the storyboard, then choosing our new class as the custom class for the Window Controller.
Now that we have the controller ready for our Touch Bar, we can start adding buttons, sliders, and more through the storyboard. Begin by finding the NSTouchBar Button in the Objects pane, then dragging and dropping it into our Touch Bar.

Once the button is in place, we need to add functionality, so we’ll hook it up to the window controller. In Assistant Editor mode with the storyboard and the WindowController class showing, CTRL+Click on the button and drag it into the class. Make sure to set this up as an Action with the type NSButton.
This can be treated as any other button when programming with macOS or iOS. Add the action to occur to the function associated with the button. Then run the program, and you’ll see the button show up in the Touch Bar simulator.
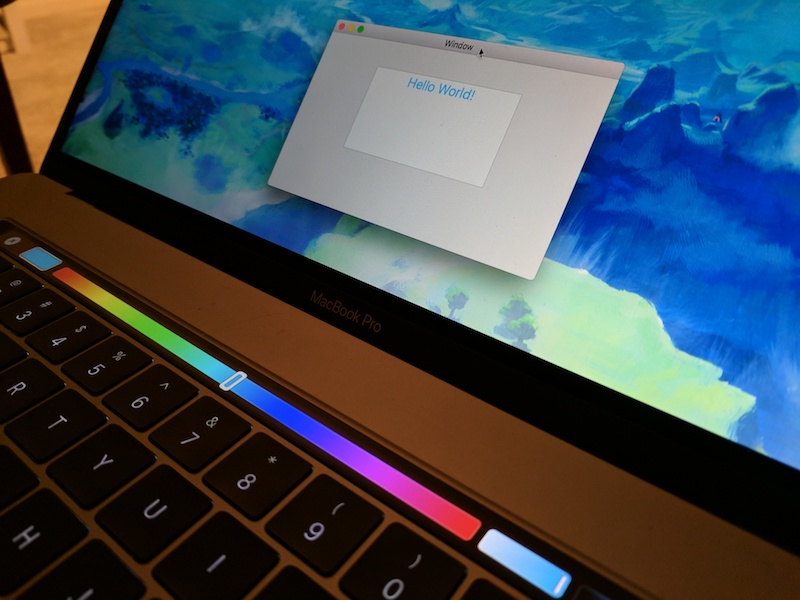
For some simple button functionality, I added a text field to my view controller and made the button change the size of the text to a random number between 0 and 30.
@IBAction func myButton(_ sender: NSButton) {
        let viewController = contentViewController as! ViewController;
        viewController.helloWorldText.font =
             .systemFont(ofSize: CGFloat(arc4random_uniform(30)))
    }
Using NSTouchBar Items
As you saw, adding buttons to the Touch Bar does not differ from adding buttons to an iOS app. Of course, we can add more complex objects to the Touch Bar to get more functionality in our application.
Following the same drag-and-drop procedure we used for the button, we can add an NSTouchBar Color Picker to our Touch Bar and then to our WindowController Class, making sure to select it as an Outlet of type NSColorPickerTouchBar.
You’ll notice right away that you get an error saying that NSTouchBarItems can only be used with macOS 10.12.2 or later. To fix this, simply click on the fix offered by Xcode, which adds an attribute to the WindowController class to limit the functionality to be used on the given operating system.

Before our color picker will be able to do anything, we need to enable it in the windowDidLoad function. We’ll also need to tell it what function to use when a color is selected, so we should set up its selector with a function we will write next. Finally, we’ll need to set the color picker’s target to self, so it knows what object the method in selector is being called on.
override func windowDidLoad() {
        super.windowDidLoad()
        colorPicker.isEnabled = true;
        colorPicker.action = #selector(colorPicked);
        colorPicker.target = self;
    }
Now we can write a function to use the color picker. If you start by writing a regular Swift function, Xcode will give you an error about the method not being exposed to Objective-C. Selectors are features of Objective-C, and methods used with selectors must be exposed to it. Normally, classes inheriting from NSObject are exposed to this, but WindowController inherits from NSWindowController, so we must add the @objc attribute to our function. I’ve simply made the function change the color of the same text field that our button uses.
@objc func colorPicked()
    {
        let viewController = contentViewController as! ViewController;
        viewController.helloWorldText.textColor = colorPicker.color;
    }
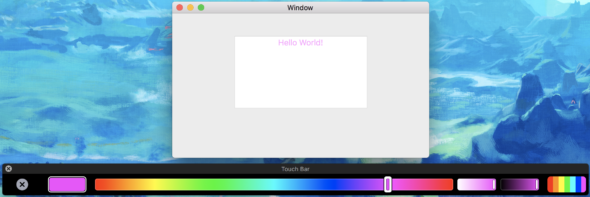
There are quite a few objects you can add to your application’s Touch Bar to make use of the new technology available to you. My best recommendation is to explore the new features available to you in Xcode. Whether this means diving right into adding a Touch Bar to your application or playing around in the sandbox, Touch Bars can add a new level of creativity to your app (and they’re also fun to mess around with).
Resources
While there aren’t too many resources currently available for developing for the Touch Bar and some have become outdated even after a year, I’ve compiled a helpful list of documentation for getting started:
- https://developer.apple.com/macos/touch-bar/ – Apple’s overview of Touch Bar for macOS: contains more links and resources for getting started
- https://developer.apple.com/documentation/appkit/nstouchbar – Apple’s developer documentation for NSTouchBar: provides more information about customizing the Touch Bar for your application beyond using storyboards
- https://github.com/loretoparisi/touchbar – A Touch Bar cheat sheet with an overview, links to examples, and other Touch Bar tools