UIScrollView has gone through some major improvements. Starting with iOS 11, Apple introduced content and frame layout guides to make it a little less confusing to configure the content inside of your scroll view. Xcode 11 also added these layout guides to interface builder.
Today, I’ll show you how to use content and frame layout guides to set up a UIScrollView that’s responsive to portrait and landscape changes. I will also show you how the scroll view can move your content out of the way of the pop-up keyboard.
Are you working on a project that cannot target iOS 11 yet? No worries. I wrote a post on how you can configure UIScrollView using Auto Layout without the fancy new layout guides.
1. Create a Basic Layout in Interface Builder
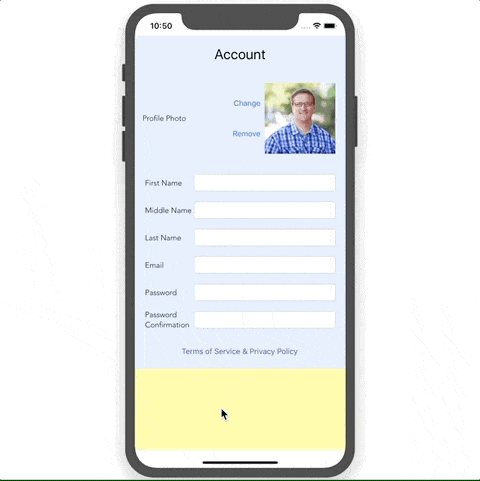
I want to give you a sense of what we are building, so you can follow along and see how the view is constructed. I created a view with some labels, text fields, and an image. If you want to see the finished project, I put the entire project on GitHub. Here is what it should look like in portrait and landscape:
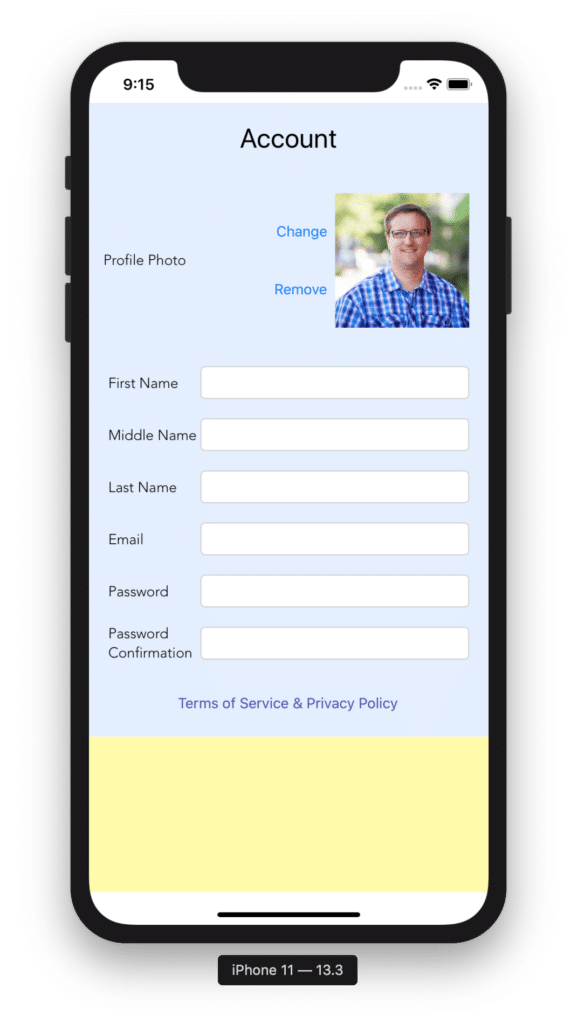
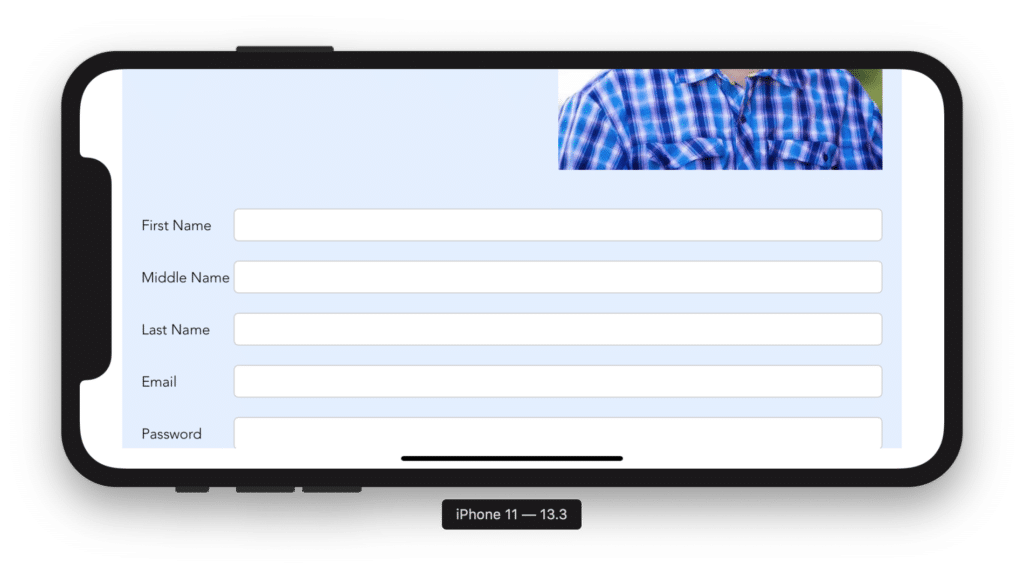
(For demo purposes, I colored the scroll view with a yellow background and the content inside with a blue background. When in portrait mode, the content will not scroll until the keyboard covers up the bottom of the view. In landscape mode, the content can scroll vertically.)
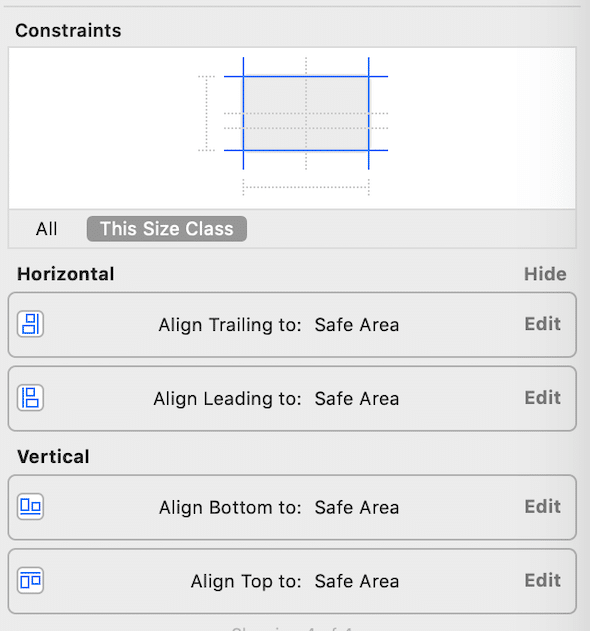
Now let’s get started building the UI. In interface builder, drag a UIScrollView and add it as a subview of the view controller’s main view. Now add some constraints to your scroll view to place it where you want it in your main view. In my example, the scroll view takes up the whole view, so I added four constraints from the scroll view’s edges to the safe area layout guide with zero spacing.
The following are the four constraints that I added to get the scroll view constrained to the super view. Your constraints may look different if you do not want the scroll view to occupy the entire screen.
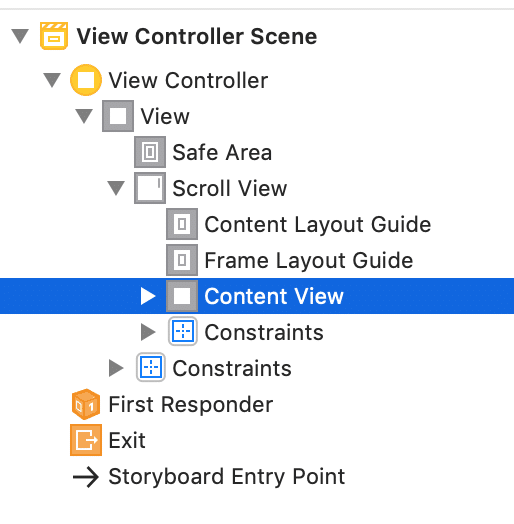
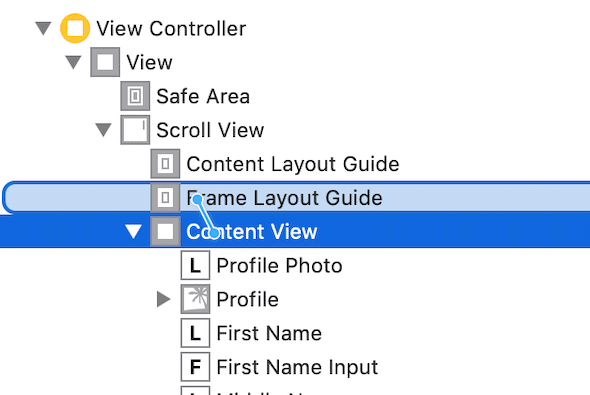
2. Use a Single Child View to Hold All of Your Content
The next step in laying out our controls is to create a single child view of the UIScrollView where we will put all of our content. Using a single child view will simplify the constraints we have to add later. You can use a UIStackView as well. If your content is only a scrolling image in a UIImageView, this can serve as the single child view. In the example below, I gave the child view a name of Content View.
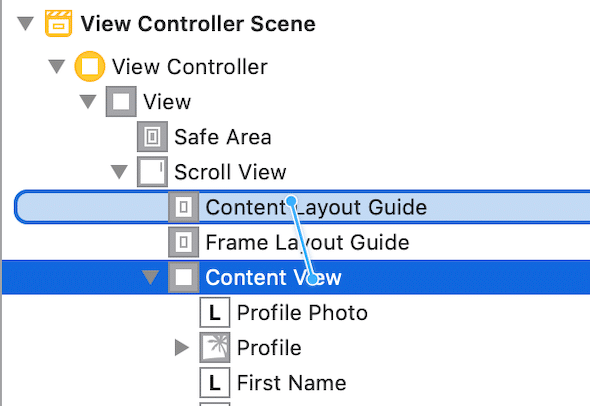
Our next step is to use the new layout guides to constrain our content view inside of the scroll view and tell the scroll view how big our content is. We will attach two sets of constraints from our content view to the layout guides.
Content Layout Guide Constraints
Attach four constraints (top, bottom, left, right) from our single content view to the content layout guide. Do this by pressing and holding the Ctrl key and dragging from your single content view to the content layout guide.
Hold down the shift key to select multiple constraints in this dialog.
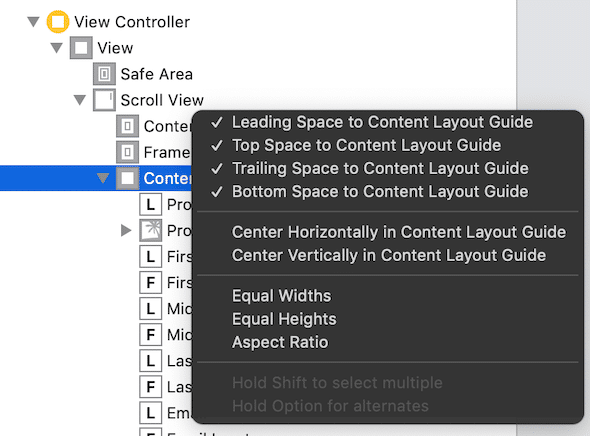
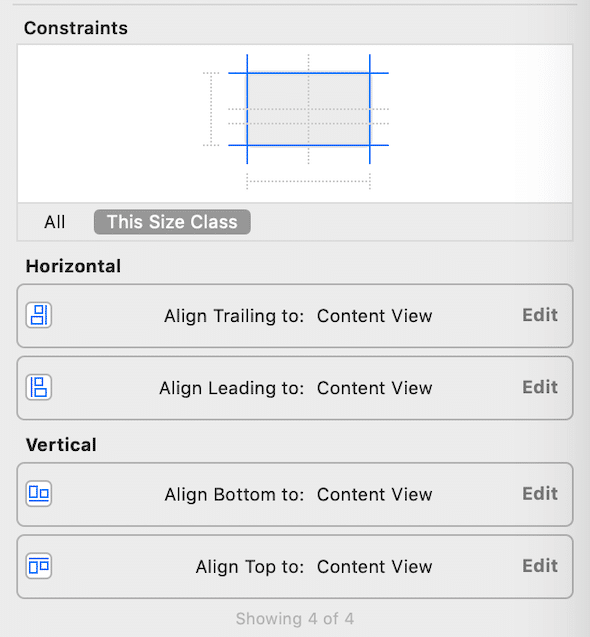
The constraints to the content layout guide are special constraints that have no effect on the size or position of your content view. These constraints tell the UIScrollView the boundaries of your content (sets the contentSize of the UIScrollView).
Frame Layout Guide Constraints
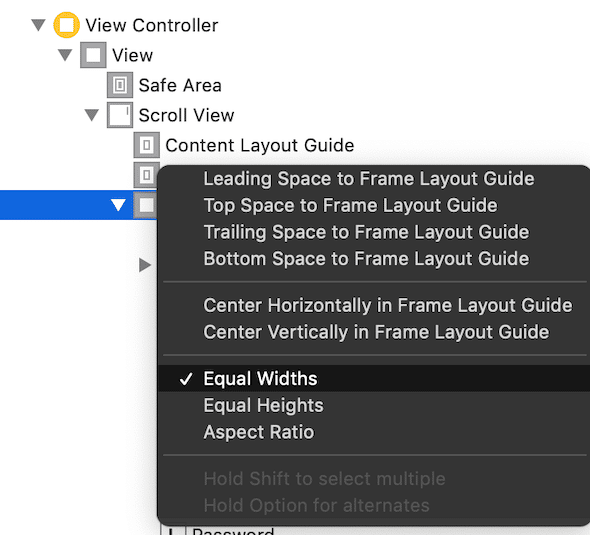
You usually only want your content to scroll in one direction. In my case, I want the scroll view to scroll vertically. Therefore, I need to set the width of my single content view to be the width of the scroll view. This is what the frame layout guide is for. Use it to set the width of your content (if you are scrolling vertically), or use it to set the height (if scrolling horizontally).
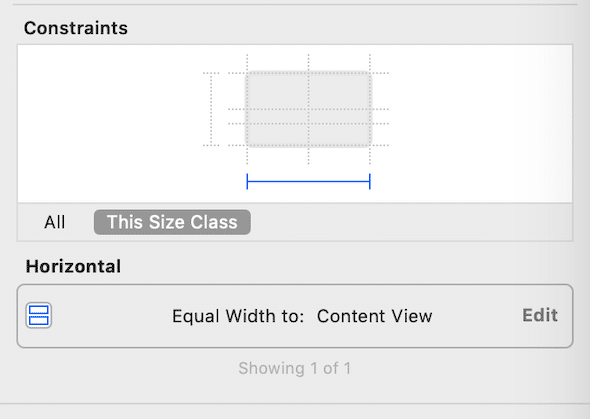
Unlike the content layout guide, constraints attached to the frame layout guide do affect the size of your content. Use the same method of Ctrl dragging from our single content view to the frame layout guide to set an equal width constraint.
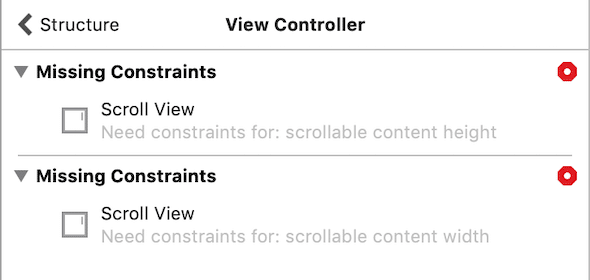
When you finish, you’ll notice we’re getting some Auto Layout errors. Without any controls inside the content view, or if there are no placeholder width and height constraints on the content view, the scroll view cannot determine the content size.
Ignore the errors for now. The next step is to add whatever content you want to scroll inside the content view and use Auto Layout to constrain the items inside the content view. Make sure you have constraints attached to all four sides of the content view so that it will expand to the size of your content.
If you need to, you can increase the simulated size of your view controller in interface builder to give yourself room to lay out all of your scrolling content. To do this, click on the view controller, select the size inspector, and select Freeform size.
Go ahead and run the project. Your content should scroll and look good in portrait and landscape rotations.
3. Move Content under the Keyboard into View
If you have UITextFields near the bottom of your content view and the keyboard pops up, it blocks the bottom half of your screen. The user can’t see what they’re typing. The scroll view allows us to scroll the content into view.

We first need to keep track of which text field is currently being edited. You can do this in many different ways, but I chose to add the view controller as a delegate to the UITextFields. In interface builder, Ctrl – Drag from each UITextField to the view controller and set it as the delegate.

Now we can implement a couple of delegate functions to keep track of which field is active. We do this to make sure that the active field is visible when the keyboard pops up.
weak var activeField: UITextField?

func textFieldDidEndEditing(_ textField: UITextField) {
    activeField = nil
}

func textFieldDidBeginEditing(_ textField: UITextField) {
    activeField = textField
}
Now we need to register for keyboard notifications. In the viewDidLoad function, add the view controller as an observer. You can unregister from these notifications in the deinit function.
override func viewDidLoad() {
    super.viewDidLoad()
    NotificationCenter.default.addObserver(self, selector: #selector(SCRViewController.keyboardDidShow),
        name: UIResponder.keyboardDidShowNotification, object: nil)
    NotificationCenter.default.addObserver(self, selector: #selector(SCRViewController.keyboardWillBeHidden),
        name: UIResponder.keyboardWillHideNotification, object: nil)
}

deinit {
    NotificationCenter.default.removeObserver(self)
}
Finally, add an outlet to your scroll view and implement the keyboard notification selectors. (If this code looks familiar, that’s because it’s based on the solution from Apple’s documentation.) I add the height of the keyboard to the scroll view’s content inset so that the scroll view has enough padding at the bottom to scroll the very bottom text field up above the keyboard. As the final step, I check to see if the active text field is visible and scroll the field into view if it is not.
@objc func keyboardDidShow(notification: Notification) {
    let keyboardSize = (notification.userInfo?[UIResponder.keyboardFrameBeginUserInfoKey] as? NSValue)?.cgRectValue
    guard let activeField = activeField, let keyboardHeight = keyboardSize?.height else { return }

    let contentInsets = UIEdgeInsets(top: 0.0, left: 0.0, bottom: keyboardHeight, right: 0.0)
    scrollView.contentInset = contentInsets
    scrollView.scrollIndicatorInsets = contentInsets
    let activeRect = activeField.convert(activeField.bounds, to: scrollView)
    scrollView.scrollRectToVisible(activeRect, animated: true)
}

@objc func keyboardWillBeHidden(notification: Notification) {
    let contentInsets = UIEdgeInsets.zero
    scrollView.contentInset = contentInsets
    scrollView.scrollIndicatorInsets = contentInsets
}
This is what it looks like when it’s all working. Once you start editing a text field, the keyboard animates into view, and your scroll view animates the active text field to be above the keyboard. If you would like to try this code out yourself to see it in action, I have the entire project on GitHub.