Have you embarked on a journey to create reliable app deployments and found that getting started is overwhelming? The first hurdle is choosing and configuring your cloud resources. With a plethora of options to pick from, finding the right configuration can be complex and confusing.
I’d strongly suggest using Kubernetes on Google Cloud Platform (GCP) for application deployment and management. Kubernetes deployment configurations will streamline your deployment, scaling, and testing by eliminating variations and unknowns from your deployment process. Using Kubernetes with GCP will also allow you to scale, update, and redeploy your application all from the command line.
This is the first post in a three-part series on setting up app deployment with GCP and Kubernetes. Today, I’ll help you activate a Google Cloud account, enable the Kubernetes engine for deployments, and provision your first cluster.
1. Start a Google Cloud Project
Find Google Cloud Console, the web-based portal for GCP management. This is where much of the initial project setup and management will happen.
If you haven’t already activated your Google Account to use GCP, click the “Activate” button on the top-right of the screen. (If you somehow still don’t have a Google account, you can sign up here as well.)
This will take you to the account configuration screen. After activating your account, you will be dropped back at the Console Page. The big change here is that you now have a project!
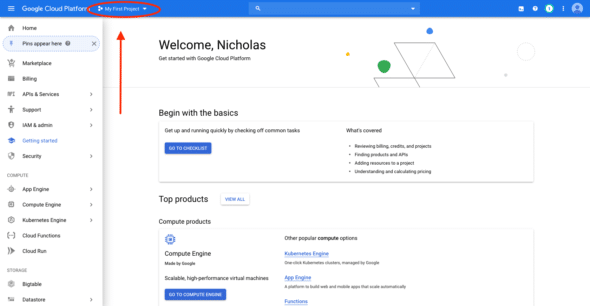
GCP uses projects as the basic level of organization and permission management, as well as for separating project billing. Your default project will be named My First Project, and it will have a unique ID. To find the ID, click on the “Projects” drop-down.

2. Enable Kubernetes Engine
You can manage applications directly from the Google Cloud Console, but I’m going to show you how to manage applications and deployments using Kubernetes. Kubernetes is a container orchestration management service that allows you to specify the deployment details, such as resources and environment, using YAML configurations.
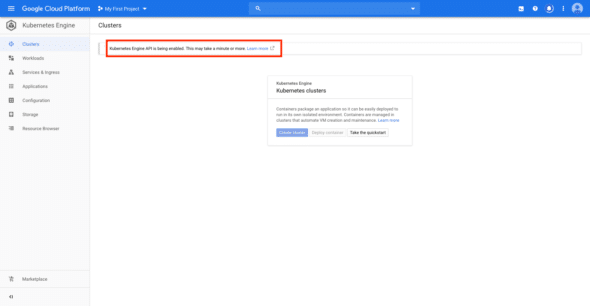
To enable Kubernetes on GCP, you can either go to the Kubernetes Engine tab in the side menu or select Kubernetes Engine on the main page.
Enabling Kubernetes may take some time.
3. Create a Kubernetes Cluster
After Kubernetes has been enabled, click the blue “Create Cluster” button. This will bring you to the Kubernetes Cluster Creation page, which defaults to Standard Cluster. You can simplify this process by using the setup guide called “My First Cluster.”
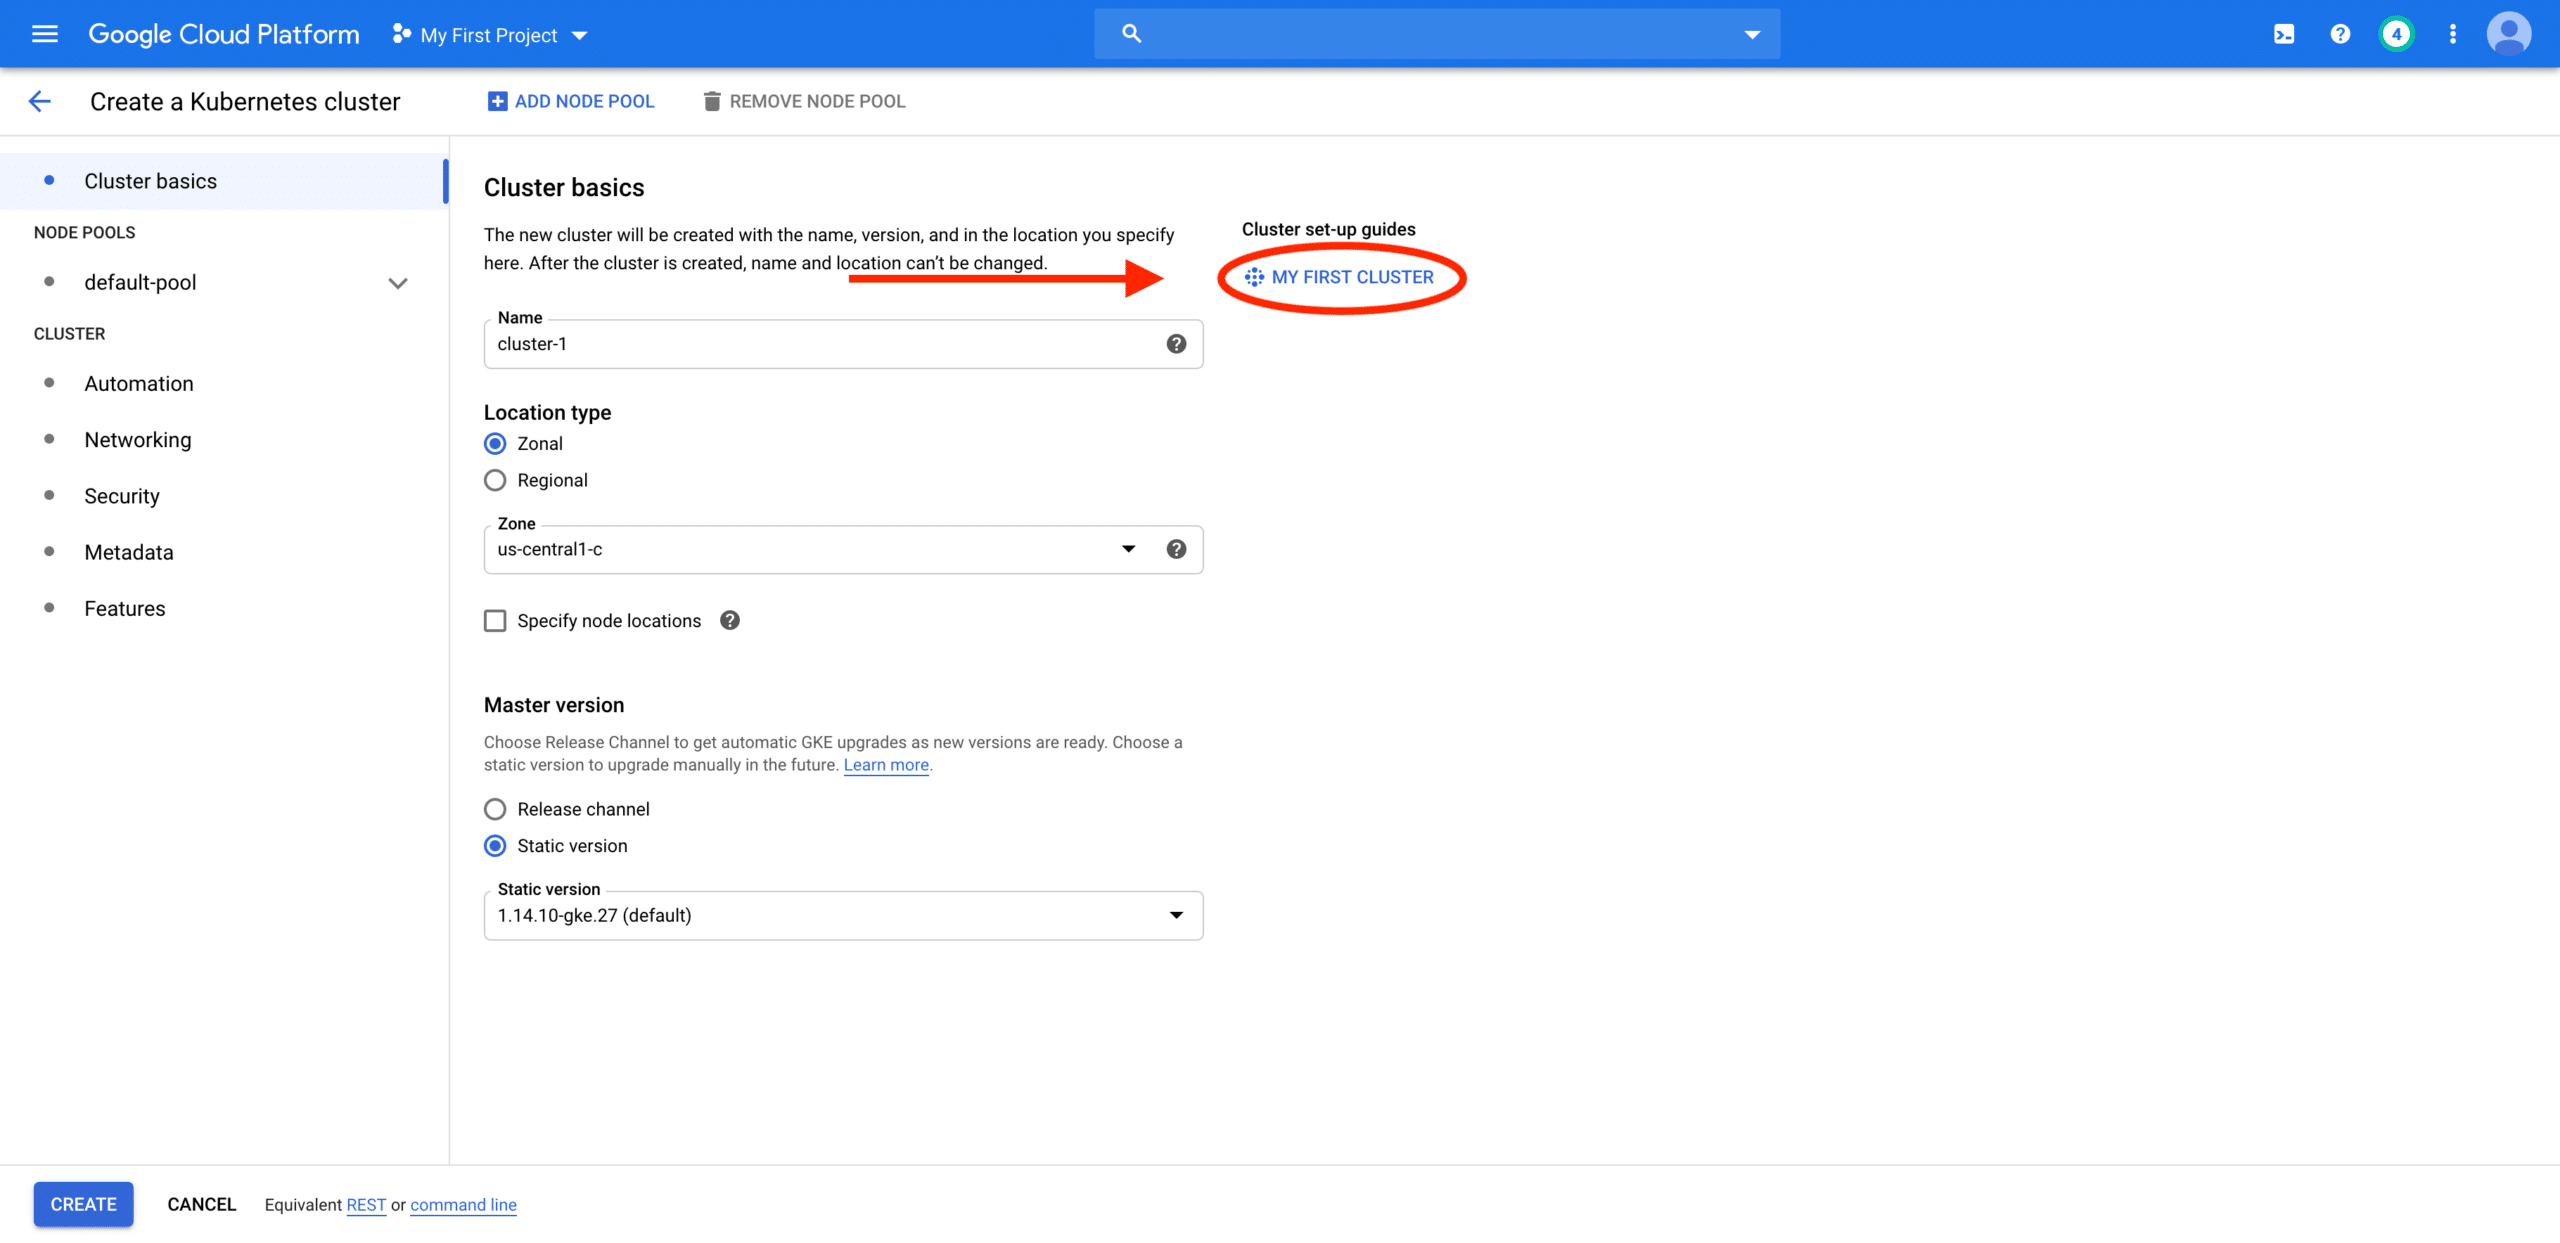
This guide will explain the significance of each variable, such as cluster location, Kubernetes engine version, and resources. To keep this lightweight, you can use g1-small machines.
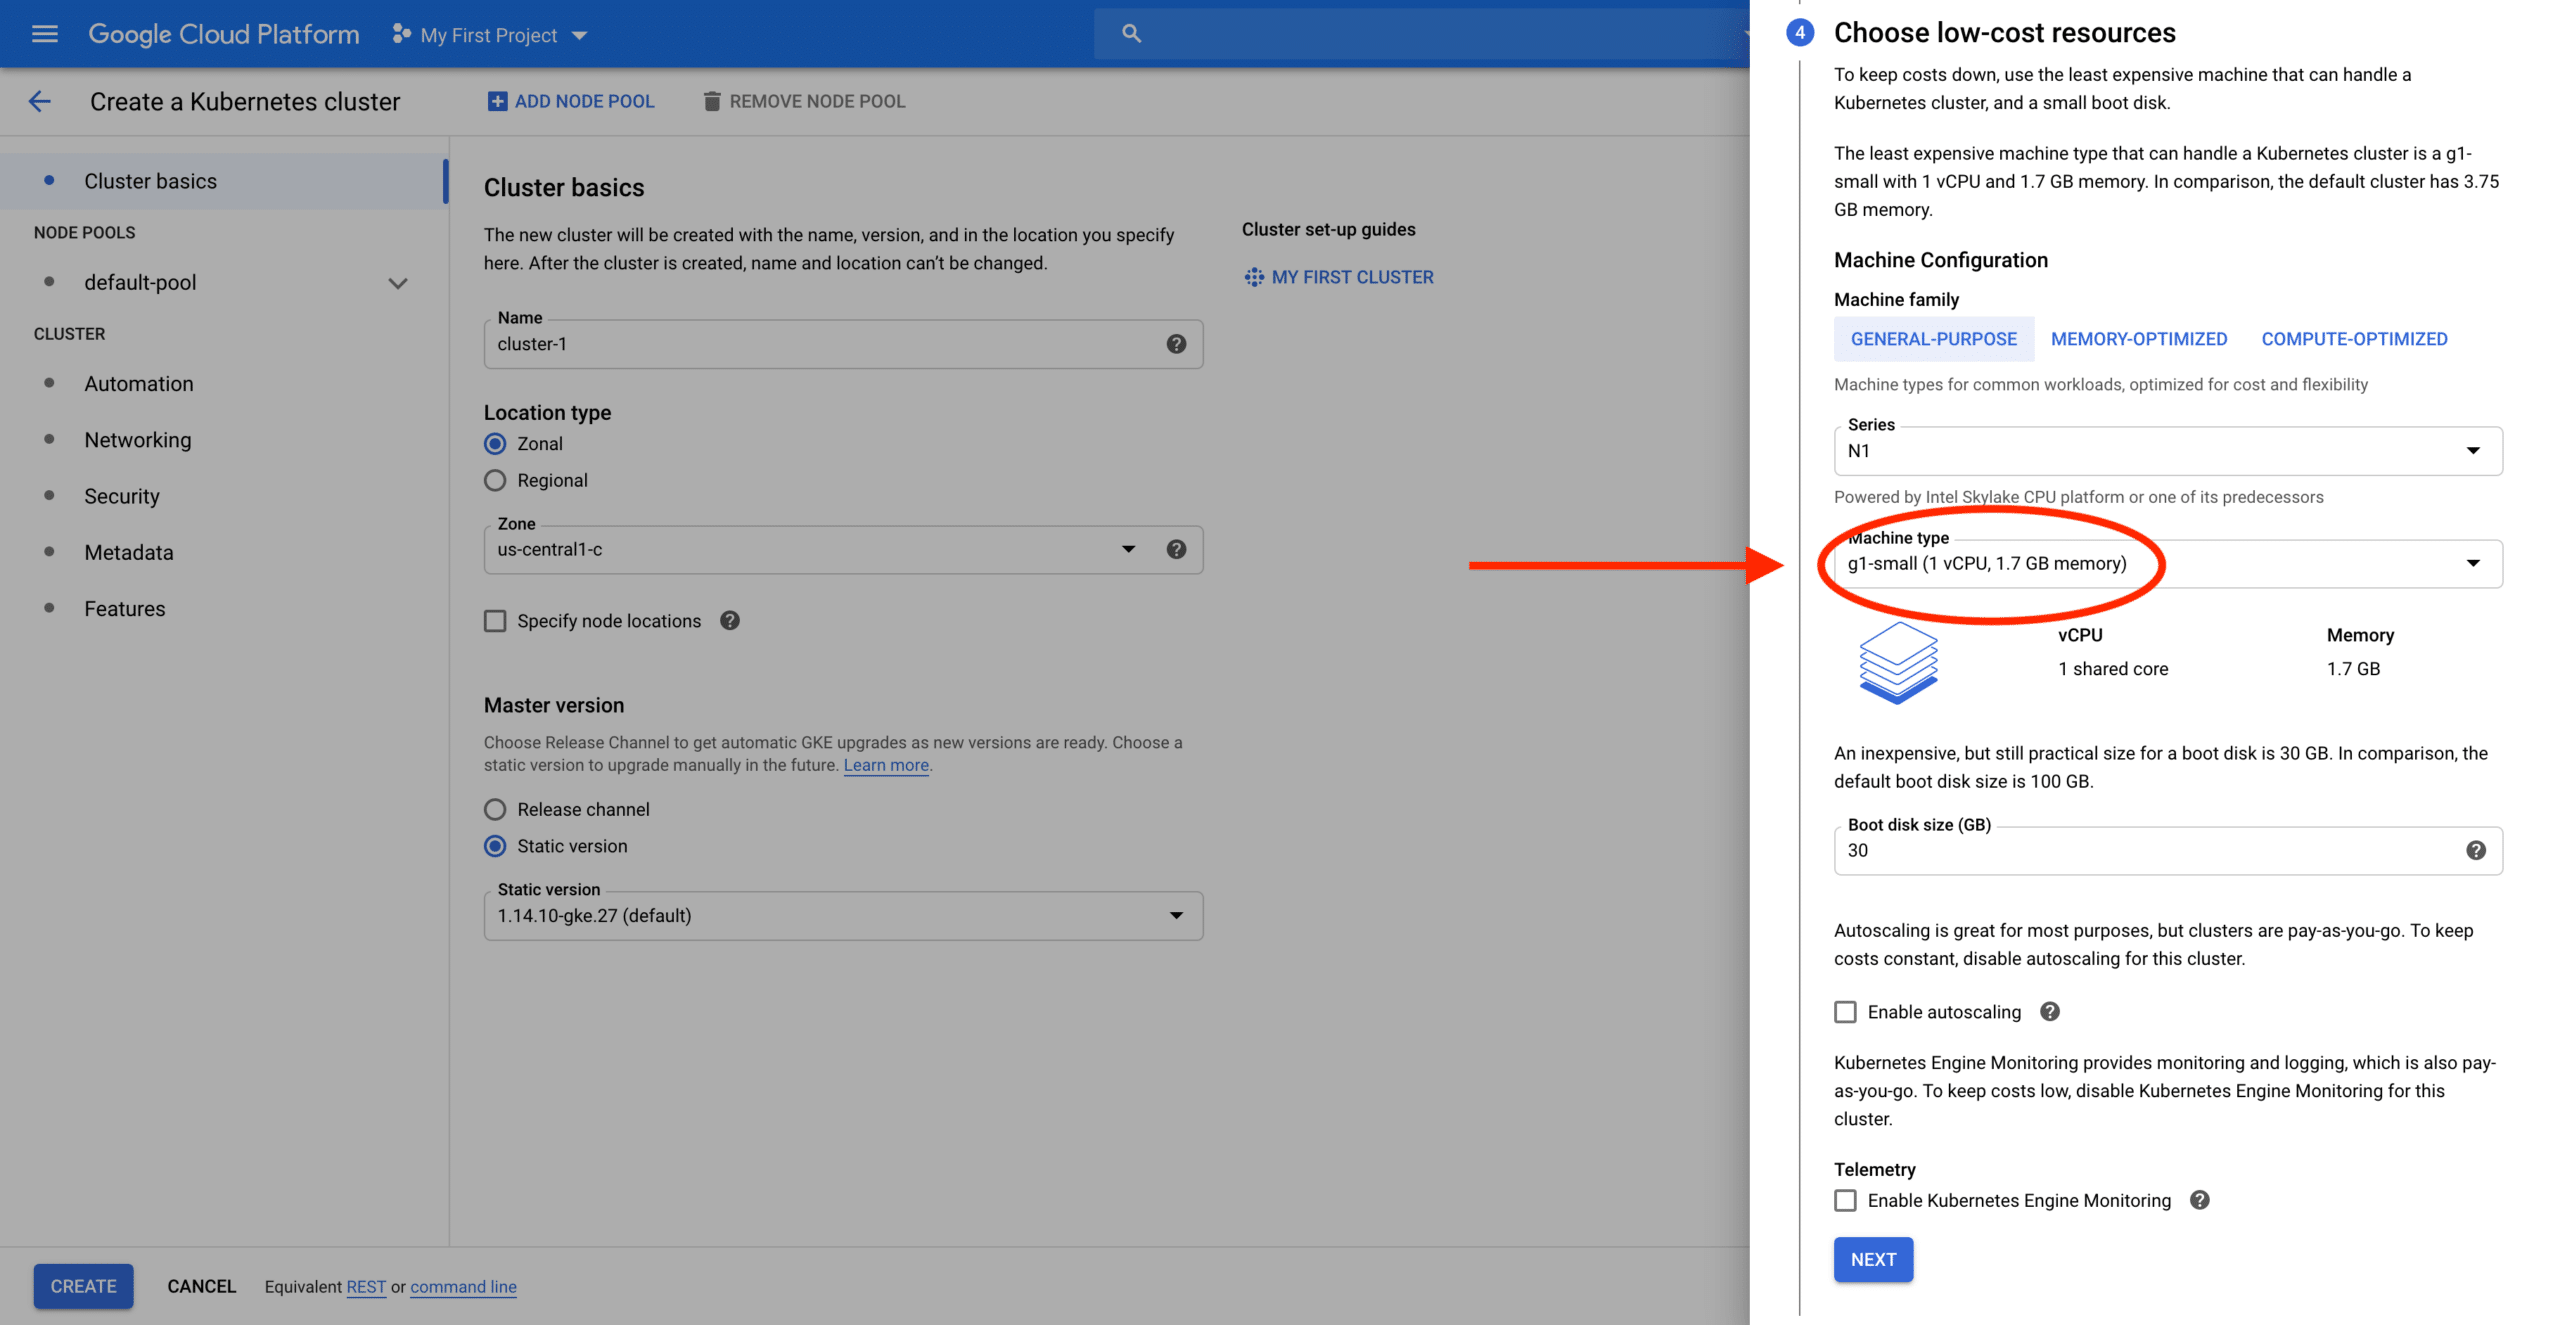
Once you have finished the setup guide, make sure you click “Make Changes” to propagate the selections into the Cluster Creation form. Then select “Create” to start the cluster.
You have now successfully provisioned your first cluster. It’s ready to start doing work.
App Deployment with Kubernetes
This is the first part of a series on how to set up app deployment with GCP and Kubernetes:
- Getting Started with Google Cloud Platform and Creating a Kubernetes Cluster
- Configuring Your Command Line Interface and Preparing Your App for Kubernetes
- Creating Kubernetes Deployments, Rolling out Updates, and Removing Resources
In Part 2, I’ll explain how to configure the command line interface, create a sample project, and containerize with Docker.