Selenium and Python are great for automated testing or web scraping.
The tutorial below shows how to:
- Install and use Selenium and Python
- Use the new version of headless Chrome
- Find elements on a webpage that appear after invoking JavaScript by clicking on an element
I gathered all of this info while setting up a new project after not using Selenium in years. I hope it helps you get started.
I’m using Python 3.11.4 on macOS for this examples.
Installing Python, Selenium, and Chrome Dependencies
First, install Python using Homebrew. You’ll have to install Homebrew and then use Homebrew to install Python.
Use the command line to install Python after you have installed Homebrew.
Run brew install python
This should install Python and Python’s package manager pip. Homebrew will create symlinks for python3 and pip3 in /user/local/bin that point to the Python 3.11.4 Homebrew Cellar.
Second, we need to install the following dependencies:
- Chrome – The browser
- Selenium WebDriver – Language specific binding to control the browser
- ChromeDriver – The Chrome specific driver to be used by Selenium WebDriver
Download and install the Chrome browser or check the version of your installed browser by launching Chrome, clicking “Chrome” in the menu bar and then clicking “About Google Chrome.”
Update your Chrome browser if it’s already installed.
I’m using Chrome Version: 114.0.5735.198 (Official Build) (x86_64).
Next, install Selenium WebDriver using the command line.
Run pip3 install -U selenium
This should install Selenium WebDriver and related dependencies.
Finally, install the ChromeDriver executable by downloading it from here. I downloaded version 114.0.5735.90 as that version most closely matched my browser version. And, because I’m still using an older Intel-based Mac, I downloaded the mac64 version. Be sure to download the version of ChromeDriver that best matches your browser and is for your operating system and architecture.
After you download the ChromeDriver executable, you need to move the executable file to a place in your PATH so it can be found when using the WebDriver in your Python script.
Using the command line, you can check your PATH.
Run echo $PATH
I moved the chromedriver executable to /usr/local/bin/
Using WebDriver with Python in Headless Mode
Now let’s use Selenium and Python in a sample script that uses headless mode and JavaScript to list film titles at https://www.scrapethissite.com/pages/ajax-javascript/.
To understand what the script below is doing, you can manually browse to the link above, click on the year 2015, and see a list of films appear.
To script this in Python, open an editor and paste in the following code:
from selenium import webdriver
from selenium.webdriver.chrome.options import Options
from selenium.webdriver.common.by import By
from selenium.webdriver.support.wait import WebDriverWait
from selenium.webdriver.support import expected_conditions as EC

# instance of Options class allows
# us to configure Headless Chrome
options = Options()

# this parameter tells Chrome that
# it should be run without UI (Headless)
options.add_argument('--headless=new')

# initializing webdriver for Chrome with our options
driver = webdriver.Chrome(options=options)


try:
    driver.get('https://www.scrapethissite.com/pages/ajax-javascript/')

    print("Page URL:", driver.current_url)
    print("Page Title:", driver.title)

    # click on 2015 for movie list of films
    driver.find_element(By.ID, '2015').click()
    film_titles = WebDriverWait(driver, 5).until(
        EC.presence_of_all_elements_located((By.CLASS_NAME, 'film-title')))

    for film_title in film_titles:
        print(film_title.text)

except Exception as e:
    print("Exception occurred " + repr(e))

finally:
    driver.close()
Running this Python script from the command line should print the page URL, page title, and the list of films that you saw when manually browsing the site.
The script uses the Selenium WebDriverWait method to poll for the existence of the film list with a five-second maximum timeout. This is more efficient than hardcoded sleep calls that take the full amount of sleep time.
In the code above, you’ll notice the headless argument given to the ChomeOptions is '--headless=new’.
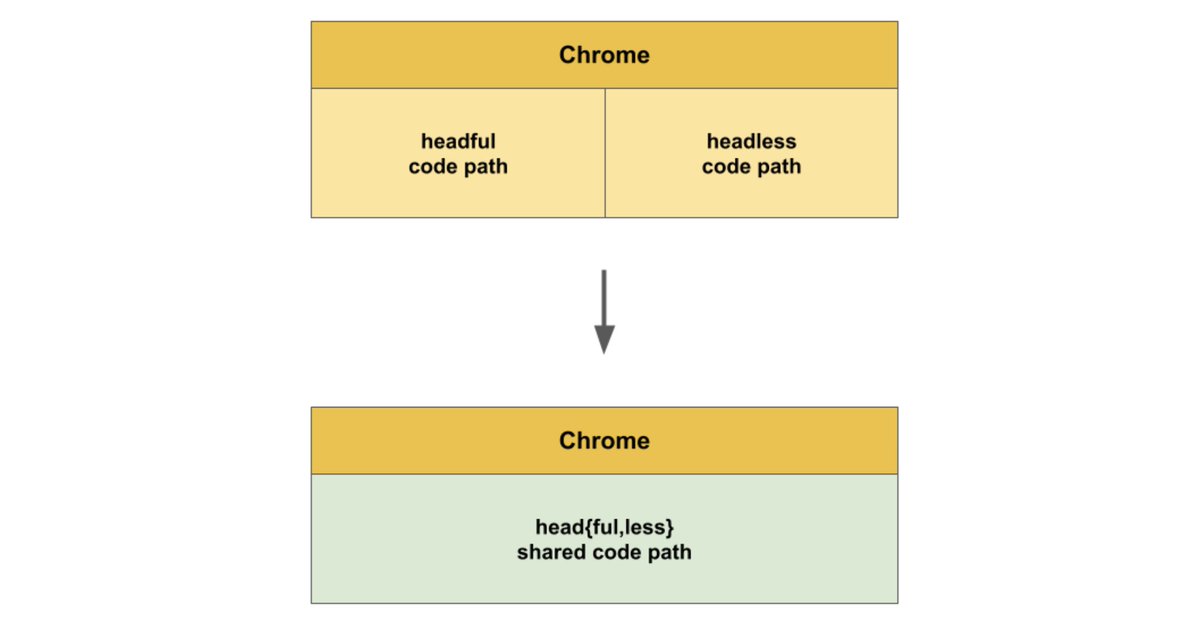
Headless and Headful Codebases Unified
This invokes the new version of headless Chrome that was announced earlier this year. Headless Chrome used to be a separate implementation from the headful implementation. This sometimes led to inconsistencies in test results when using Selenium for application testing. Now the headless and headful codebases are unified. Currently, if you only use the '--headless' argument, you’ll be using the old headless implementation.

