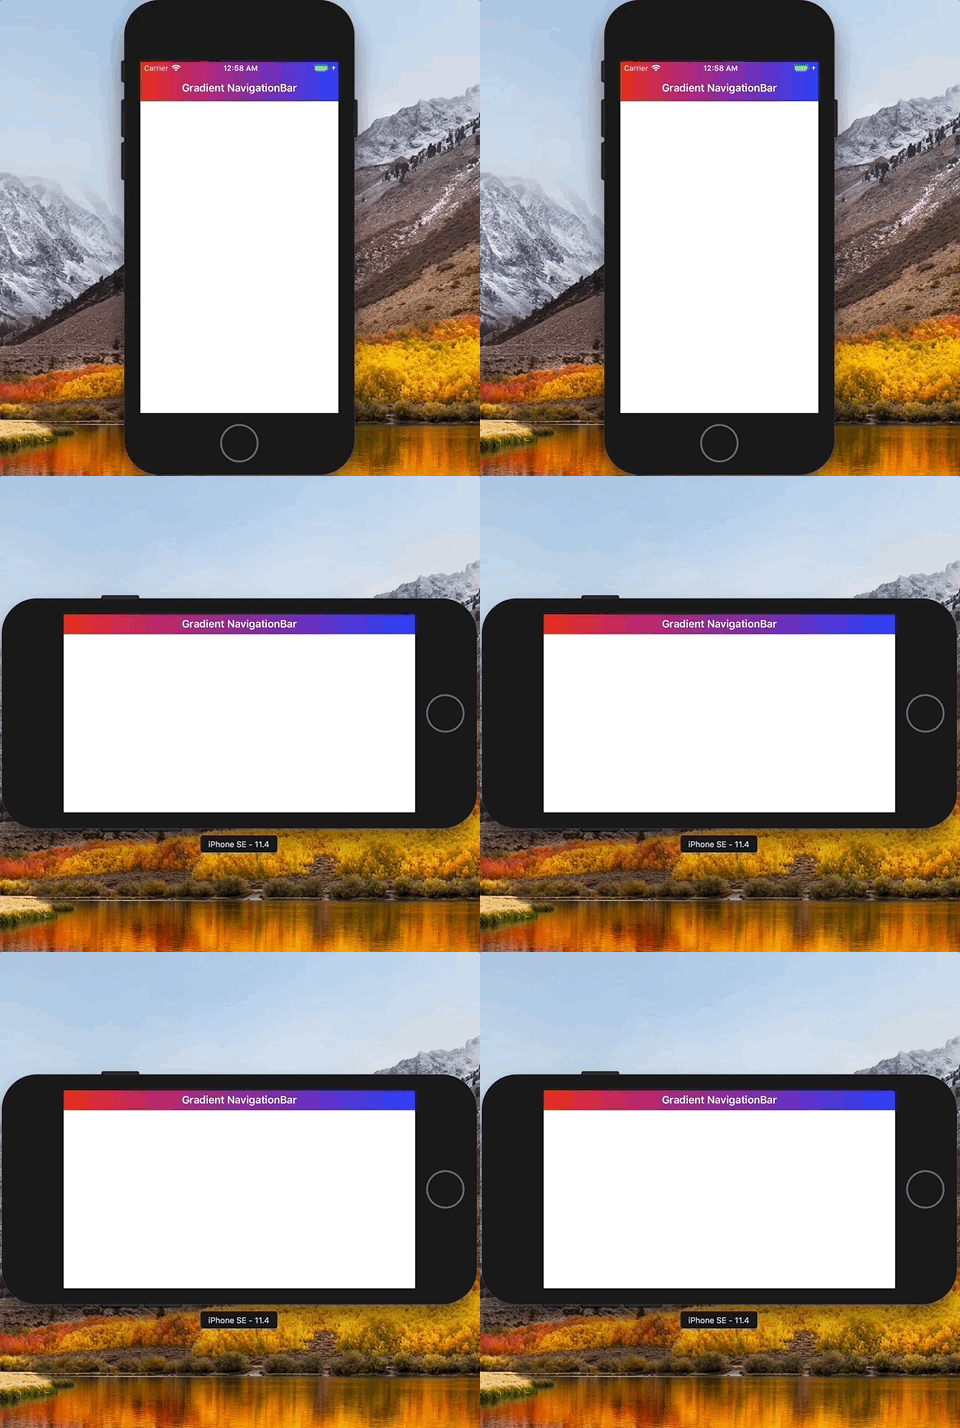
On a recent project, I had to add a gradient background to a UINavigationBar. At first, I thought it would be easy, but I soon discovered a problem when I rotated my device to landscape orientation and the gradient on the navigation bar did not resize. In this post, I will show you how to add a gradient background to your UINavigationBar that works for both portrait and landscape orientations.
Creating a Gradient
The first step of creating a gradient is to construct a CAGradientLayer class and give it the proper size, colors, and positions. To get the proper size, we need to know the size of the navigation bar plus the size of the status bar (the area where the carrier signal and clock is). We want our gradient image to extend into the status bar.
The following code gets the bounds of the navigation bar and adds the height of the status bar to those bounds. It also sets up a simple red/blue gradient, where the red is at the left and the blue at the right. The positions are specified as percentages. Zero is 0%, and one is 100%.
Since this is a simple left-to-right gradient, I don’t need to specify a Y coordinate for my position. You can get more complicated with your gradient by adding more colors and positions.
if let navigationBar = self.navigationController?.navigationBar {
    let gradient = CAGradientLayer()
    var bounds = navigationBar.bounds
    bounds.size.height += UIApplication.shared.statusBarFrame.size.height
    gradient.frame = bounds
    gradient.colors = [UIColor.red.cgColor, UIColor.blue.cgColor]
    gradient.startPoint = CGPoint(x: 0, y: 0)
    gradient.endPoint = CGPoint(x: 1, y: 0)
}

Creating a Gradient Image
With a solid background color (not a gradient), you can easily use the backgroundColor property of UINavigationBar. Unfortunately, you can’t set a gradient color using the backgroundColor property.
There is, however, a backgroundImage property that we can use to set a gradient background. The tricky part is that we’ll need to generate a gradient image at runtime.
The following function will generate a UIImage from a CAGradientLayer. This function uses the CoreGraphics functions to draw the gradient layer and capture it as an image.
func getImageFrom(gradientLayer:CAGradientLayer) -> UIImage? {
    var gradientImage:UIImage?
    UIGraphicsBeginImageContext(gradientLayer.frame.size)
    if let context = UIGraphicsGetCurrentContext() {
        gradientLayer.render(in: context)
        gradientImage = UIGraphicsGetImageFromCurrentImageContext()?.resizableImage(withCapInsets: UIEdgeInsets.zero, resizingMode: .stretch)
    }
    UIGraphicsEndImageContext()
    return gradientImage
}
Now, let’s put all this code together to set the navigation bar’s background image.
if let navigationBar = self.navigationController?.navigationBar {
    let gradient = CAGradientLayer()
    var bounds = navigationBar.bounds
    bounds.size.height += UIApplication.shared.statusBarFrame.size.height
    gradient.frame = bounds
    gradient.colors = [UIColor.red.cgColor, UIColor.blue.cgColor]
    gradient.startPoint = CGPoint(x: 0, y: 0)
    gradient.endPoint = CGPoint(x: 1, y: 0)

    if let image = getImageFrom(gradientLayer: gradient) {
        navigationBar.setBackgroundImage(image, for: UIBarMetrics.default)
    }
}

Using Stretch Mode
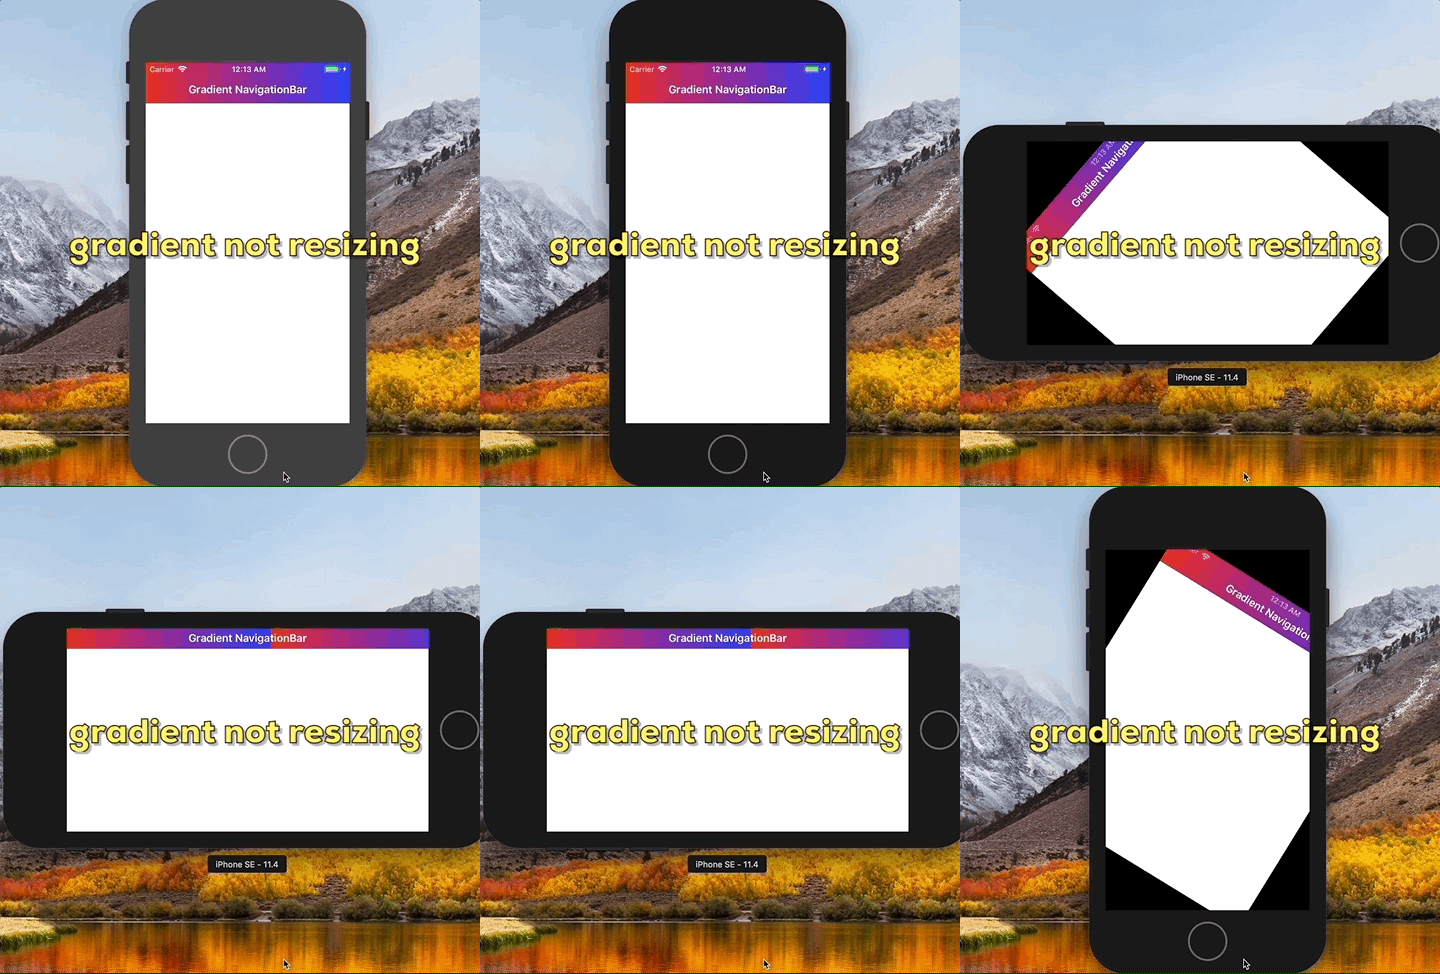
If you look closely at the gif above, you’ll see that the gradient is stretching to fit the landscape size when the device is rotated. My first attempt at drawing a gradient was not so successful. As you can see below, this gradient is not stretching to fit.

The mistake I made was not specifying a resizing mode on the resizableImage function. There are two versions of the function, and I used the incorrect one.
resizableImage(withCapInsets: UIEdgeInsets.zero)
resizableImage(withCapInsets: UIEdgeInsets.zero, resizingMode: .stretch)
Setting the Navigation Bar Appearance
What I haven’t talked about yet is where to put the code that sets the navigation bar gradient background. The answer depends on whether you want to set the background gradient on each view controller or globally. If you want to have different colors on each view controller, then put the code in each view controller’s viewDidLoad() function.
If, however, you want to set it globally, I would recommend creating a custom UINavigationController class. In your storyboard, click on the UINavigationController and set the class name to your custom class. Here is an example of how you could set the colors globally.
class MyNavigationController: UINavigationController {
    override func viewDidLoad() {
        super.viewDidLoad()

        let gradient = CAGradientLayer()
        var bounds = navigationBar.bounds
        bounds.size.height += UIApplication.shared.statusBarFrame.size.height
        gradient.frame = bounds
        gradient.colors = [UIColor.red.cgColor, UIColor.blue.cgColor]
        gradient.startPoint = CGPoint(x: 0, y: 0)
        gradient.endPoint = CGPoint(x: 1, y: 0)

        if let image = getImageFrom(gradientLayer: gradient) {
            navigationBar.setBackgroundImage(image, for: UIBarMetrics.default)
        }
    }

    func getImageFrom(gradientLayer:CAGradientLayer) -> UIImage? {
        var gradientImage:UIImage?
        UIGraphicsBeginImageContext(gradientLayer.frame.size)
        if let context = UIGraphicsGetCurrentContext() {
            gradientLayer.render(in: context)
            gradientImage = UIGraphicsGetImageFromCurrentImageContext()?.resizableImage(withCapInsets: UIEdgeInsets.zero, resizingMode: .stretch)
        }
        UIGraphicsEndImageContext()
        return gradientImage
    }
}
You may also see some code on the internet that changes the navigation bar’s appearance in the AppDelegate didFinishLaunchingWithOptions function. You can use the appearance protocol to get at the properties of a navigation bar.
func application(_ application: UIApplication, didFinishLaunchingWithOptions launchOptions: [UIApplicationLaunchOptionsKey: Any]?) -> Bool {
    let navigationBar = UINavigationBar.appearance()
    // now set properties on the navigation bar
    return true
}
Although you can access the setBackgroundImage function using the appearance protocol, I was not able to generate a gradient image using the Core Graphics functions this early in the app’s lifecycle. If you have any luck, let me know. Otherwise, the custom UINavigationController is not a bad solution.


This is not working for large titles (iOS 11 new Prefers Large Titles)
As Attiq points out, this won’t work if the navigationBar has prefersLargeTitles set to true.
This can be fixed by setting the navigationBar’s barTintColor instead:
navigationBar.barTintColor = UIColor(patternImage: image)
hi can u please guide to do that resize related code in objective c .. i have same issue when i do orientation naviation backgroud image not strach..
Hello brother,
You can achieve in didFinishLaunching by adding this line in gradient layer,
gradient.frame.size.width = UIScreen.main.bounds.width
because if you check width is 0 by default of navigationBar, that is why unable to create UIGraphicsGetCurrentContext(), try to assign screen width to it, it will work.
Enjoy!!