Article summary
I recently had the pleasure of attending Cocoaconf Atlanta, where I attended an excellent 2D gaming workshop given by Josh Smith. The workshop featured Apple’s SpriteKit (SK), which was released two years ago and is a very powerful 2D gaming framework that also includes a great, easy to use, physics engine.
In this post I’ll cover some major features of SK’s sprite rendering and physics engine by implementing a small iOS game!
The Project
A few months back a co-worker of mine, Matt Nedrich showed me the Starbucks iPhone App. When you buy a cup of coffee via the app. you get a “star” that falls into a graphical representation of a cup. When you tilt and rotate your phone, the stars tumble around in an interesting and “realistic” way.
After Josh Smith’s gaming workshop, I realized how easy this neat visualization would be to implement in SpriteKit. In this blog post, I’ll show you how (in Swift!). For those who are impatient or want to follow along, I’ve posted a github repo with the code.
Setting up the PhysicsCup Project
First, open xCode 6+ and create a new project, selecting iOS -> Application -> Game. Give it a name, choose “Swift” for the language and (this is important) “SpriteKit” for the “Game Technology”. Do not choose SceneKit. In this tutorial I used iPad as my device, but it doesn’t matter too much.

1. Scenes, nodes, and actions
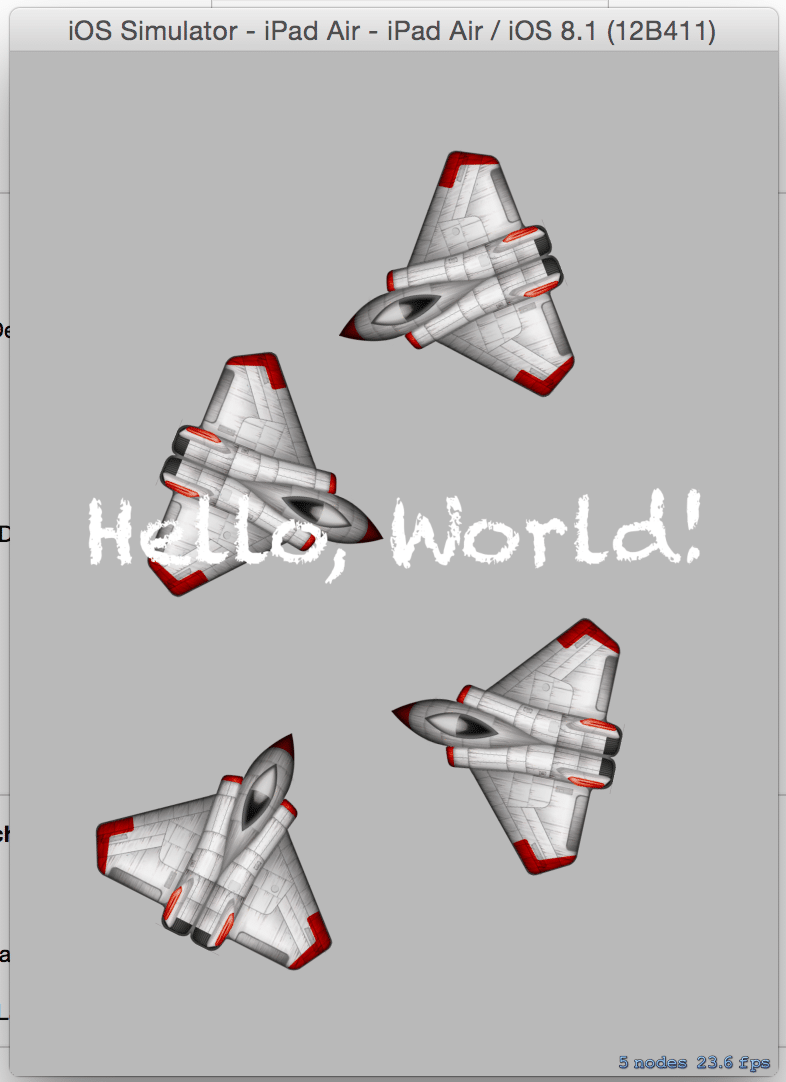
That’s pretty sweet, so what’s happening here, exactly? Well, we have a storyboard containing a single view controller whose custom class is GameViewController. Looking into GameViewController.swift we see it overrides viewDidLoad, and sets up a SKScene. In SpriteKit, scenes (implementations of SKScene) are represented as a tree structure, and the nodes of the tree are SKNodes.
To quote Josh, “Nodeness makes Sprite Kit awesome!” I don’t know about you, but the coolest thing in the app so far is the spinning spaceship that appears when the screen is tapped. Open GameScene.swift and you will see the following code:
    override func touchesBegan(touches: NSSet, withEvent event: UIEvent) {
        /* Called when a touch begins */

        for touch: AnyObject in touches {
            let location = touch.locationInNode(self)

            let sprite = SKSpriteNode(imageNamed:"Spaceship")

            sprite.xScale = 0.5
            sprite.yScale = 0.5
            sprite.position = location
Here we can see that when scene gets a touch, it creates a SKSpriteNode with the “Spaceship” image. It puts the sprite at a position on the screen, location, where the touch occurred. The rest of the code in touchesBegan is responsible for the sprite’s spinning:
            let action = SKAction.rotateByAngle(CGFloat(M_PI), duration:1)

            sprite.runAction(SKAction.repeatActionForever(action))

            self.addChild(sprite)
First, it creates an SKAction object, which is an action that’s executed by a node in the scene. SKActions are also awesome:
- SKNodes can be acted upon by SKActions.
- SKActions can do all kinds of things like move, scale or rotate the node, play sounds, adjust transparency, etc. You can even create custom actions by passing in a block.
- SKActions can be composed. They can be grouped up and run all at once on a node, or they can be put into an array and run sequentially.
- No horrible blocks or threading!
In the above code, the action chosen is a rotation action. This SKAction will rotate the node by M_PI over the course of 1 second (the duration). The action is kicked off by called sprite.runAction(), and it spines indefinitely by wrapping the action in SKAction.repeateActionForever (which in itself, another SKAction!). The key takeaway here is the scene has a tree structure populated by nodes, that are acted upon by actions. Now, delete touchesBegan and empty out the didMoveToView method so that your GameScene.swift file looks like this:
import SpriteKit

class GameScene: SKScene {
    override func didMoveToView(view: SKView) {
    }

    override func touchesBegan(touches: NSSet, withEvent event: UIEvent) {
    }

    override func update(currentTime: CFTimeInterval) {
    }
}
Running the app should now result in just a gray screen that displays the number of nodes and FPS in the lower right corner.
2. The xCode level editor
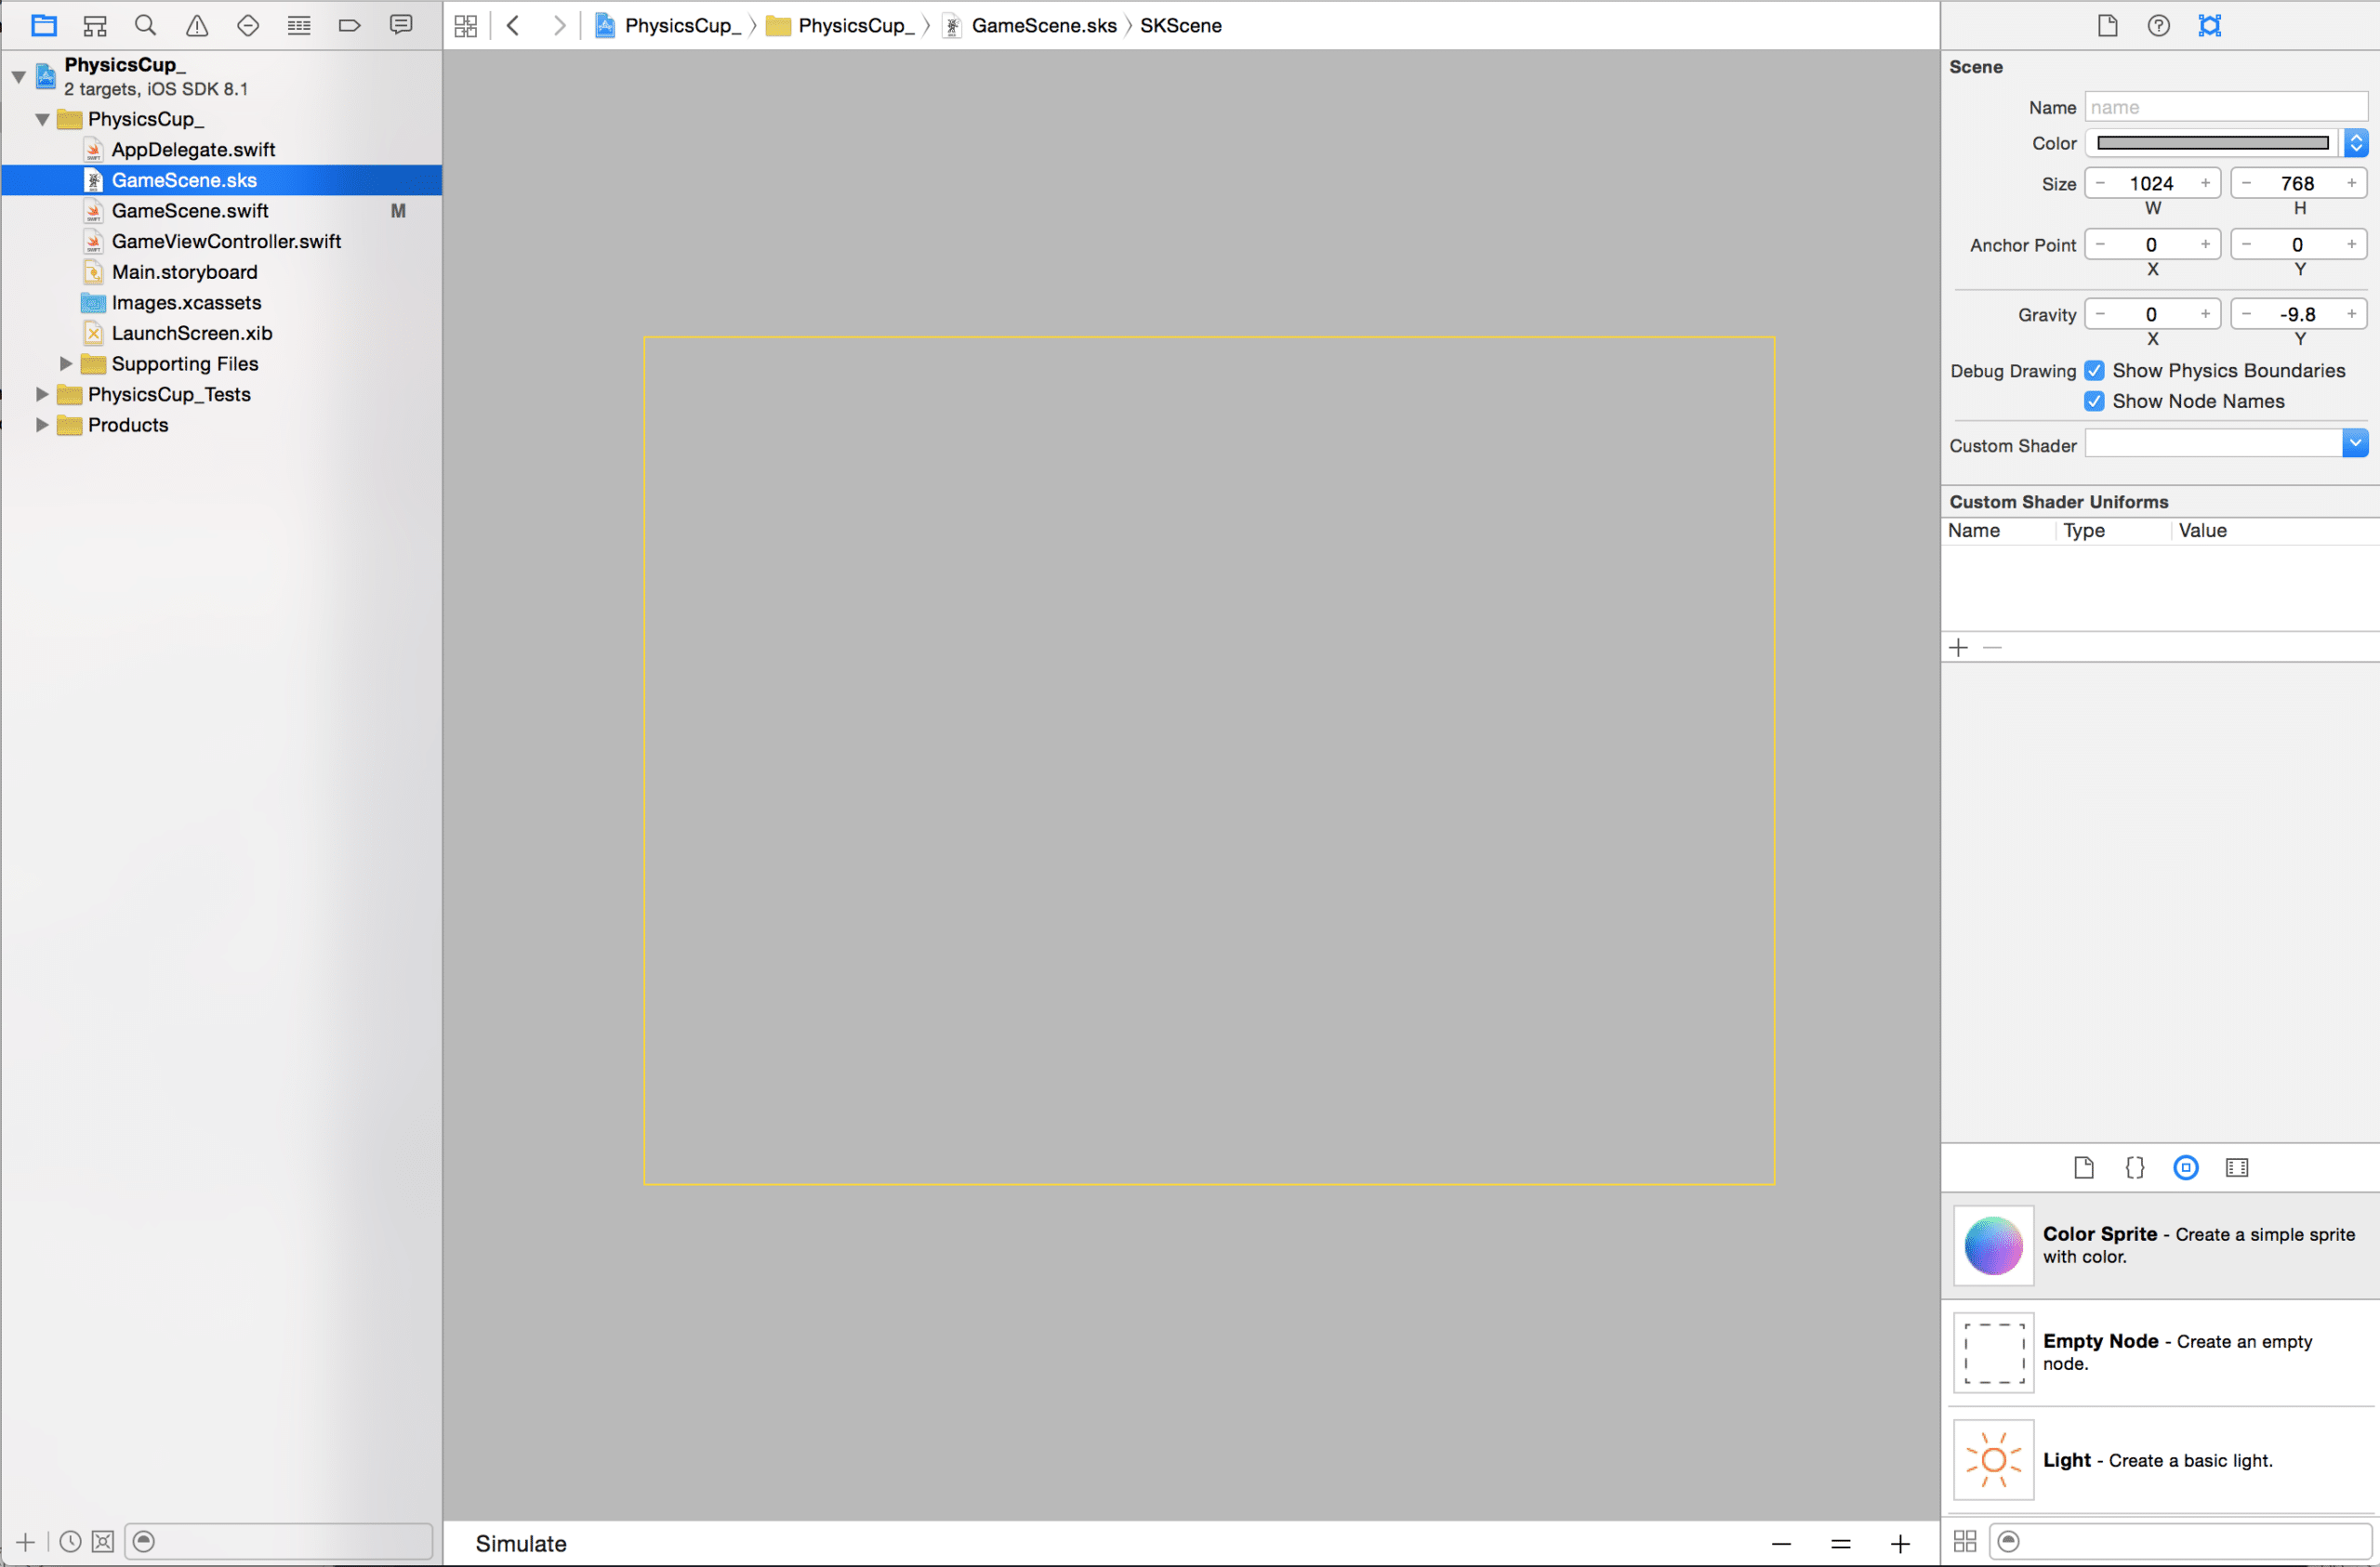
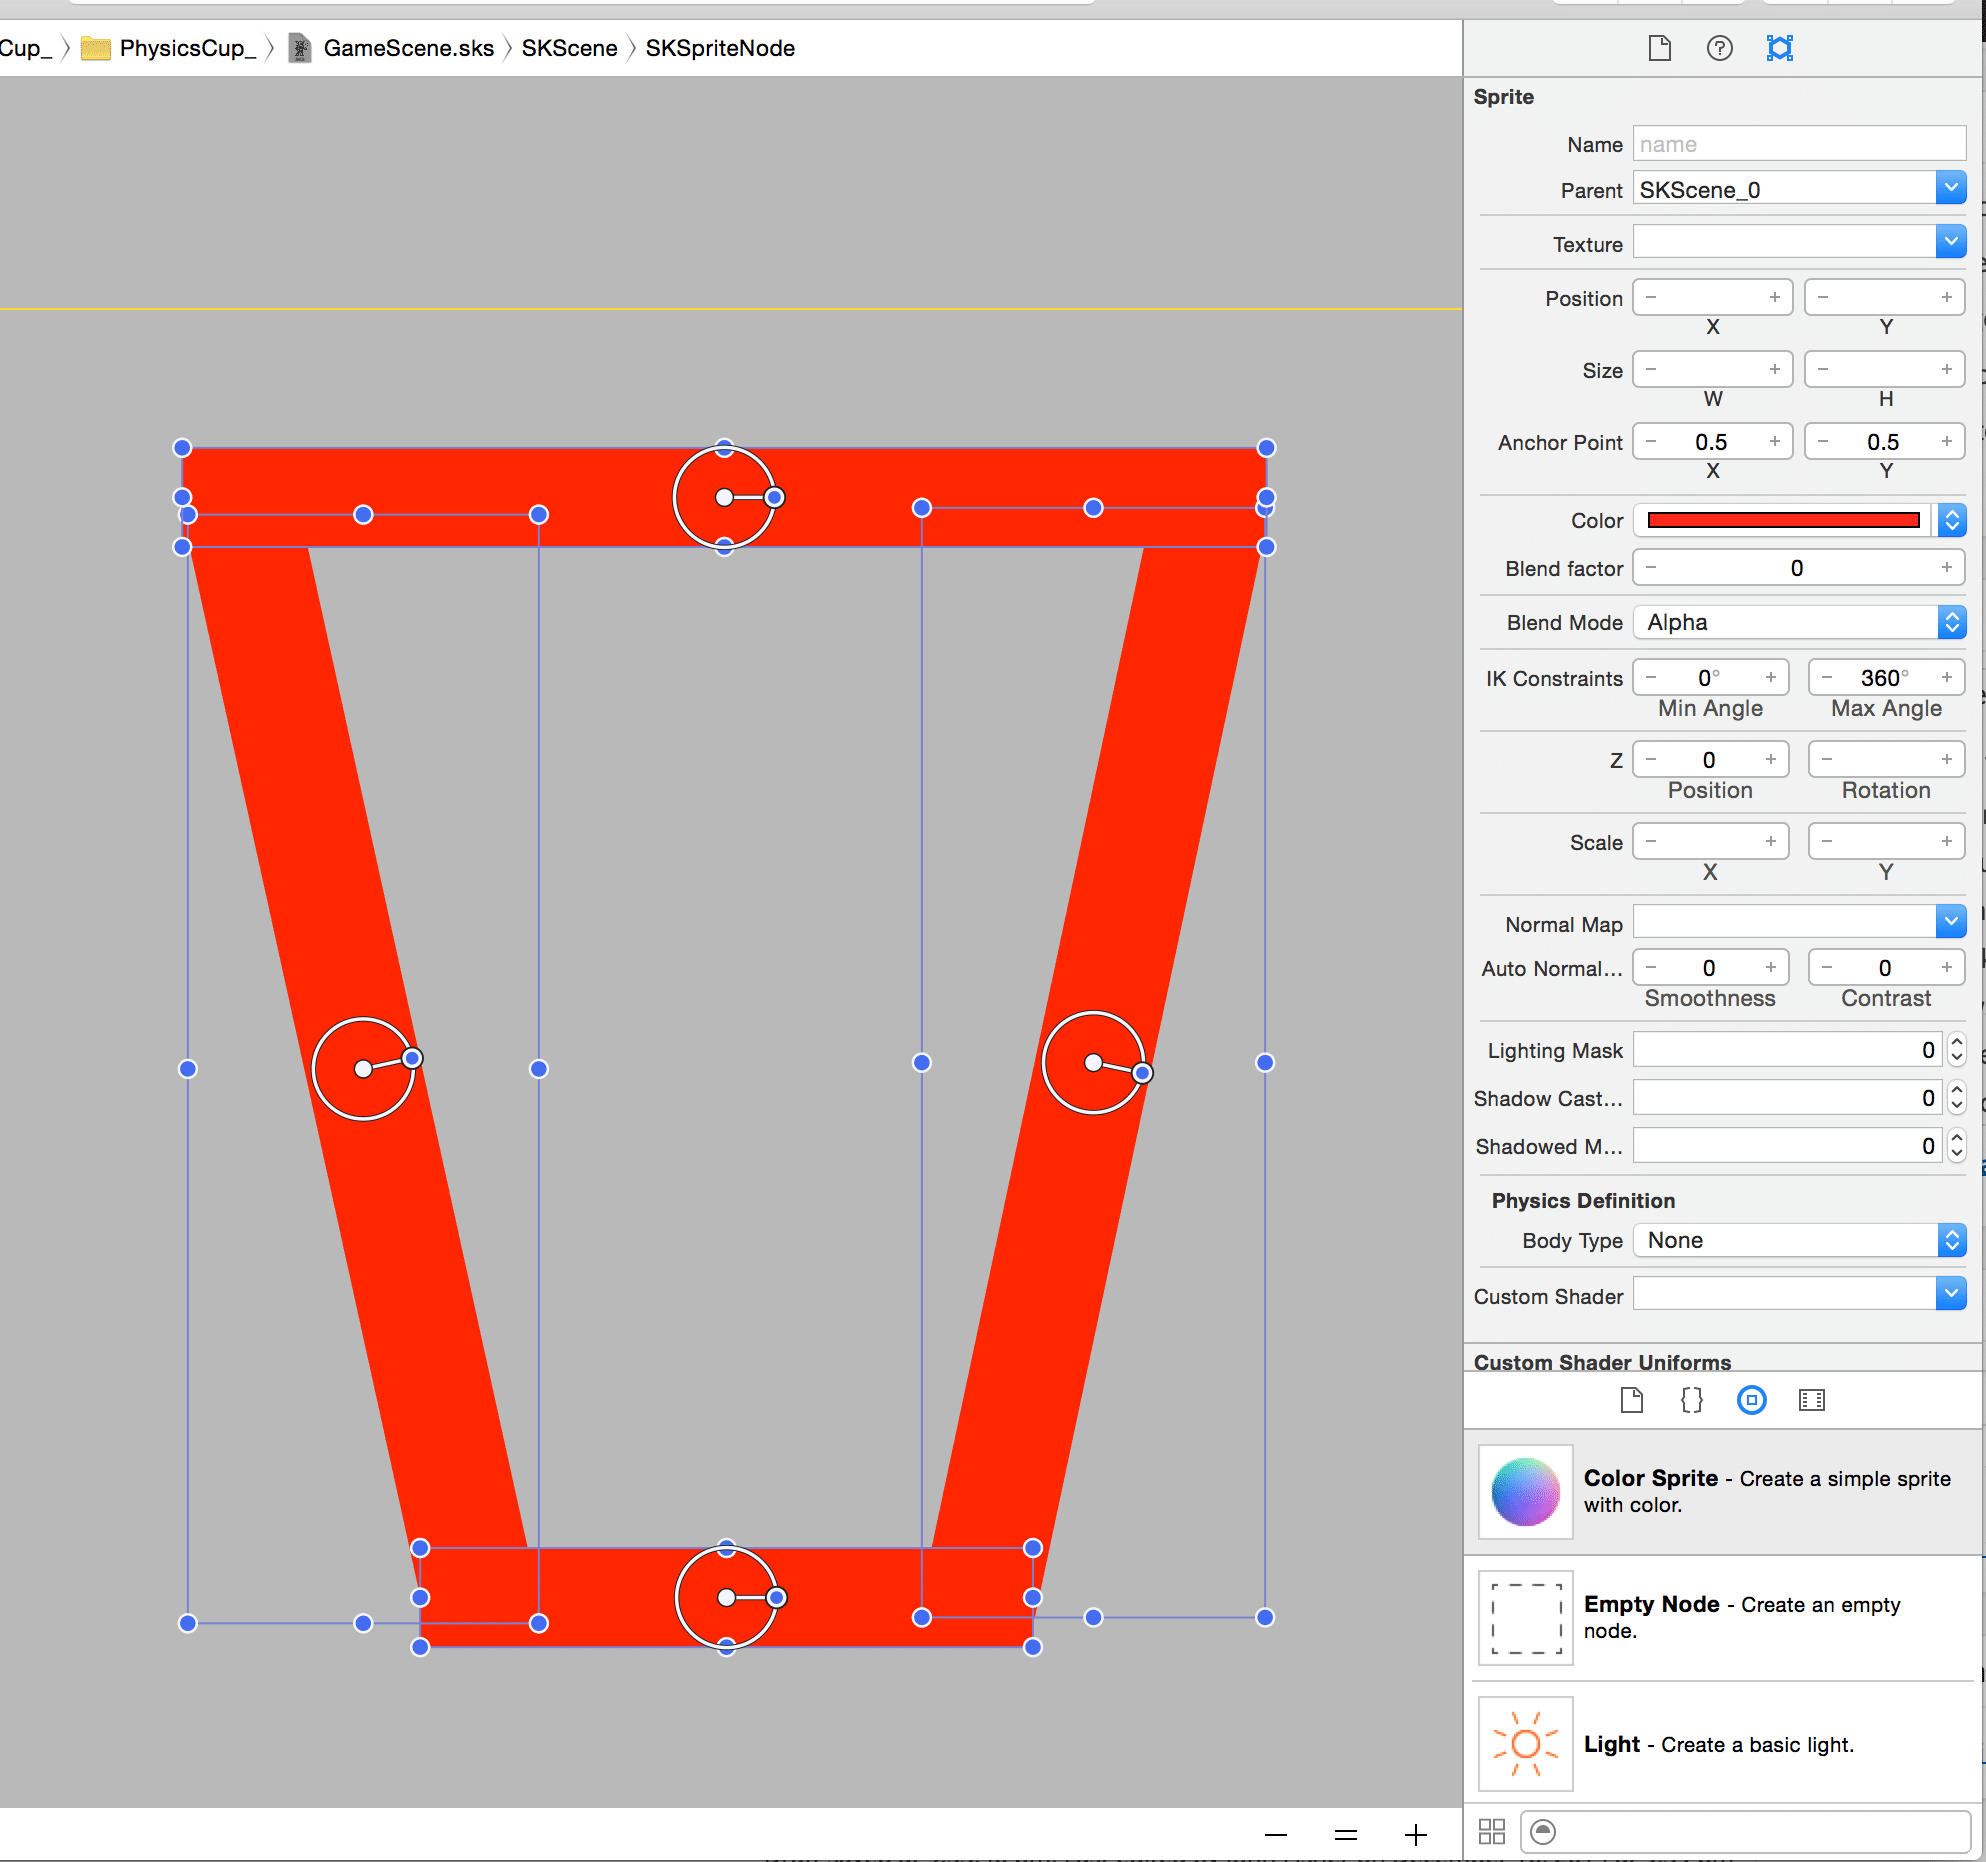
Earlier in this blog post I stated I was going to make a simple version of the Starbucks’ app coffee cup visualization, to that end we’ll use xCode’s level editor. GameViewController contains the code GameScene.unarchiveFromFile("GameScene") in its viewDidLoad function. This is a class function that goes and finds a file called Gamescene.sks in the bundle and presents it in the SKView contained in the app’s main view controller. Gamescene.sks is an xCode Sprite Kit level editor file, opening it brings up the level editor.
3. Add a star node.
Now that we have our “cup” in the level editor, let’s write the code to add a simple star-shaped sprite. First, add star.png (link here ) the project by going to image.xcassets in xCode, adding a new image set called ‘star’, and dropping star.png onto the 3x spot:
Once the .png asset is in our project, we need to use it to create a SKNode and add it to our scene’s tree. To do this, we’ll write a simple custom class that implements SKNode and add a class method on it that builds our node. In xCode, go to File -> New -> New File, then under iOS go to Source and pick “Swift File”. Give the file a name like SpriteNode.swift, and add the following code to it:
import UIKit
import SpriteKit

class StarNode: SKSpriteNode {
    class func star(location: CGPoint) -> StarNode {
        let sprite = StarNode(imageNamed:"star.png")

        sprite.xScale = 0.075
        sprite.yScale = 0.075
        sprite.position = location
        return sprite
    }
}
This method creates a new StarNode, which implements SKSpriteNode. Notice the method star is passed a CGPoint. The sprite will be located at that point. The calling code will be responsible for adding the StarNode to the scene. In GameScene.swift, add/edit the following method:
    override func touchesBegan(touches: NSSet, withEvent event: UIEvent) {
        for touch: AnyObject in touches {
            let sprite = StarNode.star(touch.locationInNode(self))
            self.addChild(sprite)
        }
    }
This code is called when any stars are touched in the scene. It creates a new StarNode by using our class method StarNode.star(location) and adds the newly created SKNode to the scene by calling self.addChild(sprite). Simple! Run the app and you should see your red “cup”, and when you tap the screen a star should appear and fall through the scene into oblivion.
4. Add SpriteKit physics!
Now that we have our scene with our nodes creating the “cup” and stars, it’s time to take advantage of the very cool Sprite Kid physics engine to really make the app work.
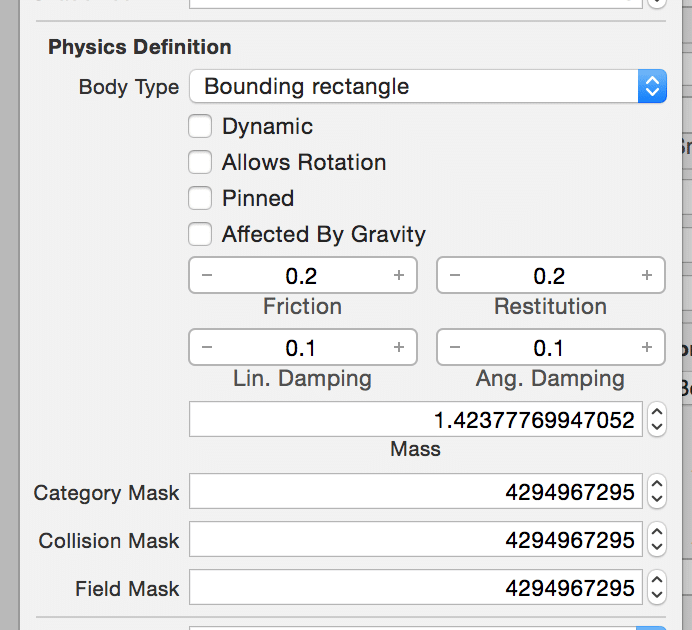
First, let’s turn on physics for our cup. Open GameScene.sks and select all four red color sprites that make up the “cup” shape. On the right side of xCode you will see an area called “Physics Definition”, which has a “Body Type” select box currently marked None. Change that drop down to “Bounding Rectangle” and un-check “Dynamic”, “Allows Rotation”, “Pinned”, and “Affected By Gravity”. By choosing these options, the “cup” shape will exist in the physical scene but will not be affected by gravity or collisions with other objects. Try turning on these options and you’ll see the cup fall out of the world, just like the stars did.
StarNode.star() in StarNode.swift to add the physics definition programmatically, as follows:
class StarNode: SKSpriteNode {
    class func star(location: CGPoint) -> StarNode {
        let sprite = StarNode(imageNamed:"star.png")

        sprite.xScale = 0.075
        sprite.yScale = 0.075
        sprite.position = location

        sprite.physicsBody = SKPhysicsBody(texture: SKTexture(imageNamed: "star.png"), size: sprite.size)
        if let physics = sprite.physicsBody {
            physics.affectedByGravity = true
            physics.allowsRotation = true
            physics.dynamic = true;
            physics.linearDamping = 0.75
            physics.angularDamping = 0.75
        }
        return sprite
    }
}
There are many interesting options on the SKPhysicsBody that can be tweaked to get the “feel” of a game just right. In the above, I set the linear and angular damping values to 0.75 (on a scale of 0.0 to 1.0) to make the stars move through space as if the air is more viscous (as if it’s in a cup of coffee). I still wasn’t happy with how quickly they were falling, so I went into GameScene.swift and decreased the world’s global gravity (-9.8 is default, and it’s in meters per second):
    override func didMoveToView(view: SKView) {
        self.physicsWorld.gravity = CGVectorMake(0.0, -4.9)
    }
That’s better. As I mentioned above, there are a number of levers to pull on physics bodies to adjust how they move through space an interact with each other. For instance, if you give the body a restitution value greater than 1.0, you’ve created flubber!
Iurge you take a look at the Apple documentation for SKPhysicsBody, but you should also be aware the physics bodies can have forces (linear, angular, torque) applied to them, and they are also responsible for defining what other physics bodies can interact with them (collisions and contacts) via bitmasks. SKPhysicsBodies are very powerful but also have a simple and fun API- much like the rest of Sprite Kit.
5. Make it more fun with gravity.
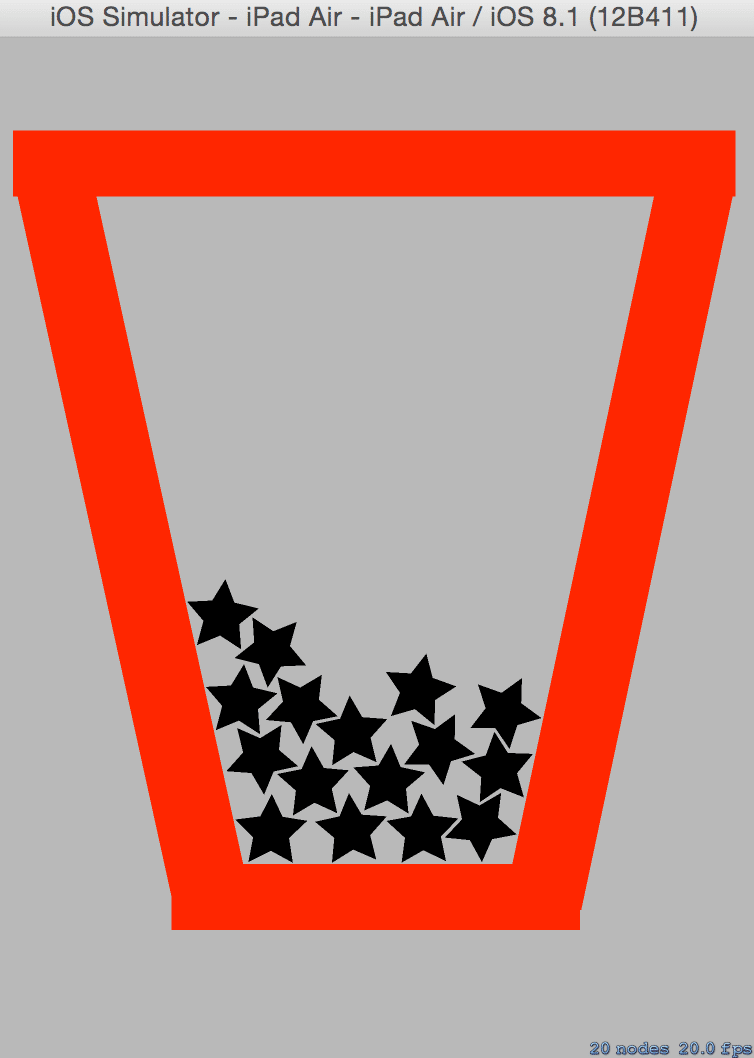
Now if you run the app and tap in the cup a few times, you should have a nice pile of stars, like so:
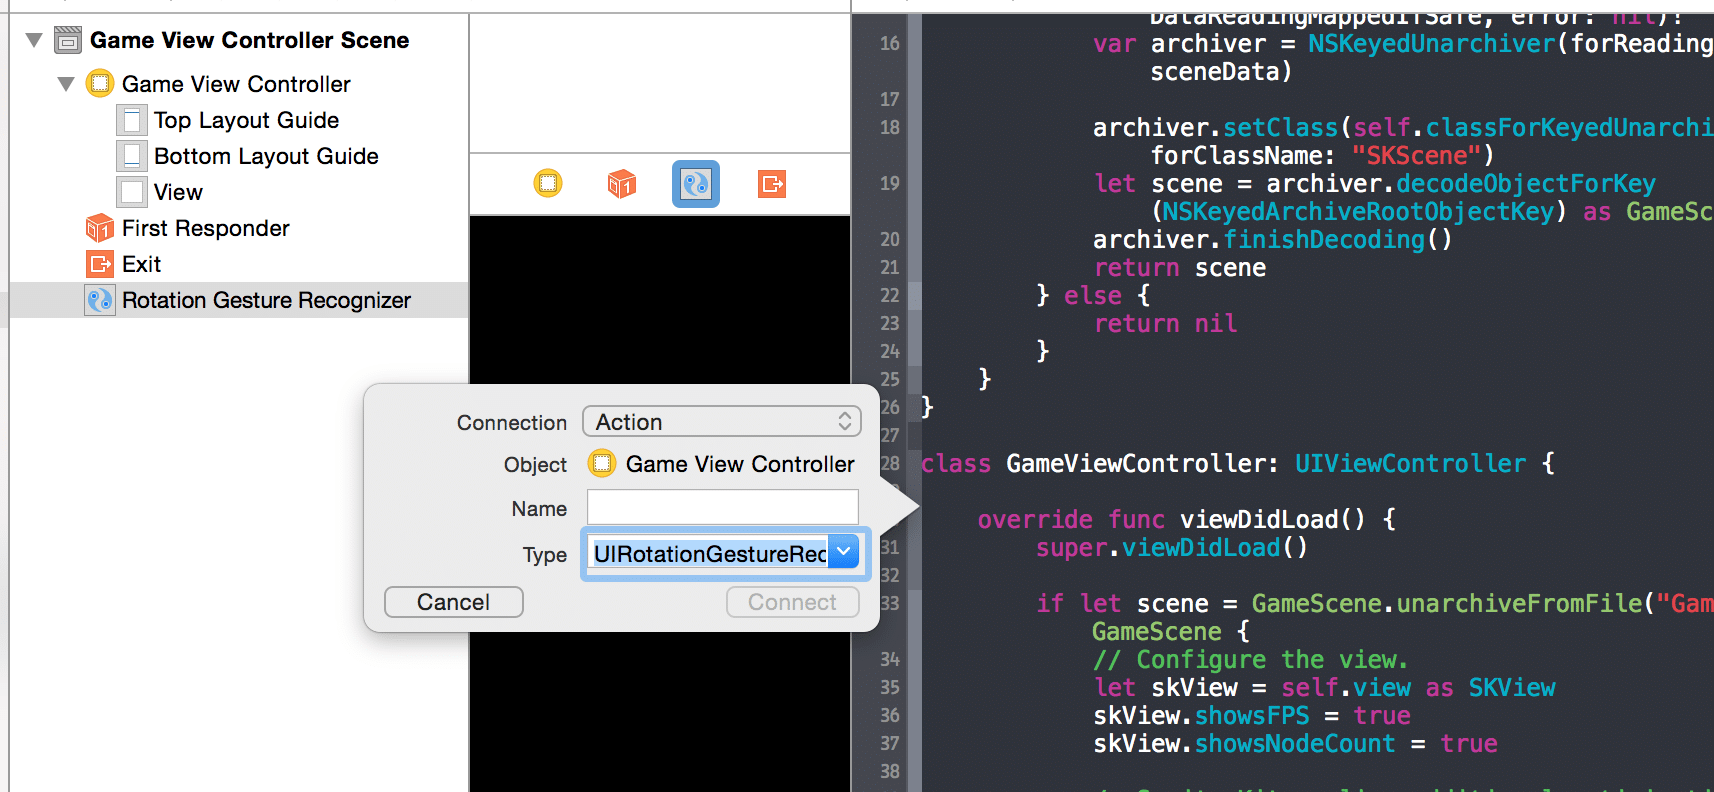
Main.storyboard. Find “Rotation Gesture Recognizer” in the Object Library and drag it over onto your Game View Controller’s view. Then, select the Rotation Gesture Recognizer in the storyboard and ctrl+drag an action over to the GameViewController class:
GameViewController.swift to the following:
class GameViewController: UIViewController {

    var lastRotation = CGFloat(0.0)
    @IBAction func rotated(sender: UIRotationGestureRecognizer) {
        if(sender.state == UIGestureRecognizerState.Ended) {
            lastRotation = 0.0;
            return
        }

        var rotation = 0.0 - (sender.rotation - lastRotation)
        var trans = CGAffineTransformMakeRotation(rotation)

        let skView = self.view as SKView
        if let skScene = skView.scene {
            var newGravity = CGPointApplyAffineTransform(CGPointMake(skScene.physicsWorld.gravity.dx, skScene.physicsWorld.gravity.dy), trans)
            skScene.physicsWorld.gravity = CGVectorMake(newGravity.x, newGravity.y)
        }

        lastRotation = sender.rotation
    }
Run the app again in the simulator—you can rotate by holding alt and the clicking and dragging. When you let go of the rotation handles, the scene gravity will update based on the rotation in radians, and the stars will be affected by gravity and tumble around interestingly.
Just the Beginning
From here, there are plenty of things you can do to make it more fun—like hook the app up to CMMotionManager and modify gravity based on movement of the phone itself.
I had a lot of fun at Cocoaconf’s game workshop, and Josh Smith was an excellent speaker and teacher. Sprite Kit really is a cool framework to play with, and it’s obvious how easy it is to develop simple and fun games (or use the basic building blocks to build a much more complex game).
I’ve also uploaded a slightly more polished version of this project to my github account.


hi
It looks like the version on github is the default code for a new spritekit project.
Oh and great tutorial..
-mj
Thanks! git fail by me!
A very helpful commenter pointed out the link to the github project was the stock default spritekit project, how embarassing ;-) I’ve updated the code on github to have the actual project now.
Fantastic tutorial, thanks for this!
Totally pedantic comment: at GameViewController.swift:35 you’ve got a superfluous semicolon. I do this myself, constantly. :)
Hi,
I was wondering if it would be possible for you to publish a tutorial on throwing a sprite as in you drag it the let go and it goes int the direction you sent it in and possibly falls after. Well anyways thanks for the tutorial
function myFunction() {
alert(“I am an alert box!”);
}
nice try…?
Hello there! I write because I have a project that left me as a task in a class, but I do not know how to solve it and if if somebody can write to me and give me some answers it would really help me; so that, we all can learn collectively , I hope somebody helps me , thanks in advance.
Hi. I need your help in moving my snake in snake game. I am using Xcode -> Swift.
I was having trouble with the rotation gesture recognizer not getting called. After a bit of hacking I changed over to using a tap recognizer instead of the touches events in the scene. Seemed cleaner and less ambiguous to me since it lets IOS deal with tap vs rotate. I think my original problem was that the storyboard editor messed up when adding the rotation gesture handler. Possibly redoing that step would have also solved the problem.
@IBAction func tapped(_ sender: Any) {
let r = sender as! UITapGestureRecognizer
let skView = self.view as! SKView
if let scene = skView.scene {
let sloc = skView.convert(r.location(in:skView), to: scene) // scene != view coords!!!
let sprite = StarNode.star(location: sloc)
scene.addChild(sprite)
}
}