Every 18 months Atomic holds an internal conference called Atomic Con. I had the privilege of serving on the planning committee for the most recently held Atomic Con in November of 2022.
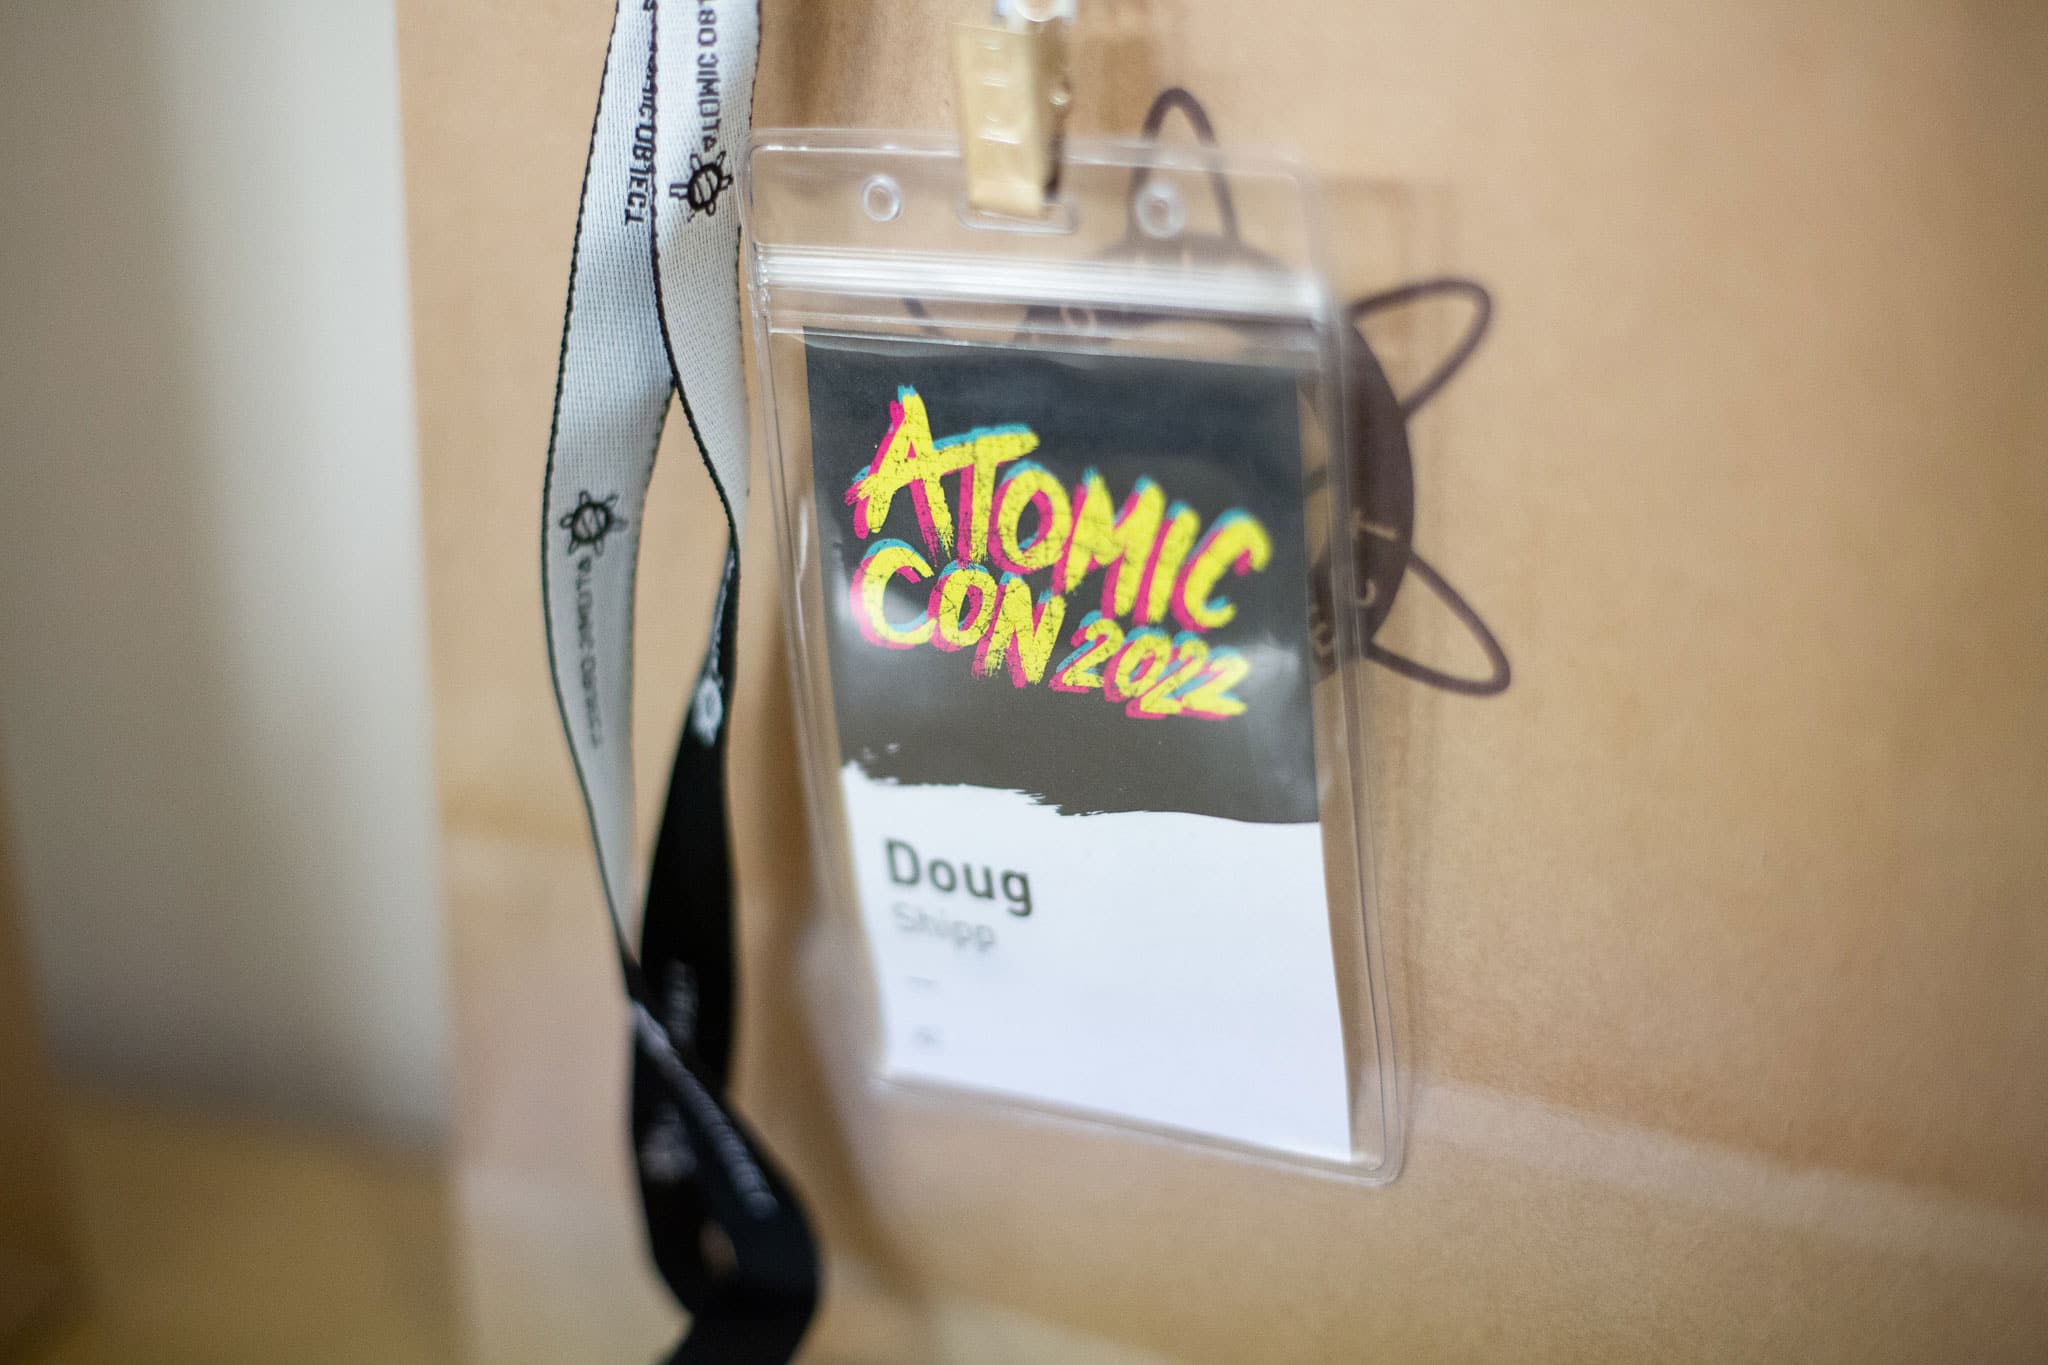
One of my tasks was to create our name tags. The event brings Atoms together from all of our offices, so it is not uncommon to meet folks you’ve previously only met on Zoom. Having name tags helps avoid awkward introductions/forgetting names or which office an Atom is from.
We have close to 90 people at Atomic these days — a bit too many for manually entering names and offices for every name tag. Because of this, I found myself looking for a more efficient way to create name tags. Fortunately, I was able to vaguely recall some spreadsheet-to-InDesign-automation black magic back from my print design days.
So… come on an adventure with me. We’ll use the Data Merge feature to populate ~90 name tags with employee names and offices! We’ll use a spreadsheet to insert the data into InDesign, requiring us to only create one original page for the name tag manually.
Step 1 – Design the Name Tag
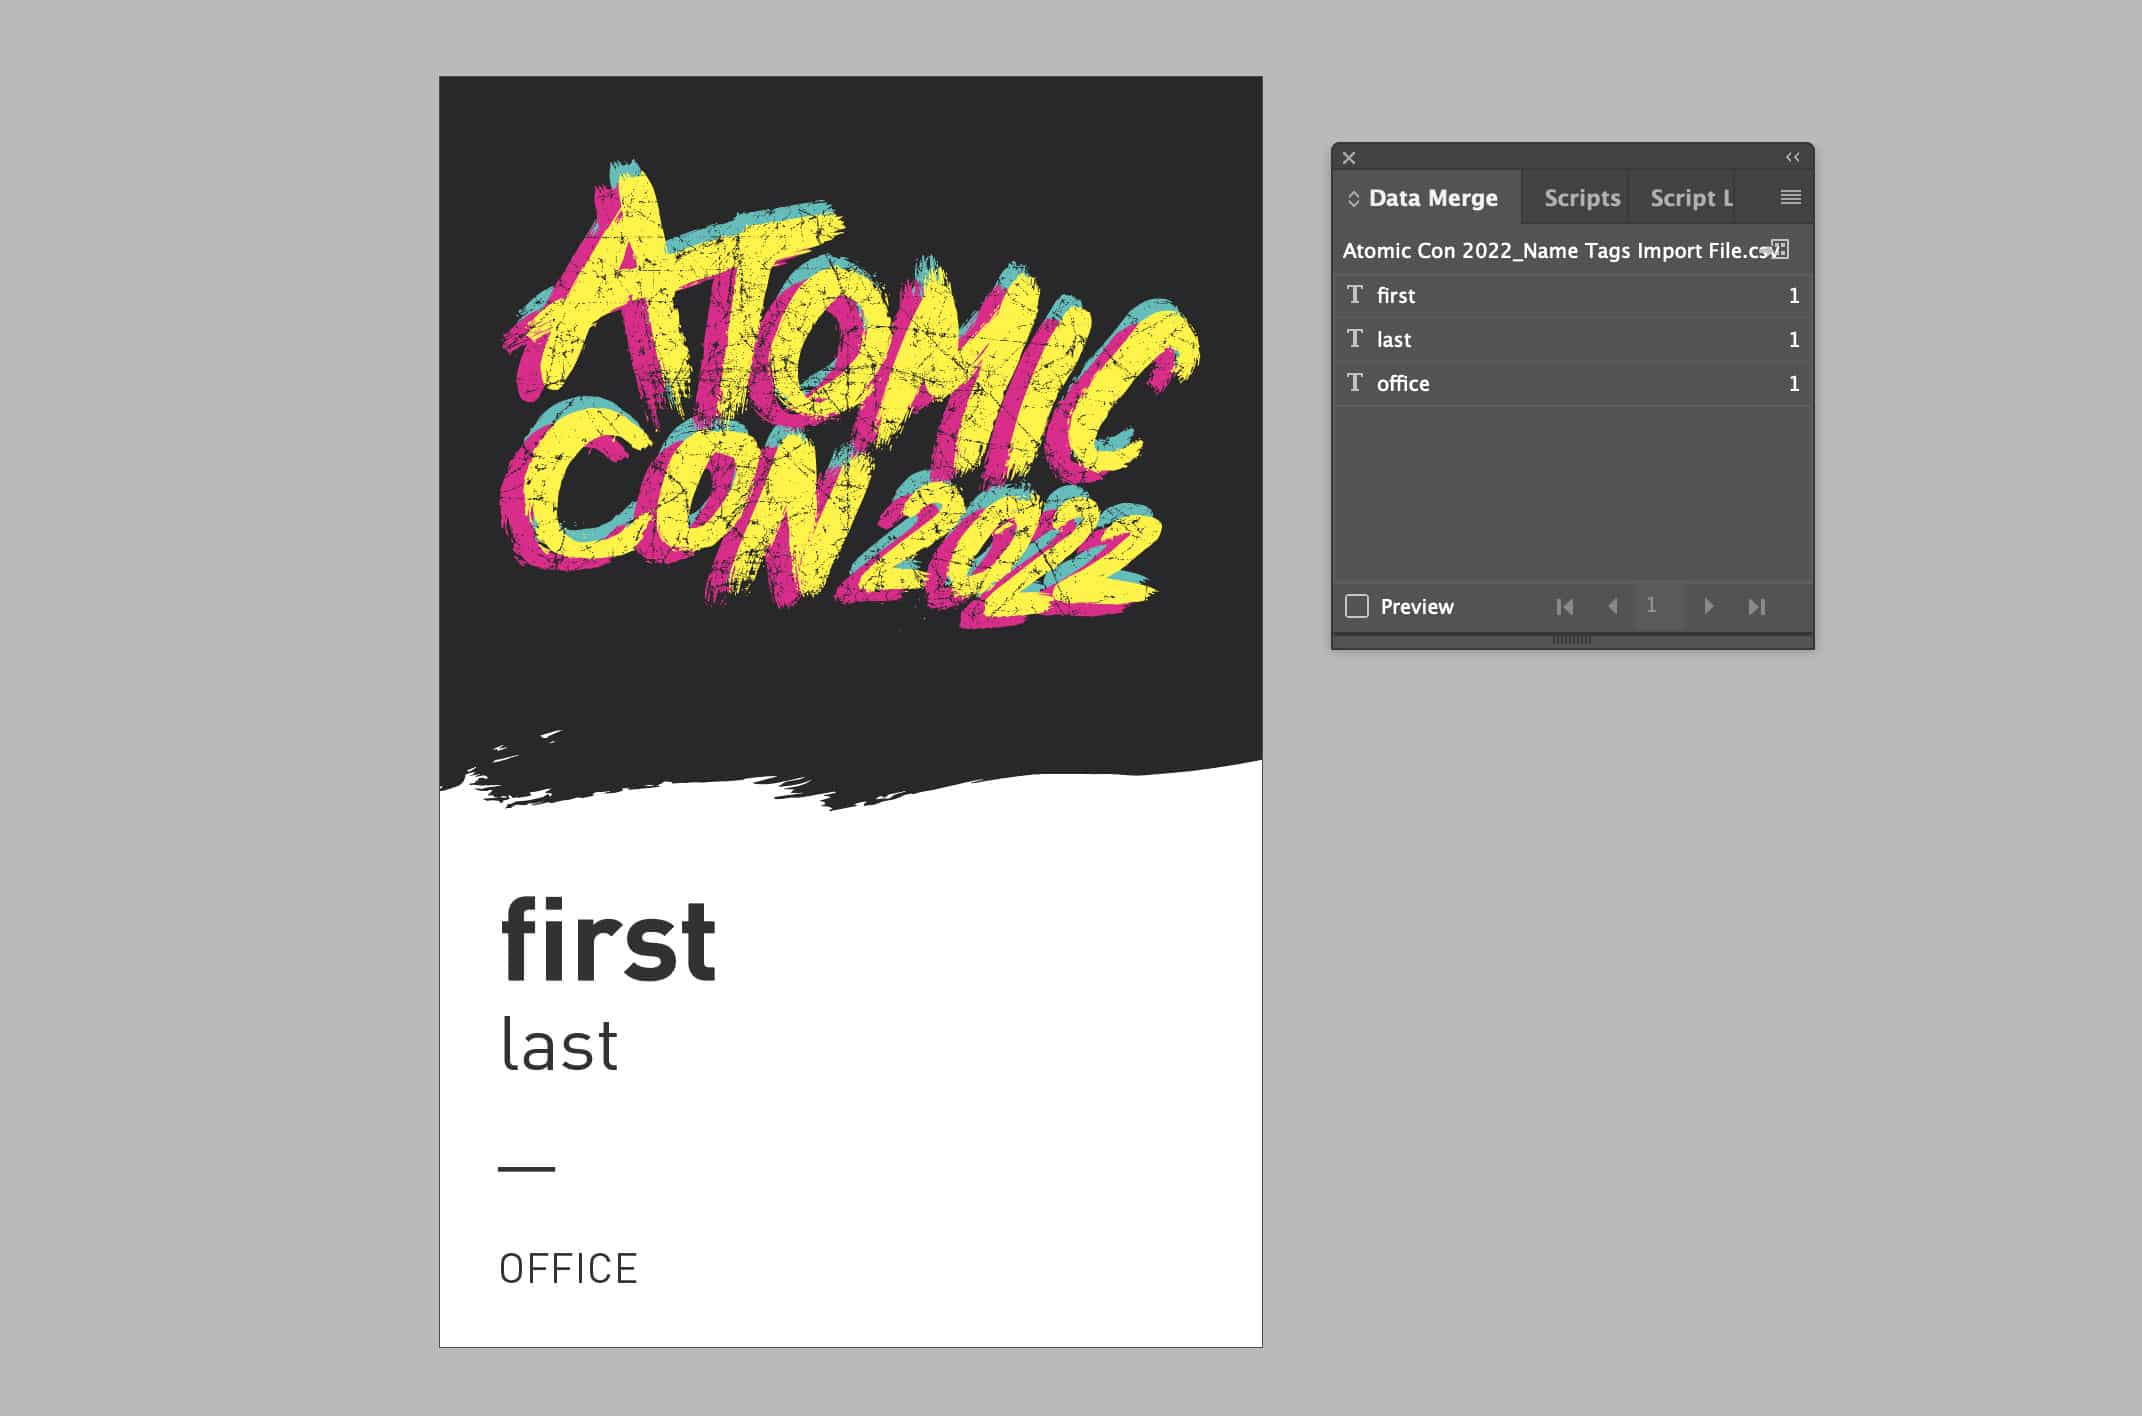
Before we can populate any data, we need our name tags designed! The name tags for Atomic Con are printed and then inserted into a plastic holder, which is attached to a lanyard. There is not a lot of information on the tags, simply: name, office, and Atomic Con branding.
Step 2 – Prepare the Spreadsheet

Knowing what fields need to exist on the tags means we can create a spreadsheet with all the information. You can use Google Sheets, Excel, or Numbers for this. The end result will be an exported .csv file.
My spreadsheet will include the following columns:
- First Name
- Last Name
- Office
First and last name are separated into their own columns because I have them styled differently in my InDesign file. If they would have been styled the same and all on one line, they could be a single field in the spreadsheet too.
The titles of the headers in the spreadsheet will be what InDesign extracts as the data titles as well. Name them accordingly, in a way that will make your document easy to understand (i.e. “first, last” instead of “name-1, name-2”).
Step 3 – Export Spreadsheet
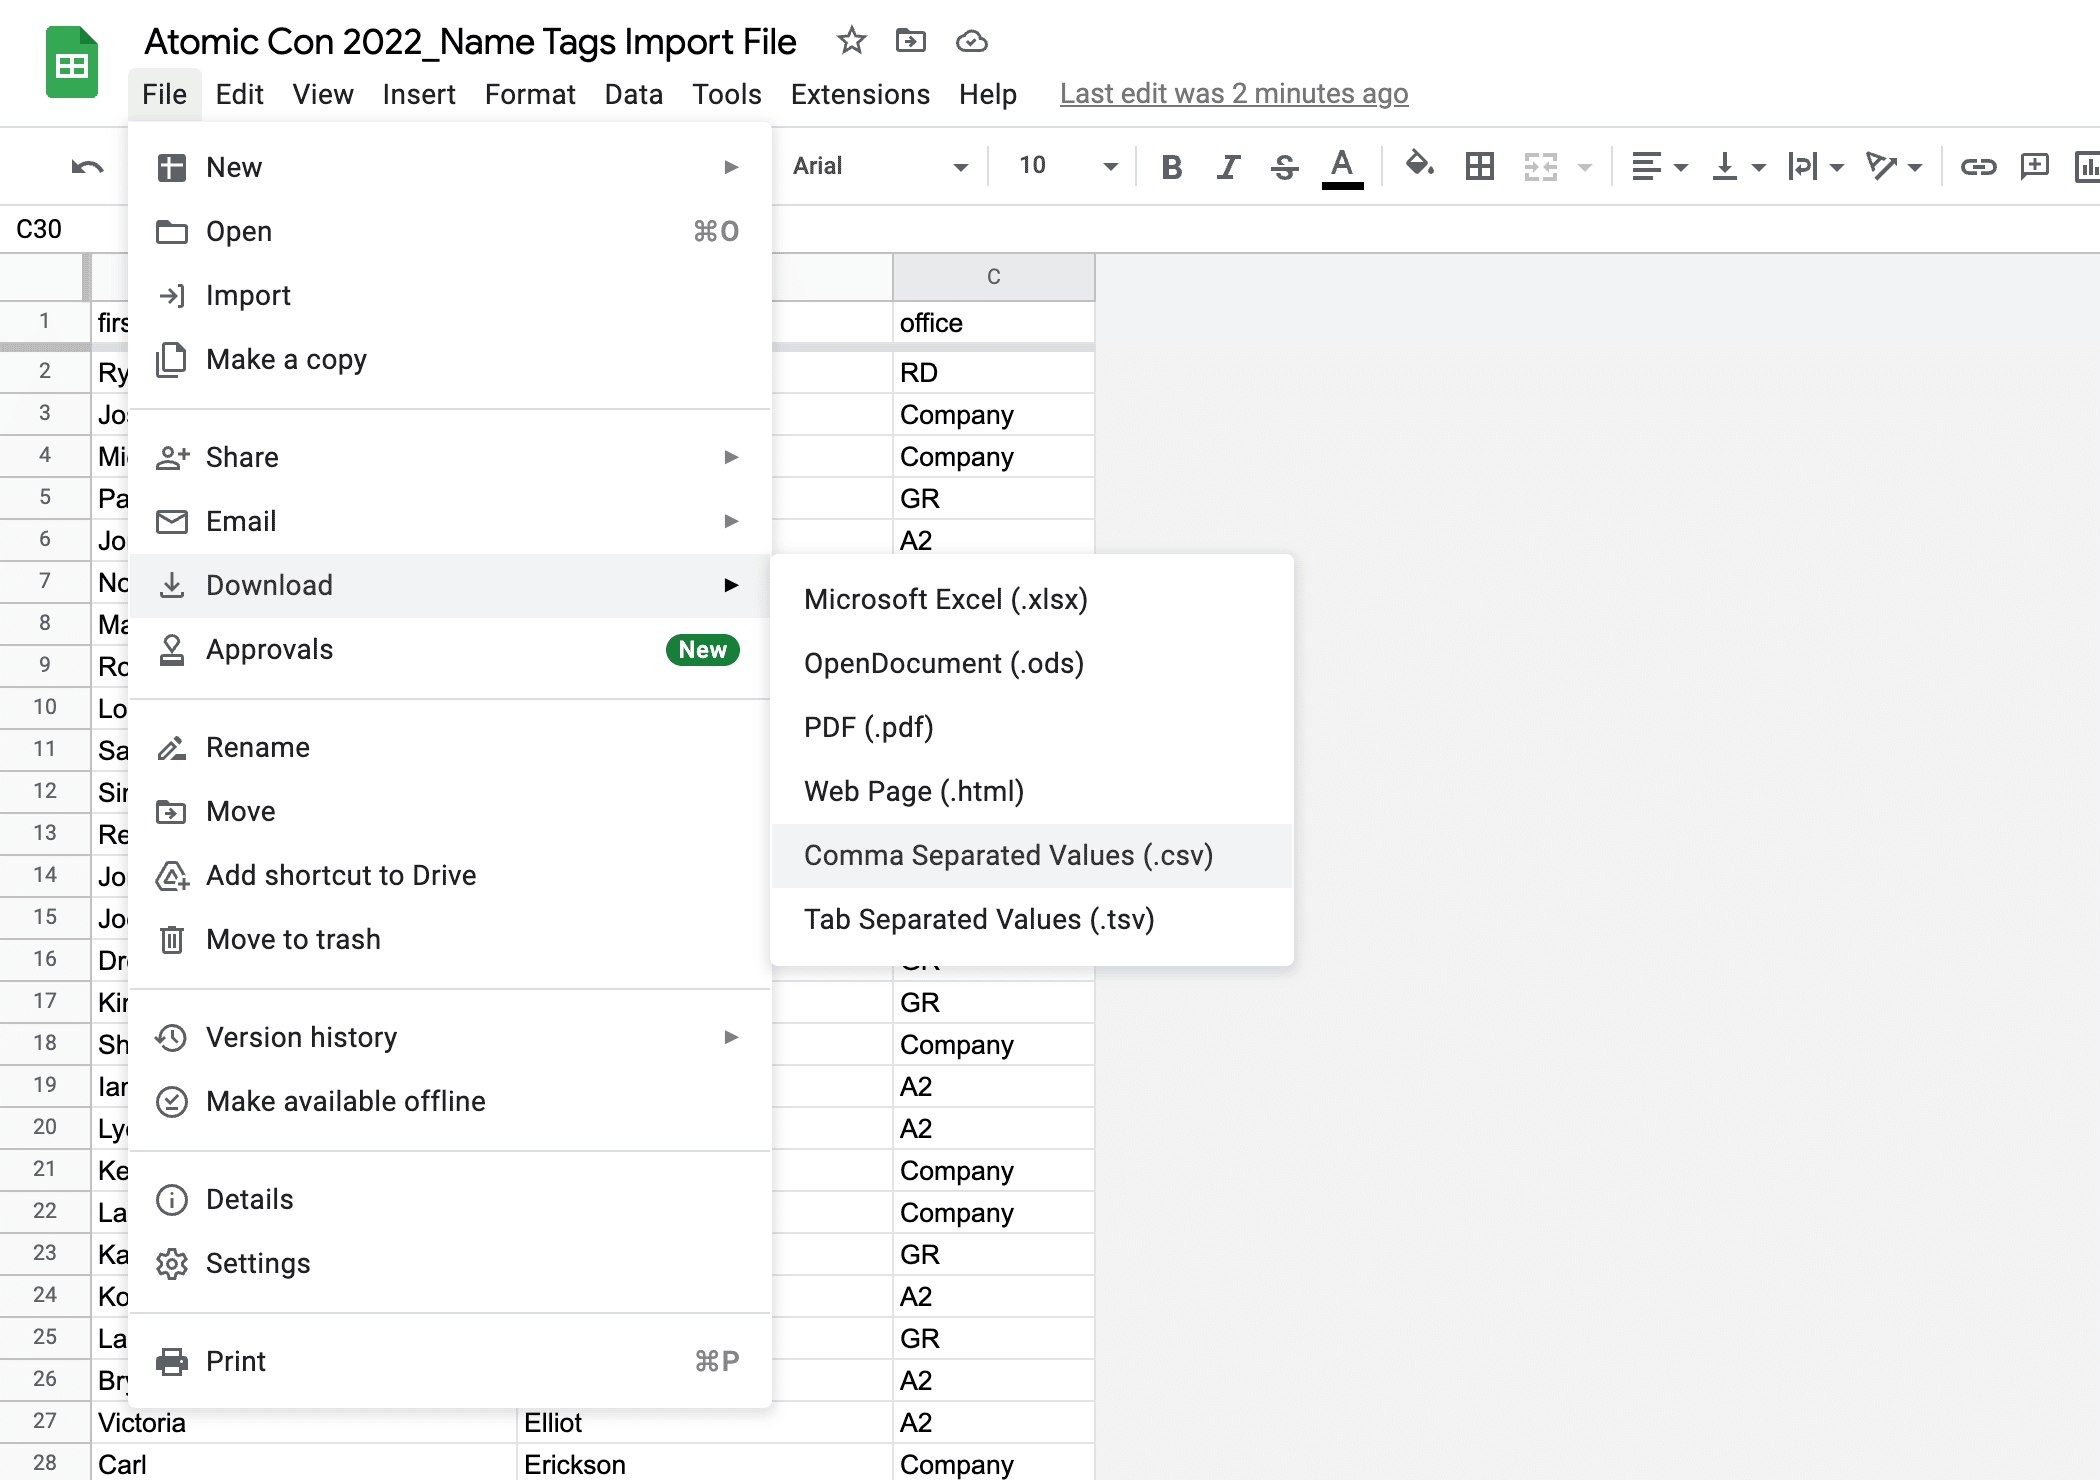
Once we have all our information ready in our spreadsheet, we can export it as a CSV. Nothing too complicated needs to be done here. Simply export it and choose CSV.
Step 4 – Add Data Source in InDesign
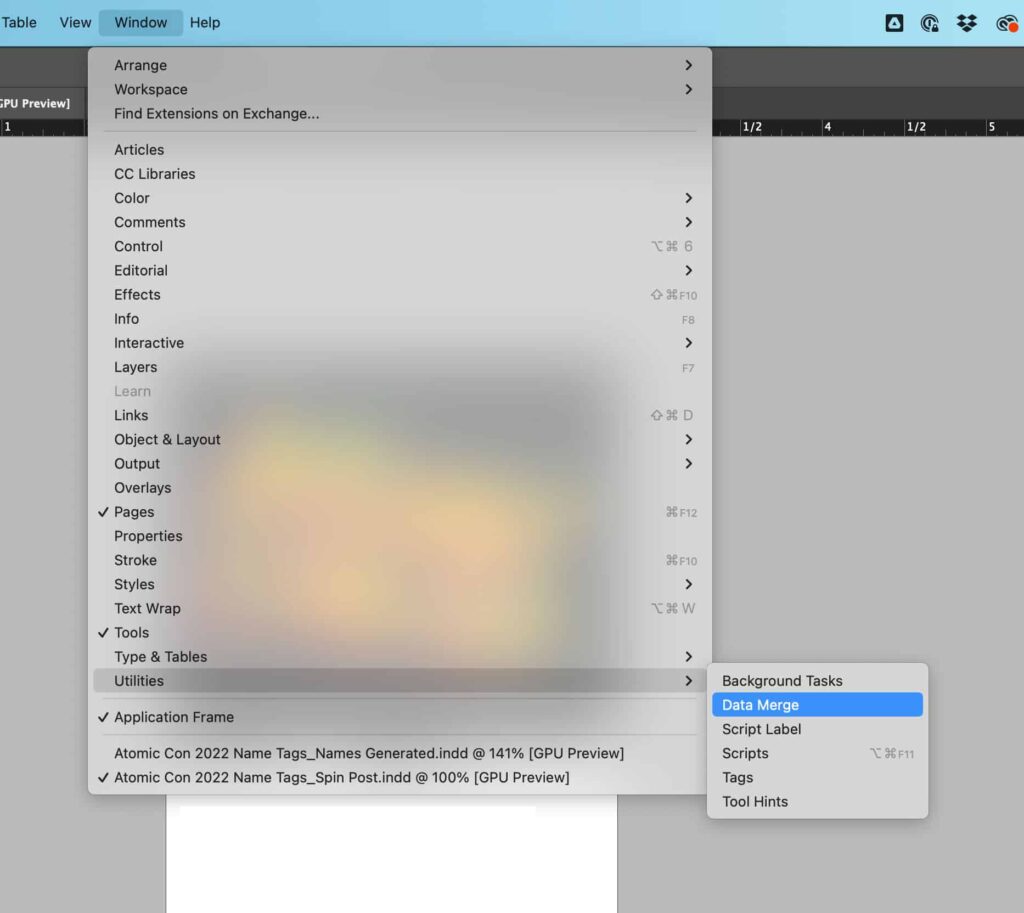
Now that we have our name tag design and our CSV file, we can add that file as the data source in our InDesign file. To do this, go to Utilities > Data Merge. Then click the hamburger menu in the Data Merge window and choose Select Data Source. Select the CSV file you just created.
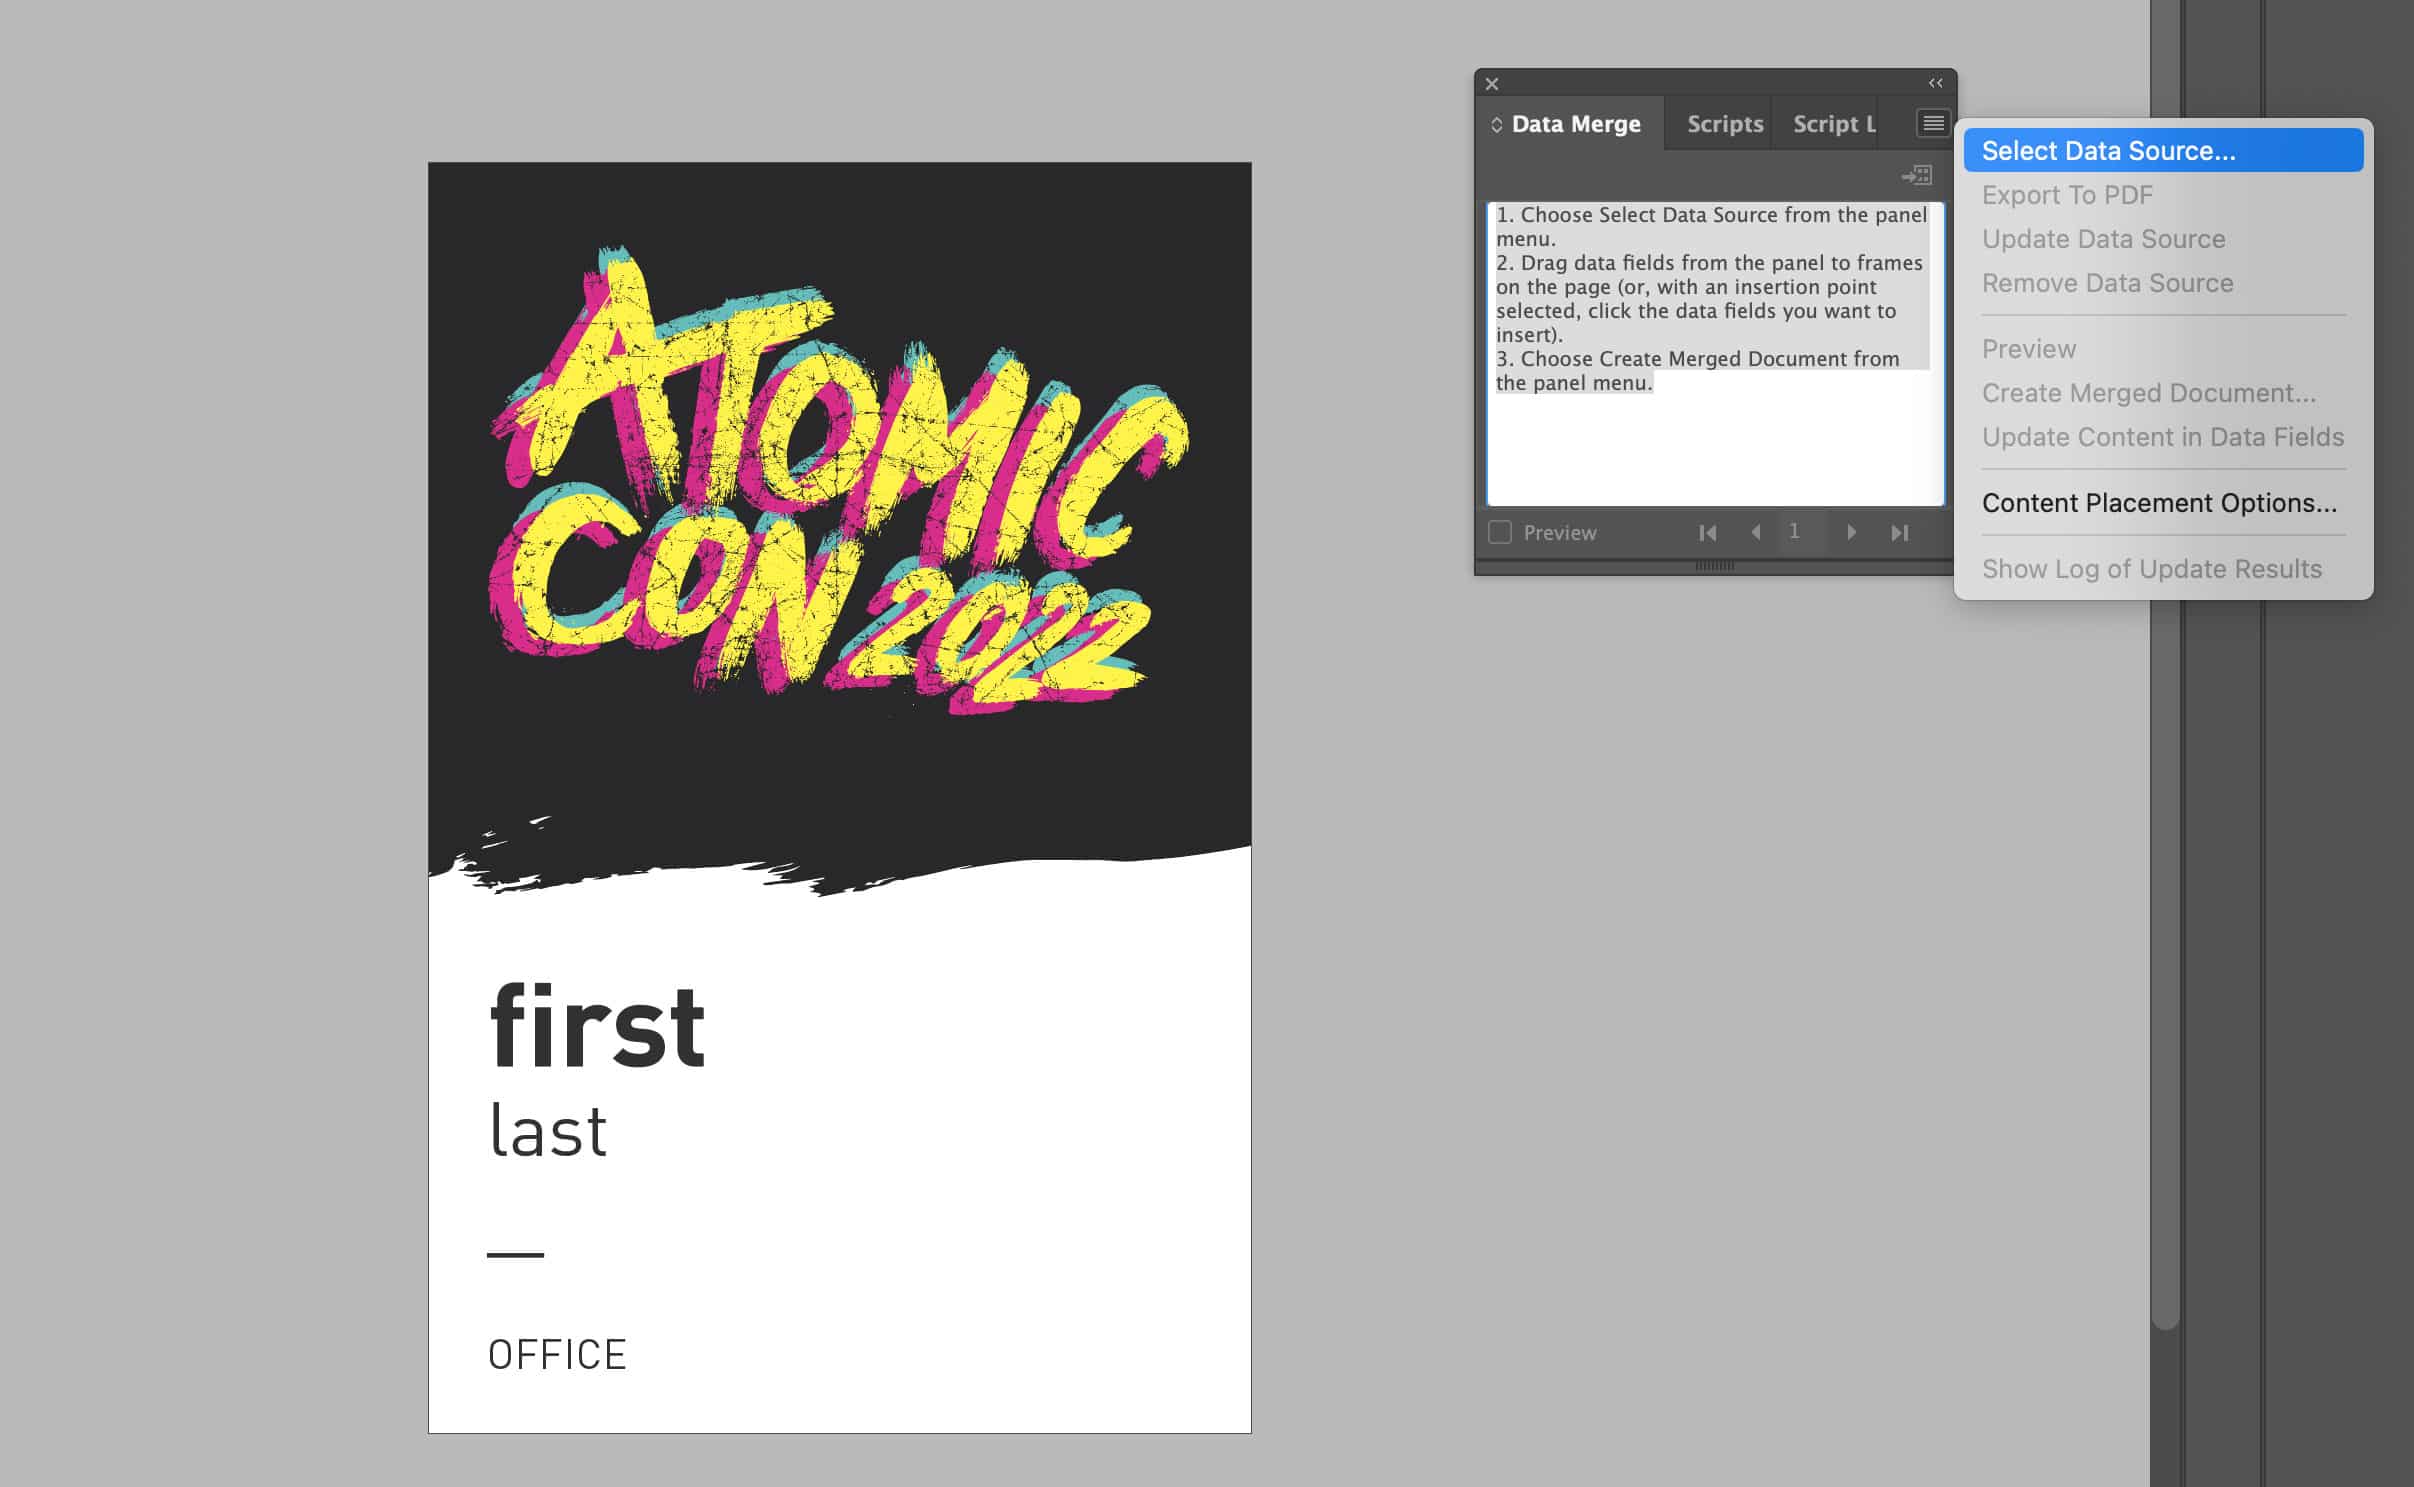
You should now see a list of the header columns in the Data Merge window.
Step 5 – Create Data Mappings
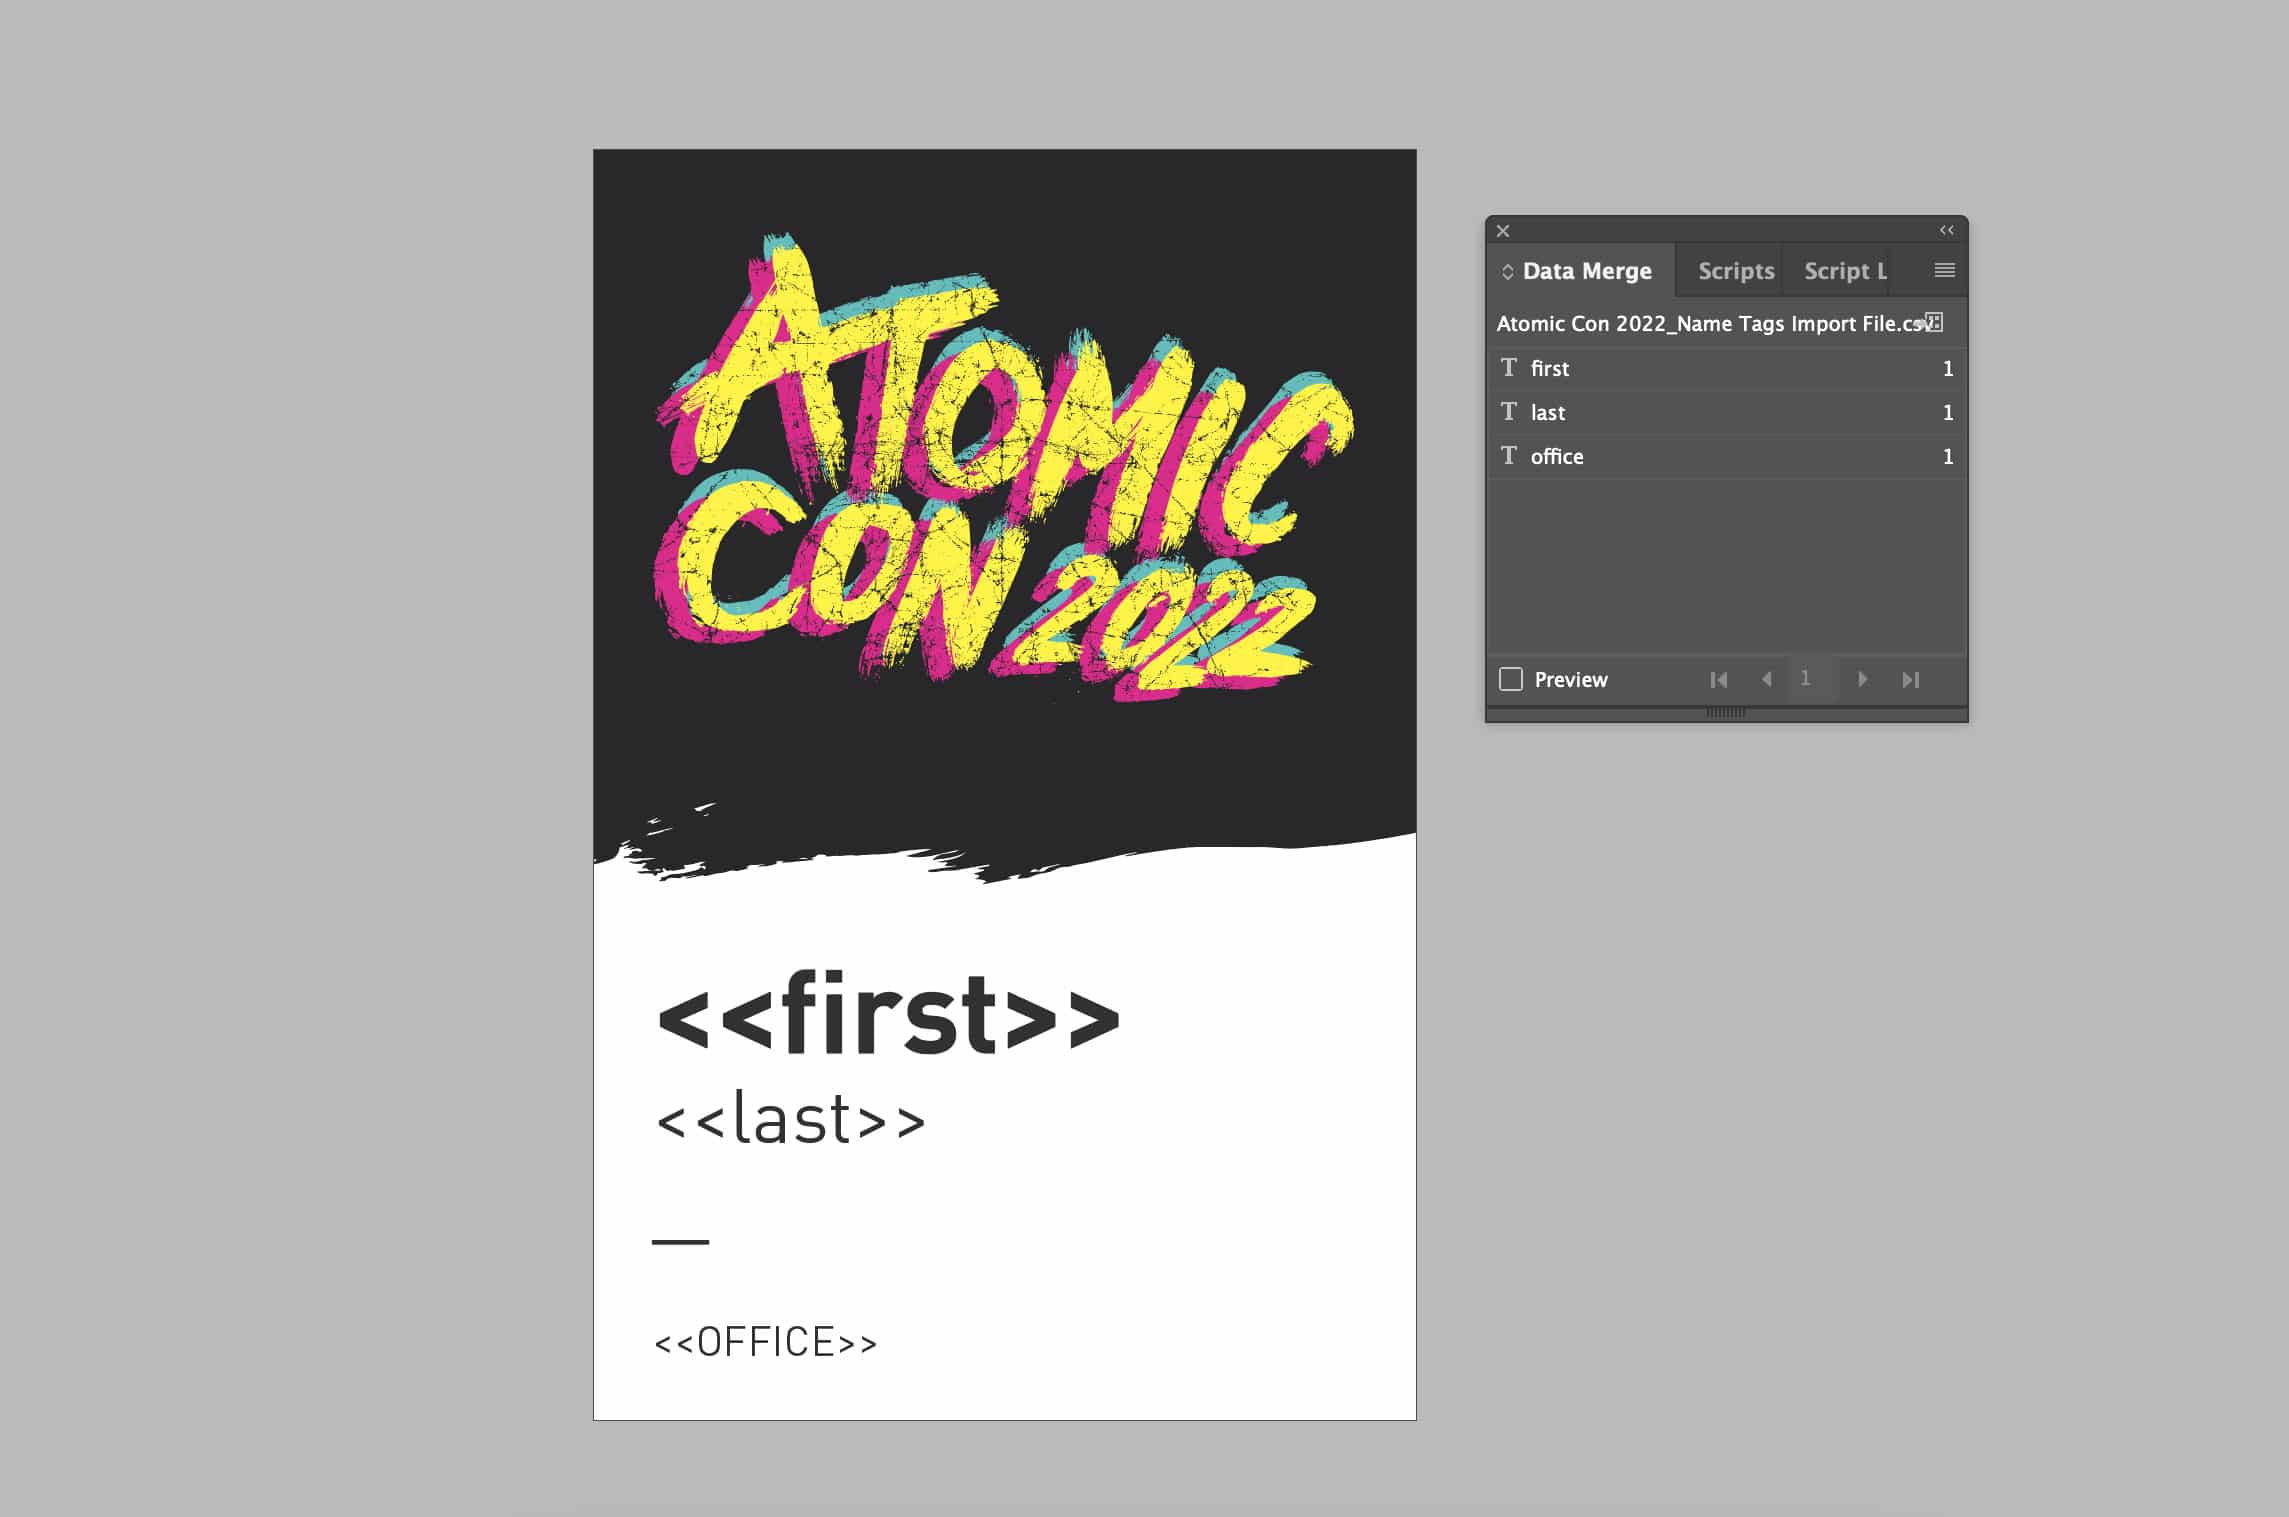
To map the data to their appropriate sections in the InDesign file, select one textbox and then click on on the appropriate data heading from the Data Merge window. You’ll see the text in the InDesign document will now simply say < < whatever the data title was > >. Do this for all data categories.
Step 6 – Generate Final Document

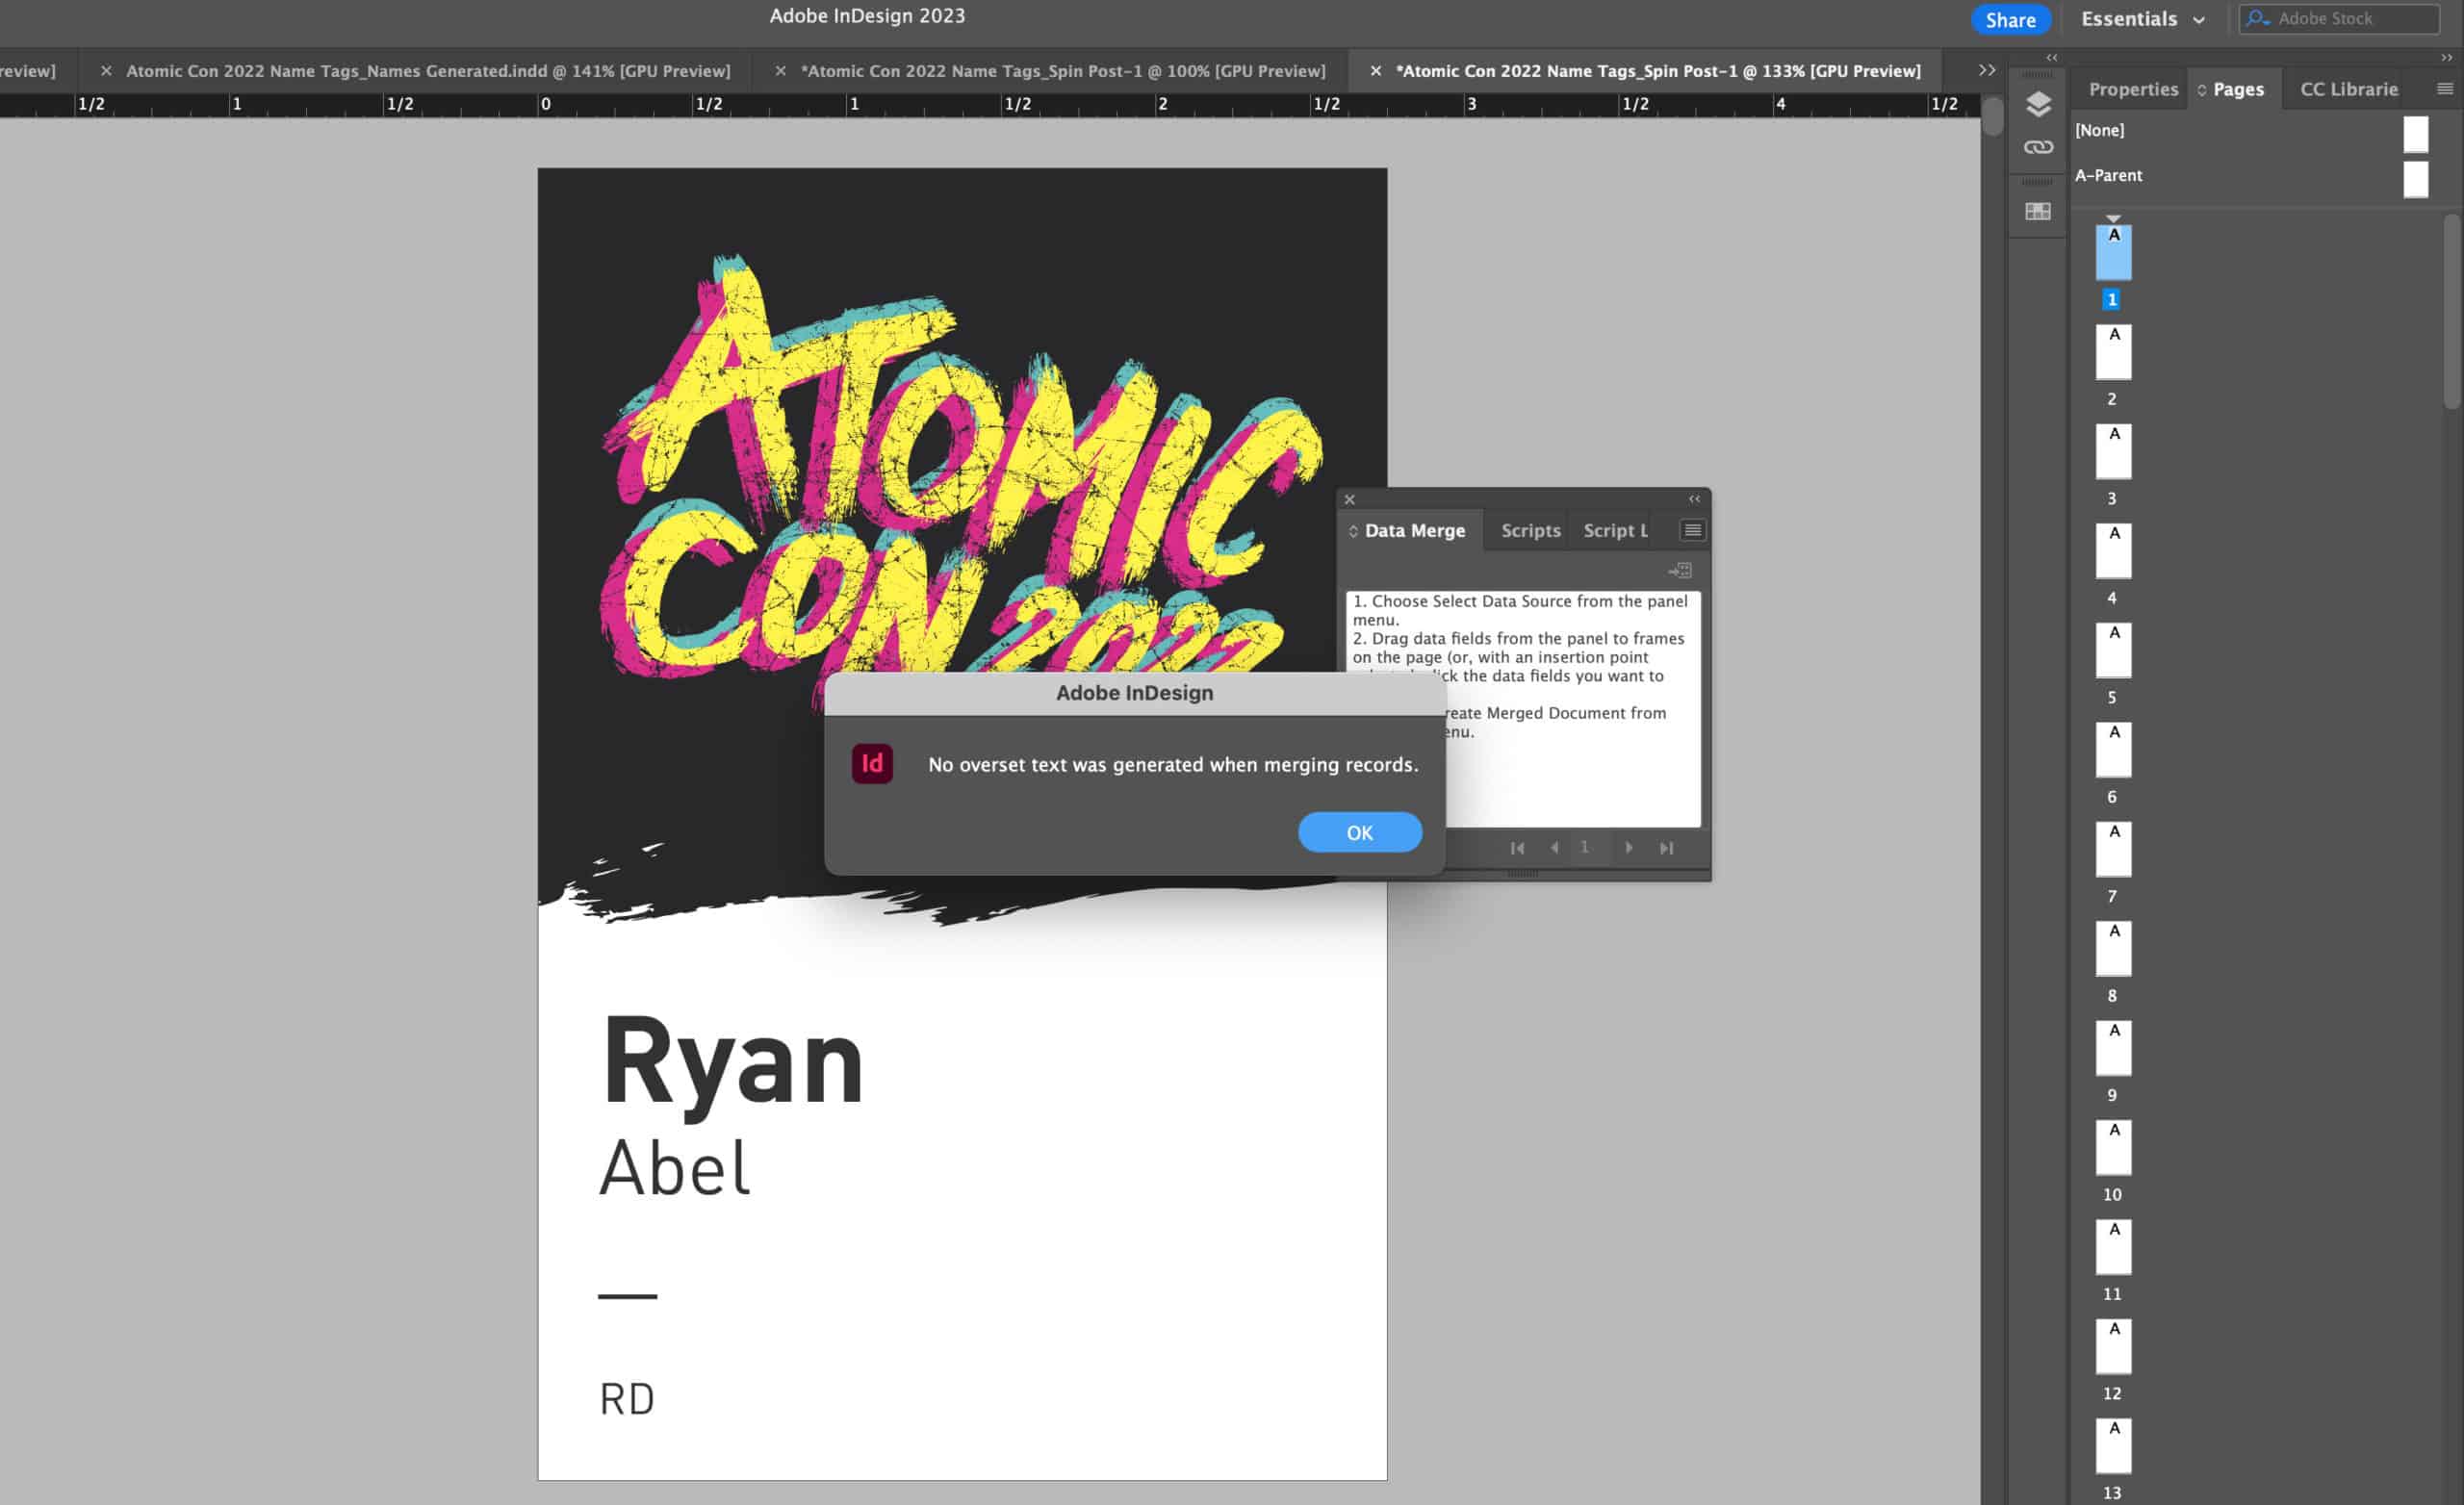
Once we’re done creating all the data mappings, we are ready to generate the final document. This action will take the single page in InDesign and create however many pages are needed (in this example, 87) to represent all the data in the linked CSV file.
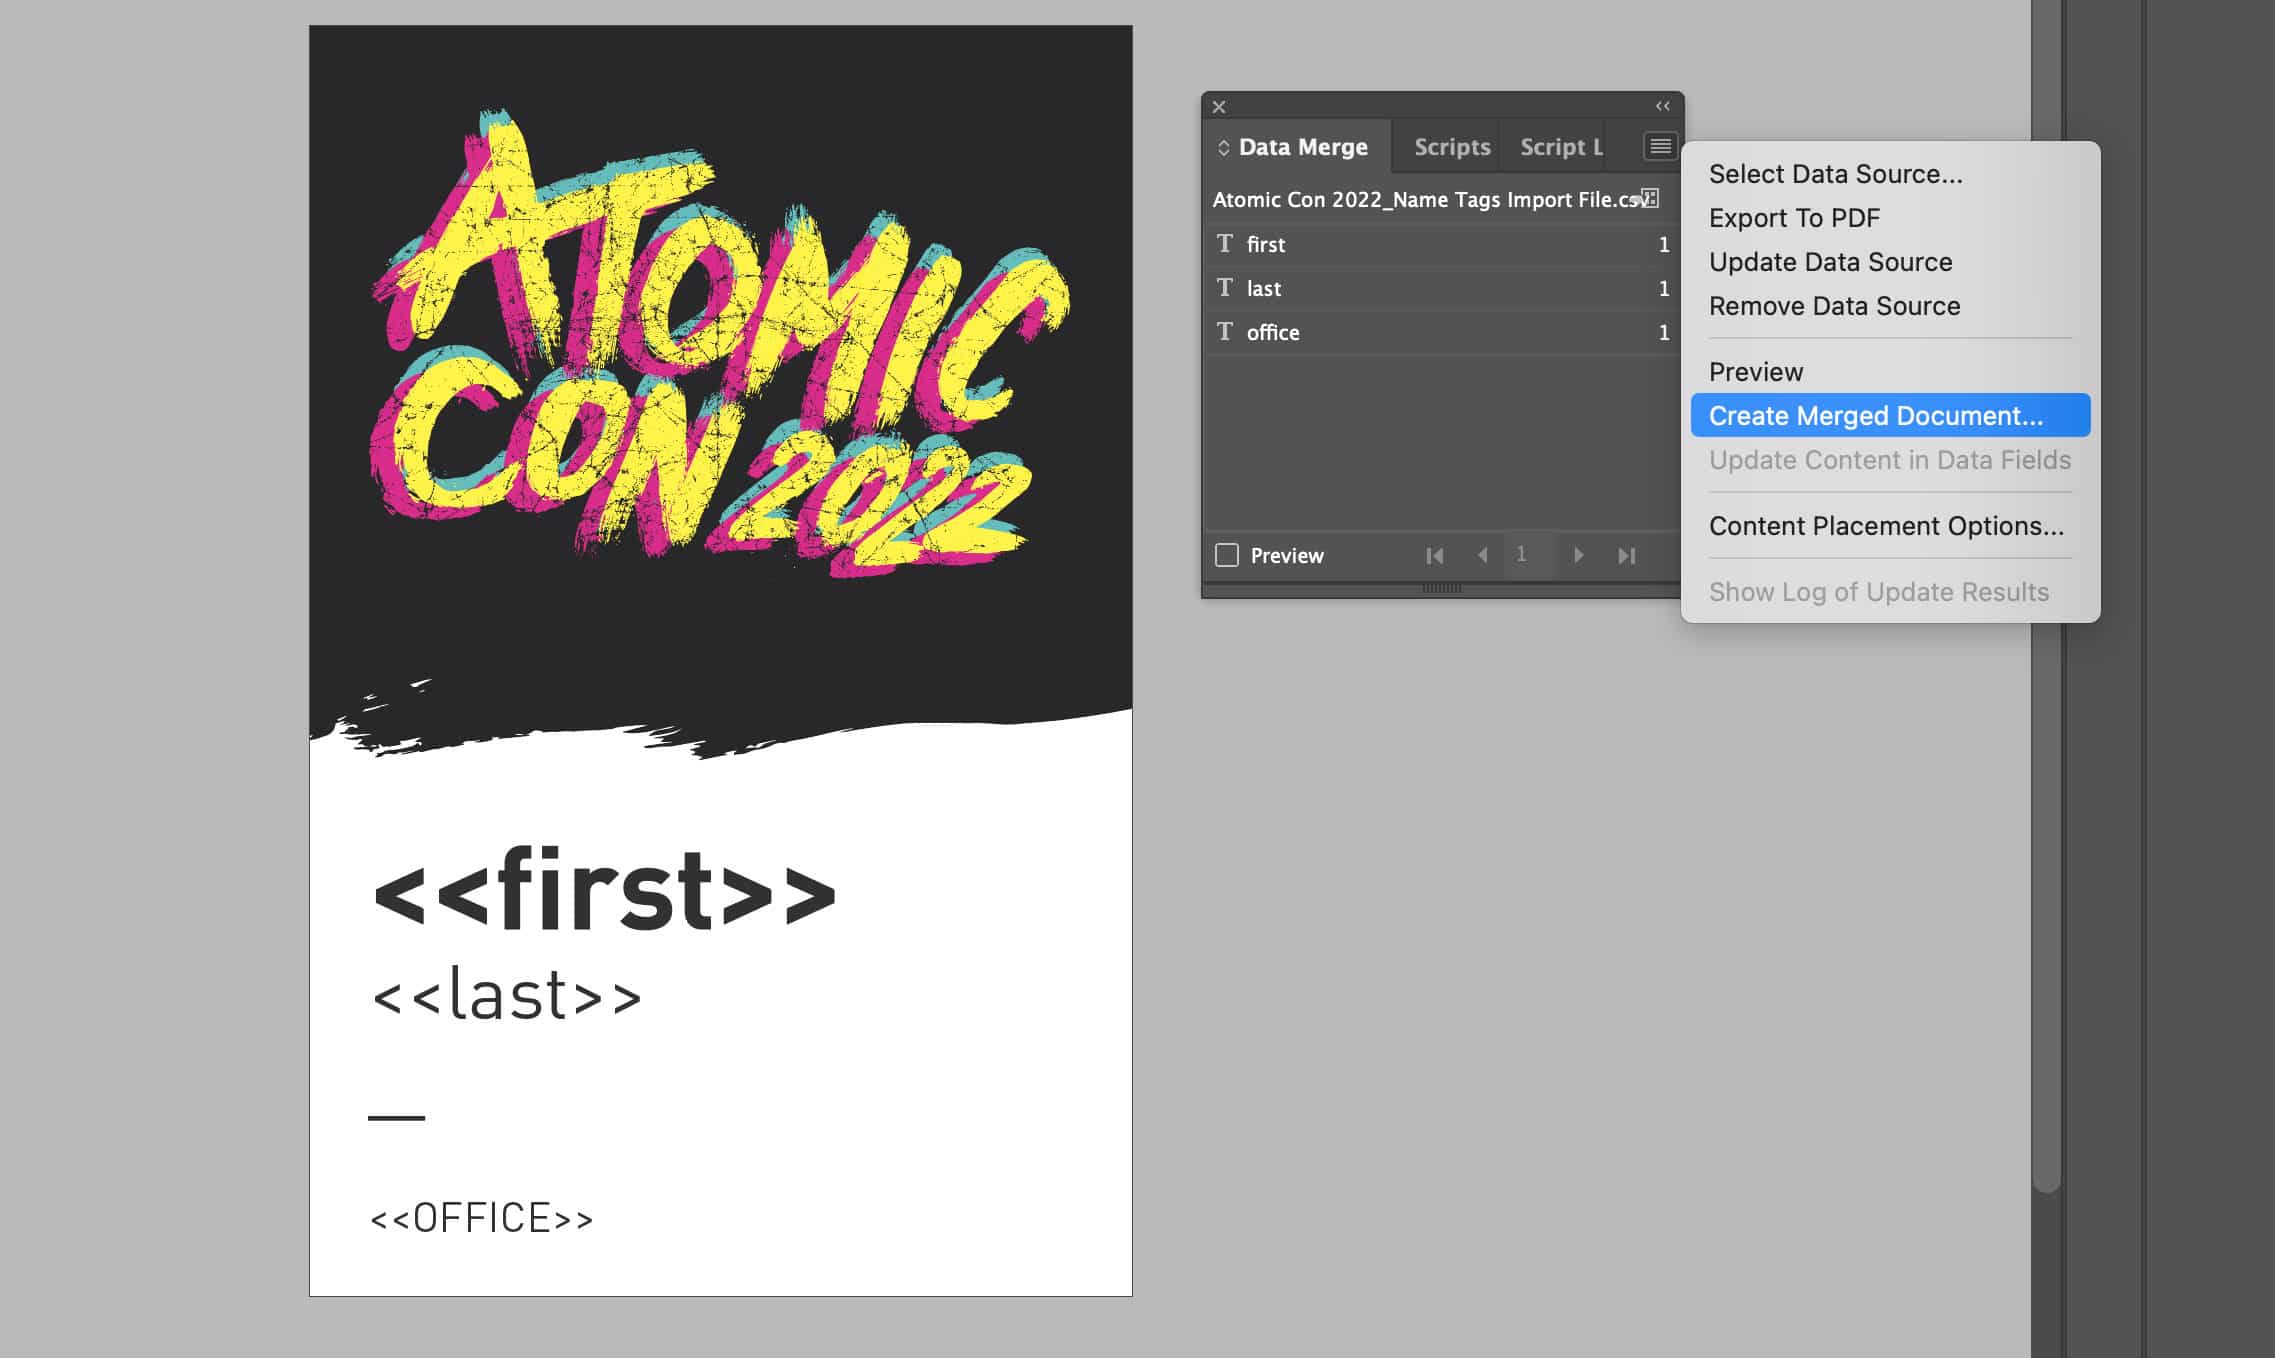
Once again, click the hamburger menu in the Data Merge window. Then select Create Merged Document.
Select All Records, and make sure Generate Overset Text Report with Document Creation is checked.
Click OK, and wait for the document to generate. InDesign will show a notification for any overflowing text (super helpful!).
Tada! We now have one InDesign document with 87 pages of name tags; one for each Atom—and it didn’t take copying + pasting 87 times! 🎉
Data Merge Can Do a Lot More
There are all sorts of fancy things that can be done with the Data Merge feature in InDesign. You can load images from a CSV file. You can populate entire brochures, etc. I’ve only scratched the surface with these name tags, but this is really all I needed. The process saved me a ton of time, and will certainly make it easier to update the name tags for future Atomic Cons!