Ready to shift your next ideation session into high gear? Bob Eberle’s SCAMPER framework will help you get there.
| Primary Goal | To dive deeper into ideation sessions |
| When to Use | When traditional ideation is at a stand-still |
| Time Required | 30-60 minutes |
| Number of Participants | 1-10+ |
| Who Should Participate? | Any members of the team |
| Supplies | Whiteboard, PostIt notes, Sharpies |
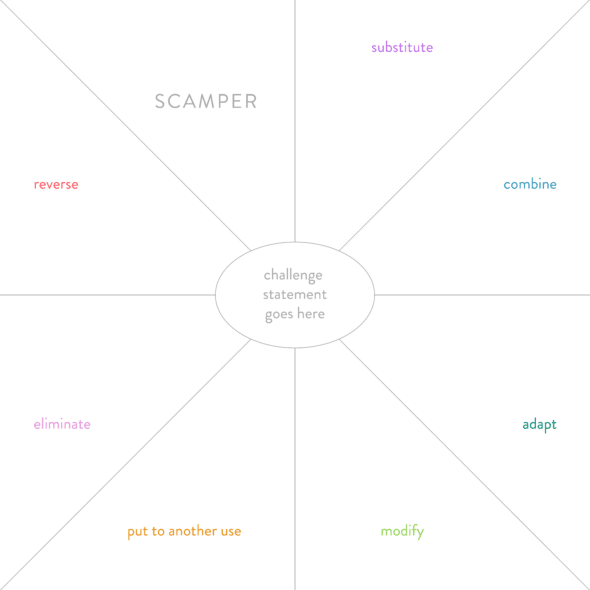
SCAMPER is a great activity when you need a fresh perspective for a problem with stale solutions. SCAMPER is an acronym for Substitute, Combine, Adapt, Modify, Put (to another use), Eliminate, and Reverse.
This activity has several strong benefits. First, it encourages creativity through perspective shifting. Each time you feel like you’ve exhausted all possibilities, this activity asks a new question that challenges the past solution.
In this way, another major benefit reveals itself: solution iteration. A very important approach, especially in creative problem solving, iteration allows for refinement and improvement of ideas over time.
Finally, this activity has a strong structure and approach that guides participants methodically through an opinionated structure. This can be especially helpful when team members feel as though they’ve exhausted all solution possibilities and are feeling stuck.
How to Prepare
First, define your problem or challenge statement.
Examples of this could be:
• Employee retention has dropped below 40% in the past two years.
• Wait times for the people mover need to be reduced by 50%.
• Teachers aren’t being recognized for their hard work and long hours.
Understand and then customize each section.
First, understand the purpose of each section. The SCAMPER definitions are as follows:
- S – Substitute – Find a part of your concept, process, etc. you could replace with something else to see whether it’s improved.
- C- Combine – One idea might not work alone, but you could combine it with several ideas, processes, or products into one more efficient result.
- A – Adapt – An idea that worked to solve one problem could be used to solve a different one.
- M – Modify – Change an aspect of your situation or problem and see whether it gives you additional insight or adds value to the process.
- P – Put to another use – Similar to “adapt,” put an existing idea or concept to another use than it was intended for.
- E- Eliminate – Remove inefficient processes or streamline them.
- R – Reverse – Reverse the direction of a process or product – do things the other way around.
Now that you understand the purpose of each section, customize them to fit the problem you’re trying to solve. Here are a few examples of how to write the sections to fit a specific problem statement:
- Substitute: What if we used a different material or technology to make this product/service?
- Combine: What if we combined two or more features of this product/service to create something new?
- Adapt: How can we adapt this product/service to meet the needs of a different market or audience?
- Modify: How can we modify this product/service to make it more efficient or effective?
- Put to another use: How can we use this product/service for a different purpose or context?
- Eliminate: What if we eliminated a feature or aspect of this product/service? How would it change?
- Rearrange: How can we rearrange the elements of this product/service to make it more user-friendly or efficient?
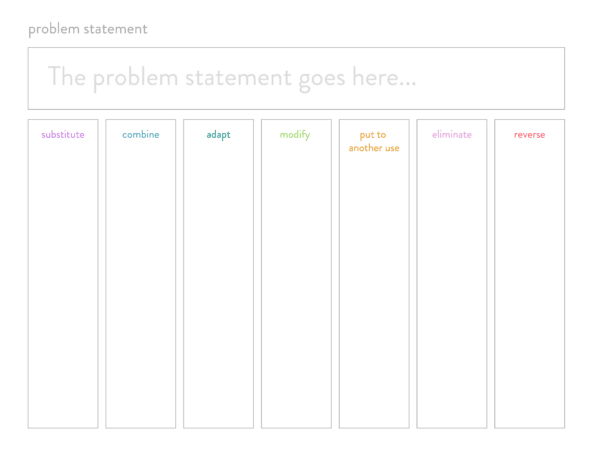
Preparing Your Workspace and Setting Up the Framework.
Have Post-its and Sharpies for all participants. Then, draw the activity framework in a large, open space where participants can place Post-its in each segment. Here are two examples of how the framework could be set up. Use whichever format you prefer.
Running the Activity
- Introduce the framework. Show participants the large framework structure and define what each section stands for.
- Generate many ideas: Section by section, have participants generate ideas based on the question asked in each section. Encourage iteration, re-writing, and creating as many ideas as possible. Everything from the most serious to the wackiest ideas should be tracked.
- Evaluate and refine ideas: Once the ideas have been generated, evaluate them based on their feasibility, potential impact, and alignment with the project or problem statement. After the evaluation, select one to three ideas you can take to the next step.
- Create an action plan: With a final idea(s) selected, create an action plan with a stepped approach for how you can execute it.
Atomic’s Design Thinking Toolkit
- What Is Design Thinking?
- Your Design Thinking Supply List
- Activity 1 – The Love/Breakup Letter
- Activity 2 – Story Mapping
- Activity 3 – P.O.E.M.S.
- Activity 4 – Start Your Day
- Activity 5 – Remember the Future
- Activity 6 – Card Sorting
- Activity 7 – Competitors/Complementors Map
- Activity 8 – Difficulty & Importance Matrix
- Activity 9 – Rose, Bud, Thorn
- Activity 10 – Affinity Mapping
- Activity 11 – Speed Boat
- Activity 12 – Visualize The Vote
- Activity 13 – Hopes & Fears
- Activity 14 – I Like, I Wish, What If
- Activity 15 – How to Make Toast
- Activity 16 – How Might We…?
- Activity 17 – Alter Egos
- Activity 18 – What’s On Your Radar?
- Activity 19 – The Perfect Morning
- Activity 20 – 2×3
- Activity 21 – How Can I Help…?
- Activity 22 – Cover Story
- Activity 23 – Crazy 8s
- Activity 24 – Abstraction Ladder
- Activity 25 – Empathy Map
- Activity 26 – Worse Possible Idea
- Activity 27 – Pre-Project Survey
- Activity 28 – The Powers of Ten
- Activity 29 – SCAMPER
- Activity 30 – Design Studio
- Activity 31 – Forced Connections