Welcome to our series on Design Thinking methods and activities. You’ll find a full list of posts in this series at the end of the page.

Story Mapping
| Primary Goal | To get a detailed understanding of the user’s experience. |
| When To Use | Any time a new initiative is started. This includes revisiting this activity any time a new user goal is added. It is used to understand the journey your users take as they engage in your experience. It also helps to identify high-level themes and user goals. |
| Time Required | On average, 1-2 hours. Add or subtract time depending on the breadth of the experience. |
| Number of Participants | 1 facilitator and 2-3 story-mappers |
| Who Should Participate? | The core team, typically consisting of the product owner, project manager, design lead, technical/development lead, and/or 2-4 client stakeholders. |
| Supplies | Large chunk of wall space or Post-it tabletop pads, Sharpies for each participant, different colored Post-its (the larger size). |
This post will describe a simplified version of Story Mapping. This activity can become much more advanced, but, for the sake of this series, this post will describe the heart of the activity. This will allow you to get up and running much faster.
We’ll use Lyft as our project and client example for these exercises.
1. Prep for the Activity
Set out a bundle of supplies for each participant that includes a Sharpie marker and two colors of large size Post-Its. It’s also helpful to have print-outs of your project goals and personas nearby to reference during the activity.
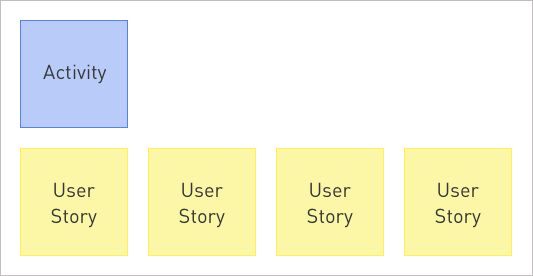
On the wall, create a key that identifies what each of the Post-It colors mean. For this example the blue Post-It is the “step” and yellow is the “user story.” Here’s an example:

2. Explain the Activity
It’s best to start by explaining the exercise from start to finish so that everyone can understand how it works, what the goals of the exercise are, and what the output of the exercise will be.
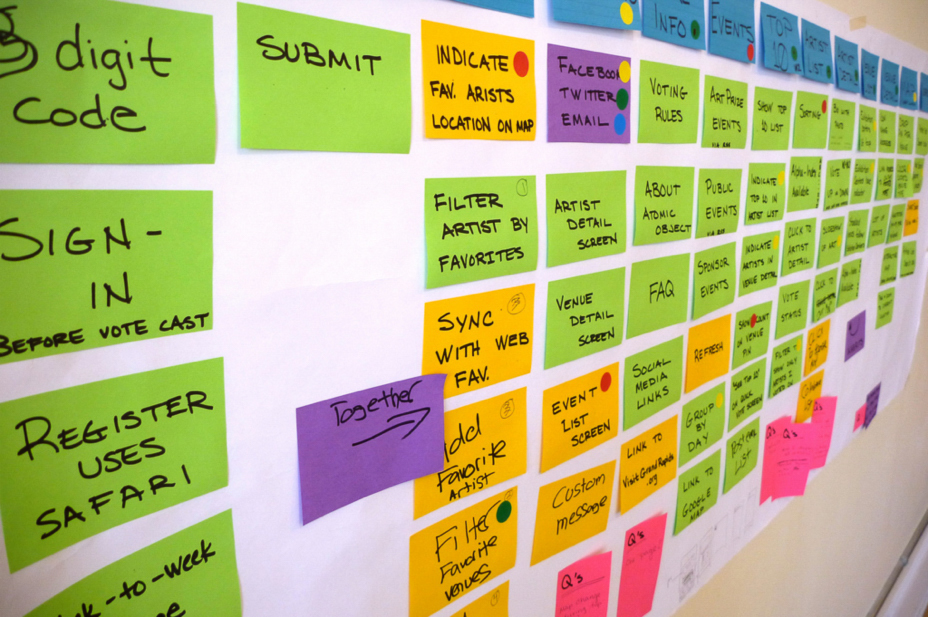
The beauty of this activity is that it can be summed up very simply: you’ll be telling stories. To be more specific, you’ll be telling stories about the way an application (Lyft in this case) fits into the lives of its users. From these stories you’ll be able to create a prioritized backlog of features and functionality. This useful model will outline system functionality, key feature bundles and/or releases that will add the most value for users and your business, and an understanding of any missing features that need deeper exploration or vetting.
At Atomic, our Delivery Leads will have portions of the activity already mapped out on a wall prior to meeting with a client so more can be discussed and accomplished in a shorter period of time. However, this doesn’t have to be done in order to host a successful story mapping session.
3. Tell a Story
To begin the exercise, start with the story of a key interaction. For Lyft this would be hailing a ride. Have your participants begin describing the story of how a ride would be hailed.
Let’s assume the user, Jane, has already setup an account and has used Lyft a couple times. This is how the rest of the story might sound…
Jane begins by opening the app from her mobile phone. After seeing the loading screen flash briefly she sees a big map with an indicator on her location, an address with the nearest pickup location, and a big button that says “Set Pickup.”
She clicks the “Set Pickup” button and then is able to choose what type of car she wants to use, confirm her pickup location, and add the destination location. After she adds-in the destination and adjusts her pickup location slightly she then clicks the “Request Lyft” button.
She waits while the ride is optimized (and a driver accepts her request.) Once a driver is confirmed she can see their name, model/color/make of car, and an estimate of when they will arrive.
Once the driver has arrived she receives a text message on her phone confirming that they are there.
Once you’ve finished telling the story of the activity you’ll move onto the fun part, mapping!
4. Map the Story
As this story is being read, you’ll begin to map out (in story-telling order) each of the major activities like so…

The theme of this story is “Request Lyft” because that is the primary activity and goal for the user. All of the user stories below are the more detailed actions, functionalities, or steps that take place as the user is attempting to request the Lyft.
After you feel that you’ve covered all the basics of the story, you can take a second pass through to ensure that you’ve covered as many of the use cases as possible. For example, what happens if a driver drops the request as they are traveling to the user? Or internet or cell reception is lost? Try to map out stories for these situations too.
Also, once you’re through the story for one user/persona think at it from another user’s perspective. In my example I requested a Lyft from the rider’s perspective. How might the story and features change when you tell the story again from the driver’s perspective? How do they accept the request? How do they cancel it? Etc, etc.
The more stories you begin to map the more crossover you’ll find such as the user’s location on a map will most likely pop-up in multiple stories. You can either map the duplicate stories or write only one story that covers multiple and place a dot or note to indicate it’s referenced multiple times. These crossover stories will also help you to indicate key features and functionalities of your product.

5. Create a Backlog
After you’ve completed this activity you can synthesize the information into a backlog (our backlog tool of choice is Pivotal Tracker) or into a Google Drawing document. Either of these options allow you to share with the client to continue to prioritize stories, add requirements, under stand effort to implement, and plan releases.
Story Mapping Beyond Software
This activity can be extended for uses beyond software very easily:
- Planning an event? Walkthrough the story of how a guest might experience it from start to finish. The user stories become tasks you need to accomplish like ordering catering or preparing invitations.
- Planning class lessons? Think through the flow of content from start to finish. User stories become a rough outline of your plan and help create a task list.
- Planning life goals? Talk through the story of how you might achieve those goals and your user stories will become the steps by which you do so. User story mapping as life coach! Neat.
That’s it for this lesson. Check back soon for new ones, and leave me a comment below if you’ve given Story Mapping a go.
References
Reference for this exercise: User Story Mapping by Jeff Patton and Peter Economy (2015)
Atomic’s Design Thinking Toolkit
- What Is Design Thinking?
- Your Design Thinking Supply List
- Activity 1 – The Love/Breakup Letter
- Activity 2 – Story Mapping
- Activity 3 – P.O.E.M.S.
- Activity 4 – Start Your Day
- Activity 5 – Remember the Future
- Activity 6 – Card Sorting
- Activity 7 – Competitors/Complementors Map
- Activity 8 – Difficulty & Importance Matrix
- Activity 9 – Rose, Bud, Thorn
- Activity 10 – Affinity Mapping
- Activity 11 – Speed Boat
- Activity 12 – Visualize The Vote
- Activity 13 – Hopes & Fears
- Activity 14 – I Like, I Wish, What If
- Activity 15 – How to Make Toast
- Activity 16 – How Might We…?
- Activity 17 – Alter Egos
- Activity 18 – What’s On Your Radar?
- Activity 19 – The Perfect Morning
- Activity 20 – 2×3
- Activity 21 – How Can I Help…?
- Activity 22 – Cover Story
- Activity 23 – Crazy 8s
- Activity 24 – Abstraction Ladder
- Activity 25 – Empathy Map
- Activity 26 – Worse Possible Idea
- Activity 27 – Pre-Project Survey
- Activity 28 – The Powers of Ten
- Activity 29 – SCAMPER
- Activity 30 – Design Studio
This is an updated version of a post originally published in August 2017.

