This is the second post in a series on Design Thinking methods and tools. You’ll find a full list of posts in this series at the end of the page.

Before we dive too deeply into design thinking exercises, I want to help you set the stage with the proper tools and materials. At Atomic, we’ve been holding workshops and project kickoffs for 15 years, so we’ve done all the user testing for you! Here, you’ll find a collection of our most loved and used tools for group activities.
First, I’ll discuss the big-ticket items that are nice to have for group activities. Then I’ll help you develop a list of other essential supplies you can keep on hand at the office or use for traveling. Think of it as a toolkit for design thinkers.
1. Find a Big Room
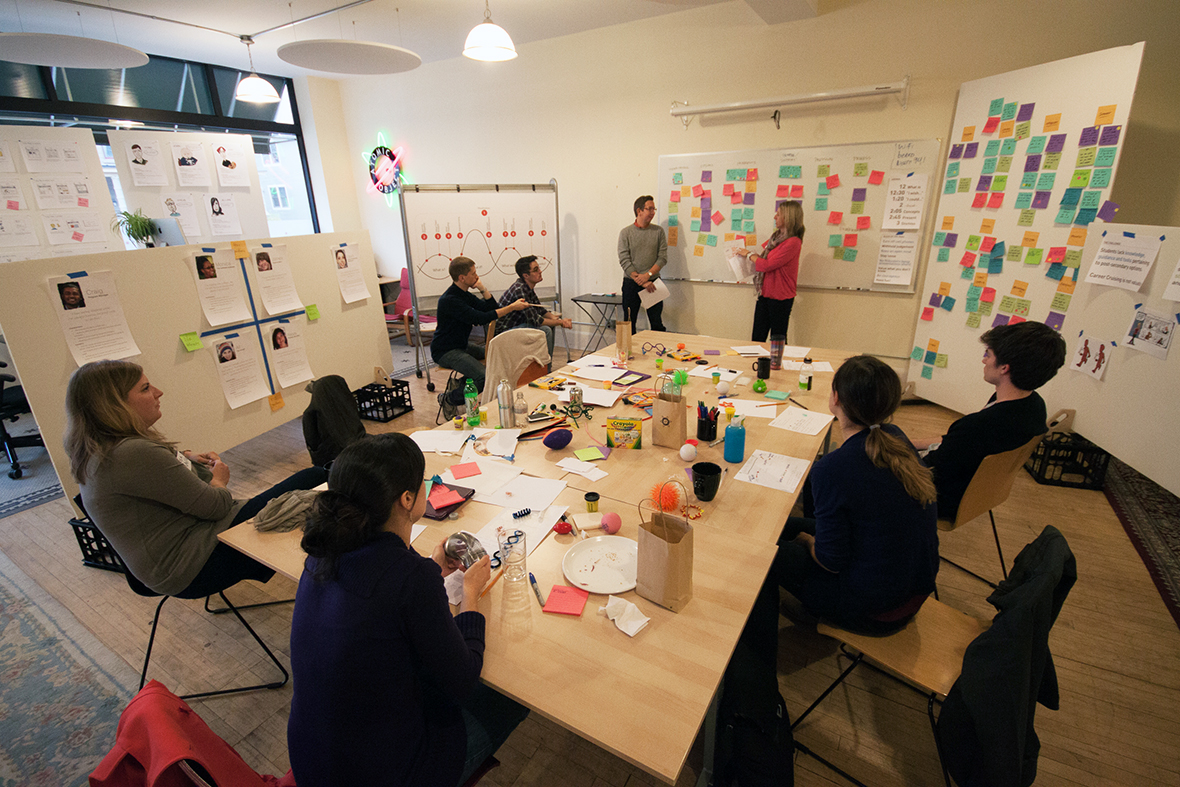
In group activities, it’s ideal to have a nice big space where you can move about. Design thinking methods often require all participants get up and engage in the activity at a whiteboard or around a wall. It’s helpful when the room accommodates a large group and allows people to move about freely.

The facilitator of a group activity also needs room to work. It’s especially important that they can stand up and move around to keep participants involved with the activity. A sitting facilitator can’t engage the room quite as well as a standing, lively one can.
Don’t have a big space in your office? Think about renting out a co-working space, using a room at your local library, or asking a client if they have access to a larger space.
When planning for a client meeting, I often reference a favorite quote by J. A. Brillat-Savarin:
“To receive guests is to take charge of their happiness during the entire time they are under your roof.”
Make sure you have a space where people can be comfortable and, ultimately, happy. After all, you’ll be using maximum brain power during these meetings. Comfort + space = happy, productive brains!
2. Gather Your Equipment
Whiteboards
A whiteboard is to a design thinker as a linen canvas is to da Vinci. The best-case scenario for your meeting’s setting is a large room with multiple large whiteboards. The classic wall-mounted whiteboard is great, though I’ve seen wall-mounted plexiglass work well, too.
Atomic has many whiteboards mounted around the office, though we’ve also been spoiled rotten by using IdeaPaint, a high-performance dry-erase paint, on a giant wall of our first floor. It erases like a dream and comes in clear, allowing the original wall color to shine through. Though it runs a bit pricey, I can’t recommend it enough.
Whiteboard Alternatives
Don’t have access to great whiteboards in your space? Don’t fret, dear design thinker, because I have a couple of great workarounds for you.
Post-it Easel Pads are excellent for traveling and/or maximizing writing space without whiteboards. They also offer the added benefit of making the output of your activities portable. I’ll sometimes use these large-format Post-its on top of a whiteboard, simply because I can roll them up after a meeting is finished and take them with me.

Plastic dry-erase sheets offer another nice alternative. SmartSheets and Wizard Wall are two brands that I’ve personally used with success. They both stick to typical painted wall surfaces easily and erase well. The only downside I’ve experienced is they don’t travel as well as large Post-its due to the slippery nature of the sheets. If they move around even a little, they run the risk of erasing the writing on each sheet’s surface.
Finally, if you have access to a room with large windows or giant glass walls or doors, use those! They erase well and provide a nice surface for Post-its—but beware the timing of your meeting, especially if you are using windows. You won’t be able read what’s written on the glass if it’s nighttime and the windows are no longer backlit.
A Projector w/Connectors
Many times, you’ll want to project your screen for the room to see—for example, to review a document, visit a website, or share web tools with participants. A projector can help with consensus building and ensure everyone is looking at the same thing.
If you are going to use a projector, make sure you have all the appropriate laptop-to-projector connectors for everyone who will be participating. If there’s no WiFi access and you can’t use a screen-sharing program, you may want to use several different laptops with the projector, but it will be an absolute bummer and can potentially stop your meeting in its tracks if you don’t have the right connectors for everyone’s computer.
I recommend keeping these common connectors on hand:
- HDMI cable (PC & Mac)
- VGA for PC (VGA to Mini DisplayPort for Mac)
- DVI for PC (DVI to Mini DisplayPort for Mac)
If you want to avoid the connector hassle altogether, the easiest route for screen sharing is to have a single laptop hooked up to the projector. Then, all participants can log into a screen-sharing application like GoToMeeting or join.me. Participants can then simply swap screen hosting rights and let the host laptop display the screen—no laptop-to-projector swapping needed.
A Camera
This one should be pretty simple, because most of us have a camera built into our smartphones. Whatever your preferred device for image capturing may be, make sure you have one on hand. You’ll want to snap images of your whiteboards and sticky notes.
I often also like to capture images of the team working together. I use these pictures in the deliverables I create later in a project’s lifecycle to remind everyone of the consensus we built and the hard work we did together.
3. Build a Tool Kit
Now that you have all of the big items in place, let’s build a small portable tool kit.
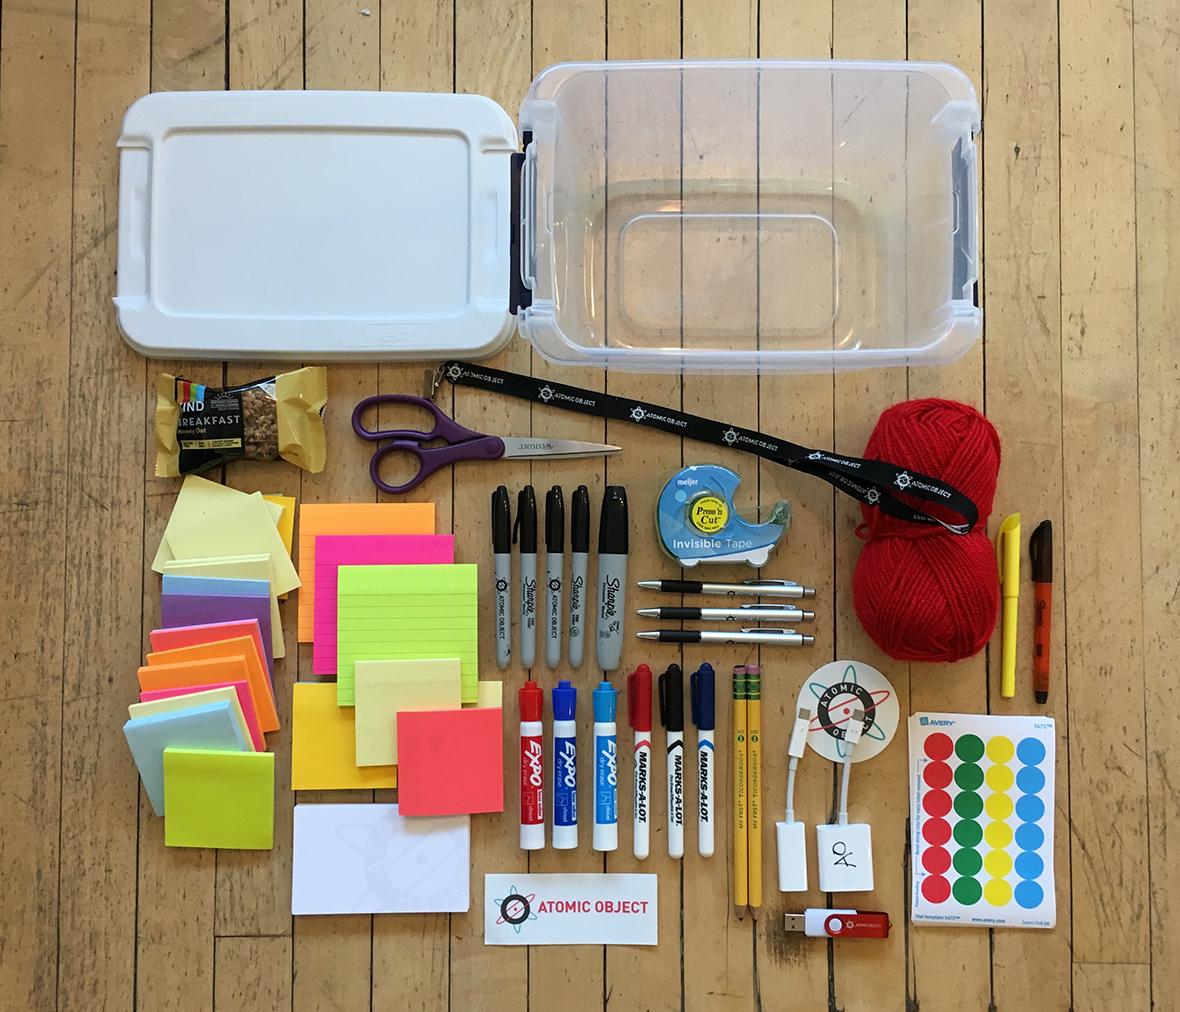
- A Container – The first thing you’ll need is a plastic tub with a lid. Anything you can carry comfortably should do the trick. Avoid anything bigger than a large tackle box. Now, let’s fill it with goodies!
- Post-its – All hail Arthur Fry, creator of the almighty Post-it! Without his little papery invention, we’d all be forgetting to pick up cat food after work or losing that brilliant idea for a new feature. If there is one tool (aside from a pen, sketchbook, and laptop) that I use on a consistent basis, it must be the Post-it. Have a bunch of these in a variety of colors and sizes ready to go (with plenty of the 3×3 inch variety). A majority of your tool kit should be Post-its.
- Sharpies – Salt and pepper. Sherlock and Watson. Post-Its and Sharpies. In my world, Post-its and Sharpies are an infamous and devout duo, never to be separated. Does it have to be a Sharpie, you ask? Indeed it does. Sharpies have the right thickness of line and density of ink to be legible from far away. If participants were to write with any old pen, it might be eye-straining to read their notes–especially if they have poor handwriting. Sharpies also prevent writers from becoming overly verbose. Typically, notes made on Post-its should be short and sweet. Sharpies help enforce that practice. (I promise I’m not being paid to endorse Post-its or Sharpies. They are just, simply, the best.)
- Dry-erase Markers – I like both fine and chisel tip dry erase markers in various colors. The chisel tips are great for making big bold statements and drawing graphs. Fine tips are nice for writing more detailed notes or sketching storyboards. Also, do your nostrils a favor and grab the low-odor kind.
- Pencils & Pens – All right, I know what you’re thinking: “Make up your mind about the writing utensils, lady!” I know I just said that Sharpies are the holy mecca, but it is good to have a few No. 2 pencils and ballpoint pens on hand. They are great for fast sketches in notebooks and penciling in dates on calendars.
- Tape – Sometimes Post-its exhaust their power to stick. Meet the remedy: tape. You’ll also need it for hanging yarn. (Yarn? See next item.)
- Yarn! – Put down your crochet hook. We’re not making hats. I use yarn for a variety of activities, but most frequently for making grids on whiteboards or dividing up huge swaths of wall. Trust me, it’s fun, fast, and easy. Also, I think it reminds people of grandmas.
- Dot Stickers – Who doesn’t like a good sticker? Add a bunch of these, in various colors, to your tool kit for visualizing votes. We’ll cover the details of how to use these handy, sticky fellows in an upcoming lesson. Until then, pack ’em in the kit!
- A Thumb Drive – Sometimes you will have poor WIFI or even lose your connection during a meeting. For quick swapping of files, it’s always advisable to have a USB thumb drive on hand. 4GB or above should do the trick.
- Snacks! – Using your brain is hard work. Snacks can help keep the pistons firing. Snacks also come in handy when working with clients who suffer from low blood sugar (true story) or when Jimmy John’s is running late. Throw some granola bars in your kit because no one wants to work with hangry people.

Let’s Swap Tool Kit Ideas!
That’s my tool kit above. Leave a comment below with a picture of your kit. Also, let me know if there are any must-have items that I missed. As any good Girl Scout (‘sup, Troop #308) will tell you, it’s best to “Be Prepared!”
Now that you have your list of supplies, it’s time to get down to business. In the next post, we’ll officially kick things off with our first lesson. Until then, happy Post-it sticking!
Atomic’s Design Thinking Toolkit
-
- What Is Design Thinking?
- Your Design Thinking Supply List
- Activity 1 – The Love/Breakup Letter
- Activity 2 – Story Mapping
- Activity 3 – P.O.E.M.S.
- Activity 4 – Start Your Day
- Activity 5 – Remember the Future
- Activity 6 – Card Sorting
- Activity 7 – Competitors/Complementors Map
- Activity 8 – Difficulty & Importance Matrix
- Activity 9 – Rose, Bud, Thorn
- Activity 10 – Affinity Mapping
- Activity 11 – Speed Boat
- Activity 12 – Visualize The Vote
- Activity 13 – Hopes & Fears
- Activity 14 – I Like, I Wish, What If
- Activity 15 – How to Make Toast
- Activity 16 – How Might We…?
- Activity 17 – Alter Egos
- Activity 18 – What’s On Your Radar?
- Activity 19 – The Perfect Morning
- Activity 20 – 2×3
- Activity 21 – How Can I Help…?
- Activity 22 – Cover Story
- Activity 23 – Crazy 8s
- Activity 24 – Abstraction Ladder
- Activity 25 – Empathy Map
- Activity 26 – Worse Possible Idea
- Activity 27 – Pre-Project Survey
- Activity 28 – The Powers of Ten
- Activity 29 – SCAMPER
- Activity 30 – Design Studio
This is an updated version of a post originally published in May 2017.


great work to you!. Thanks for sharing your advice.
Thanks, Michael! I’m always happy to share.
Awesome list of design thinking supplies and pictures of them in action too! My favorite are 4″x6″ notecards with lines on one side and blank on the back.
I like your name, Design Thinking Darin. :)
I love the versatility of 4x6s. They are always handy to have on-hand.